Get at least 6-10 pictures that you have already taken in your groups of conventional shot sequencing and dialogue sequencing – make sure they are different shot sizes and that they show you understand conventional shot sequencing / dialogue sequencing.
Upload them to a folder on your V drive – you ideally need to work on the local drive to improve the efficiency of Premiere, but you also need to make sure you keep a back-up on the Media drive in case the local (V) drive breaks!
Import these pictures into Premiere and edit together – I will give you direct instructions and support.
Export this premiere project (ie your edit) at the following settings: H264 & match bit rate high so that you now have an AVI.
Upload the AVI (not the premiere project) into your own (and new) Film Studies Youtube account (you set it up yourself – it’s very easy).
Embed the YouTube link into your blog.
As ever I will mark the embedded AVI (ie finished edit) on my markbook.
This will be your first video edit and therefore first mini movie completed, so please write some annotation / notes onto your blog post about what you have done, what you have learned, what you like, what you are looking to improve etc etc
Dear IB Film students, unfortunately I can’t be in our lesson today as I am interviewing for a new member of staff.
As such, can I ask you to undertake a photoshop exercise in our lesson, which will not have a cover teacher? Using photoshop is a really good introduction to Adobe products and the idea of POST PRODUCTION which is the next area we will cover (PRODUCTION includes preparation, costume, mise-en-scene, character development, plot, action, story etc. As well as the use of camera – shot size, angle, composition, framing, sequencing shots etc.
In other words, this easy task will help us as we move forward . . . trust me.
TASK: make a header image in photoshop for our 2021 Film Blog.
Create a new document in photoshop that is 1260 x 240 pixels, that has a resolution of 300 and is CMYK and transparent.
Populate the header with anything that is related to the Film Course that you have already looked at.
Make sure your header is creative, innovative and appropriate
Save your header as a new post
I will upload so that your header will randomly appear each time the blog is refreshed.
Any questions: ask someone who takes AS media, as we have already done this task in this course!
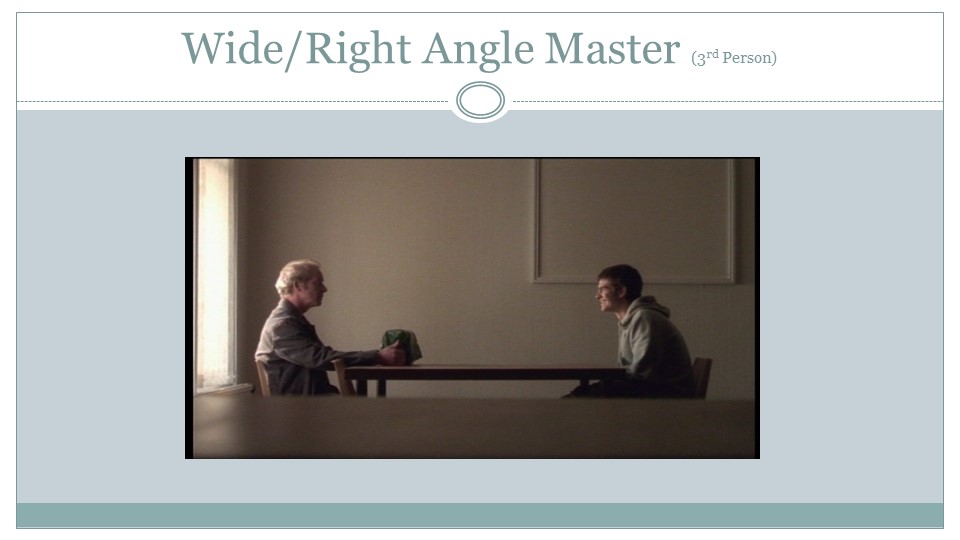
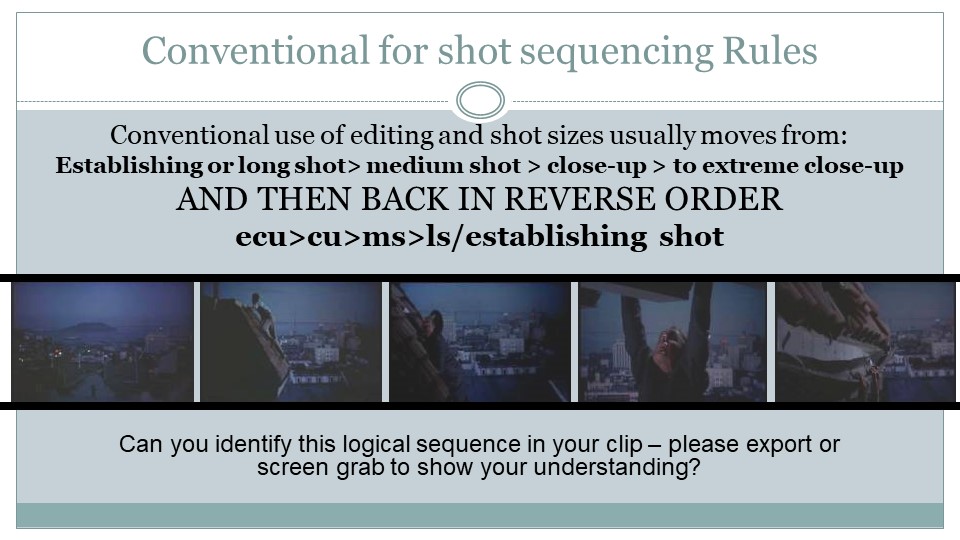
Previously we looked at conventional shot sequencing: how you introduce a place, a character and a detail for each of your sequences.
In this lesson we will look at how to structure a sequence of dialogue.
As we are looking at the use of camera, please make sure you are on MANUAL FOCUS, that you try to capture DEPTH OF FIELD, that you are using a RANGE OF SHOT SIZES & ANGLES.
AND MAKE SURE YOUR EYE-LINES MATCH!
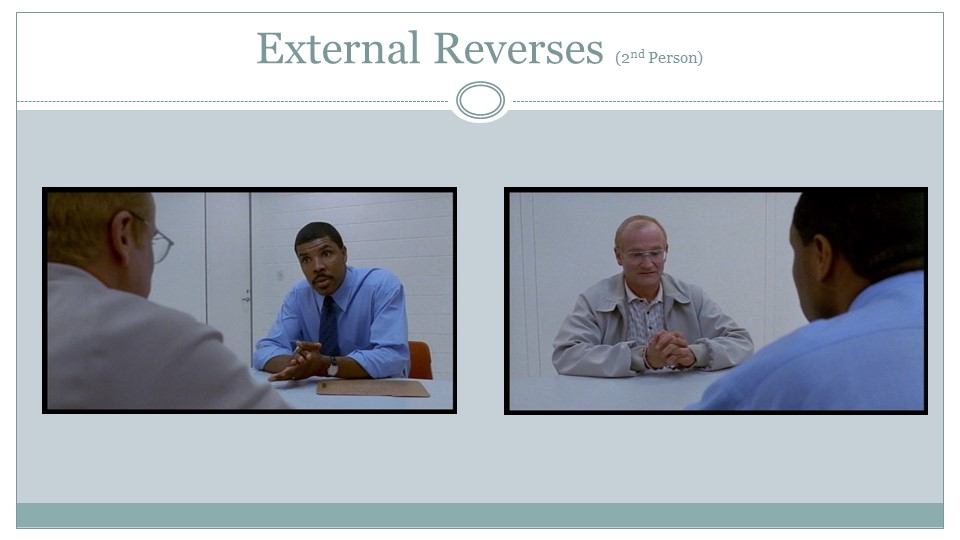
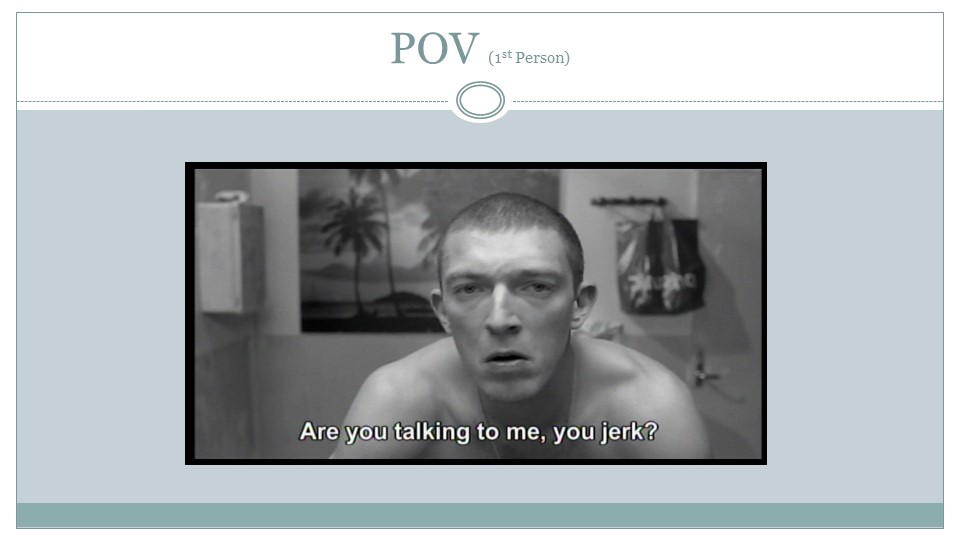
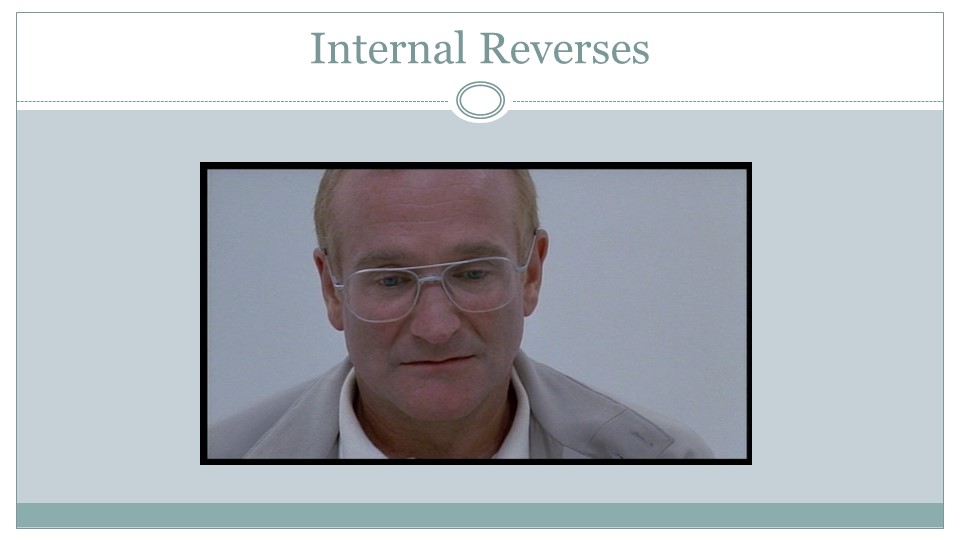
NOTE THE DIFFERENCE BETWEEN AN ‘INTERNAL REVERSE’ AND A ‘POV’ SHOT (POINT OF VIEW)
TASK: In groups take still images that structure a dialogue – shot / reverse shot. This doesn’t necessarily have to be between 2 people . . .
Remember to move from a wide angle master to external reverse (over the shoulder shots) to internal reverses. Think about your FRAMING, COMPOSITION, SHOT SIZES, ANGLES, DEPTH OF FIELD.
Share your photos, but write up your own notes, ideas, reflections on this task. Feel free to include a video or some other research material to support your creative knowledge and thinking.
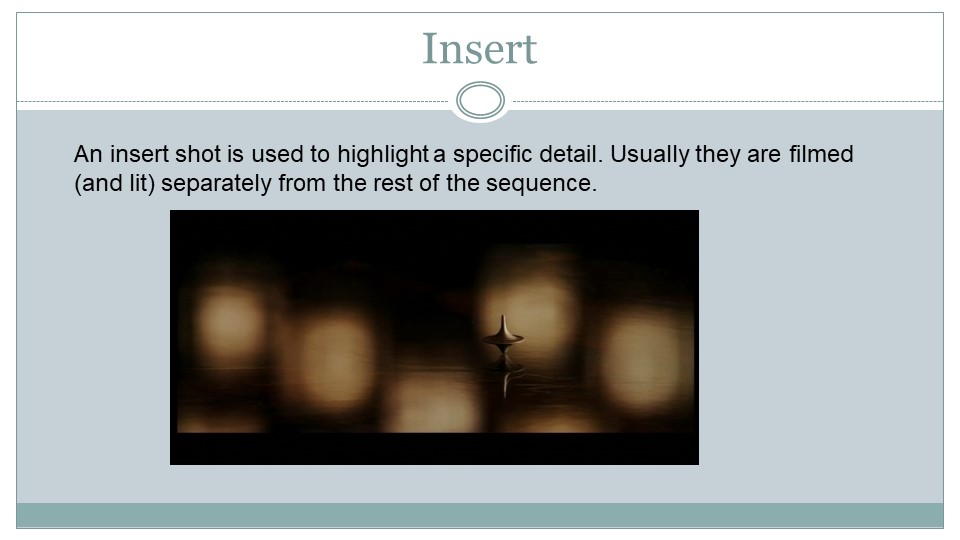
In ‘Film Language’ your most important tool (or your biggest trick) is to use the a BCU (Big Close-Up) and/or ECU (Extreme Close-Up) and the Insert Shot. In the lesson we will look at these and then use the manual settings on the camera to practice them.
First of all, let’s identify these shots.
Insert Shots are used to provide detail, they can be of a person, an object, a place, but they are always ABOUT DETAIL. It is one of the key features of cinema that it is able to transform our expectations and understanding around TIME AND SPACE that we are able to bring an audience so closely to such details. This can create DRAMATIC IRONY (the audience is given information that our characters are not aware of) or EMPATHY we connect with our characters, or SYMPATHY (we feel sorry for our characters) or . . .
In terms of people we can use an BCU or ECU to bring the audience into contact with a character is feeling at a particular moment in the film. We will look at how to build character sequences (often used during dialogue) next week. But for now it would be good to practice some shots using our cameras.
TASK: Take 10-12 single shots that are ECU’s/BCU’s of your character, including some shots of a key object (ie your INSERT SHOT). Upload onto your blog with some explanation and description of what you are doing
How to use your camera to get a really good BCU/ECU, INSERT shot. The best way to get a really good close up is to get really, really, really close! Think about:
framing
shot size
shot angle
colour
texture
focus
depth of field (we will look at this in more detail in another lesson)
Task: Take 5 single frame shots that move from: ES>LS>MS>CU>ECU. The aim to provide an overall setting for your character to the small detail that your character is connected to.
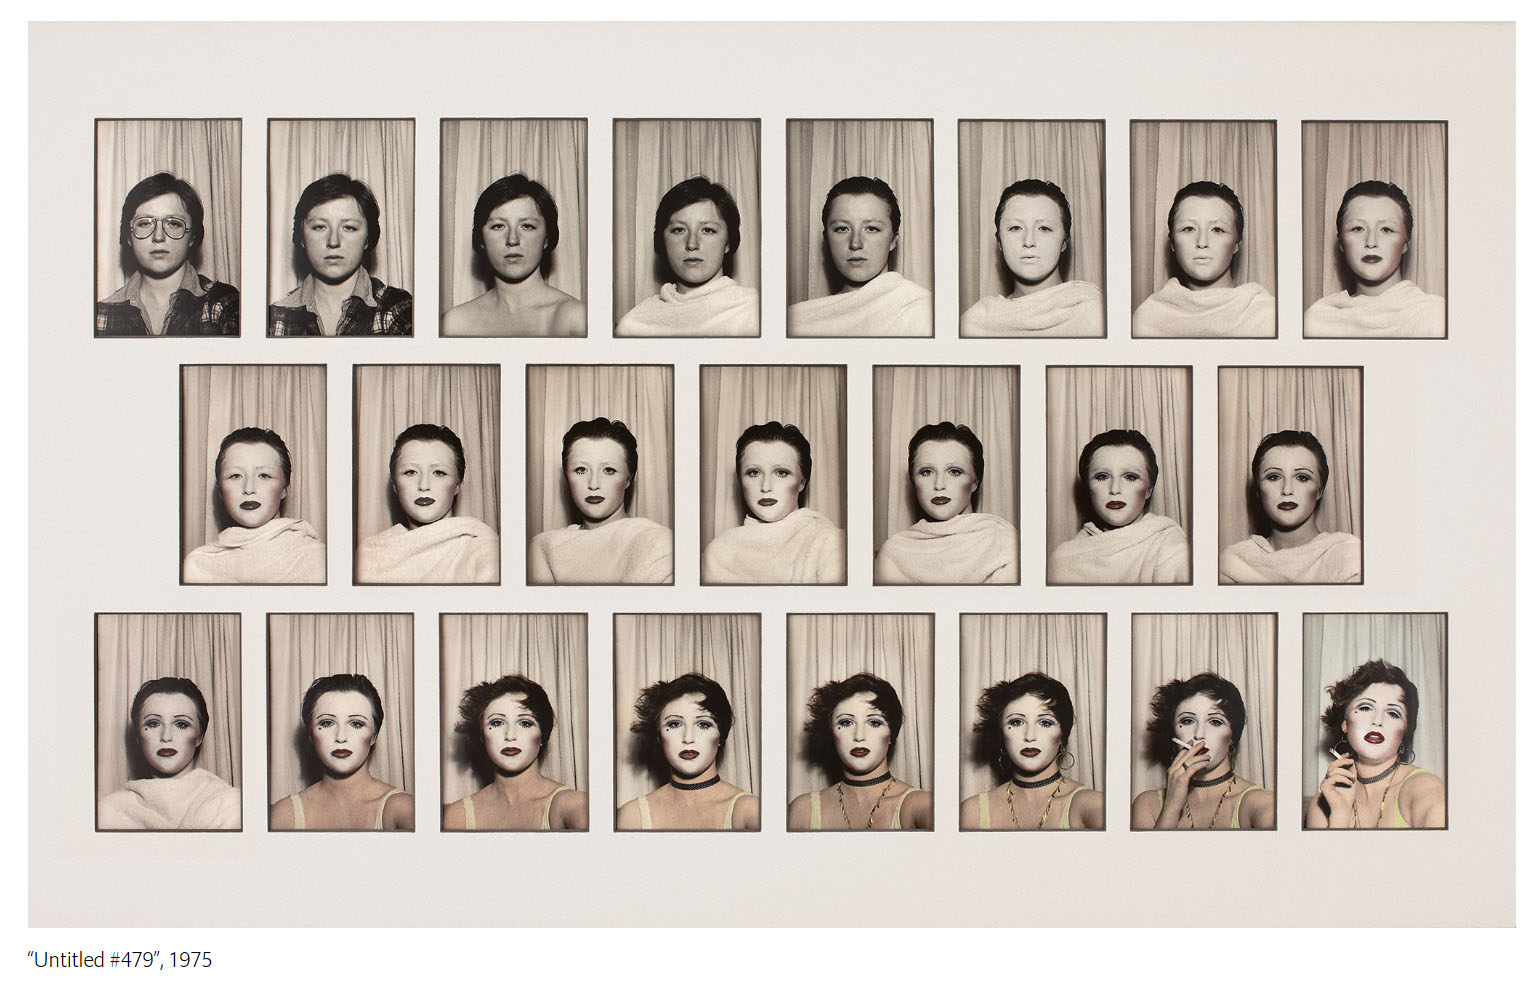
Sherman had found her subject: “How people choose, unconsciously maybe, how they look in order to present themselves to the world.” For the first time, she felt like she was making art.
TASK 1: 5mins RESEARCH THE WORK OF CINDY SHERMAN
TASK 2: 5 mins Assign roles divide into 3 groups: producer (research Cindy Sherman work even more oversee production process and write up post), actor/actress/model, set designer, costume and make up artist/designer.
5 mins MM Show Cindy Sherman work and class discuss ideas. Introduce the concept of mise-en-scène, in terms of Cindy Sherman and possible approaches to a practical creative task.
TASK 3: Take 3 photos of the same person, as 3 different characters in 3 different yet appropriate backgrounds/settings.
15 mins brainstorm, recce, assemble -props, makeup & costume.
10 mins each shoot (take 10 photos for each shoot – embed as gallery – but select 1 shot from each as final image).
Save images, post up to everybody’s blog. Producer to write up intentions and reflection – which each member of the group can copy.
5 mins put everything back.
LESSON 2: STUDIO WORK
Building on the work from last lesson, first of all make sure your work is posted. Then think about the importance of building a character and how that is possible?
One way is the use of the camera, often bringing faces and facial expressions into close contact with the audience. The other way is through make-up, costume, clothing – essentially mise-en-scène.
Performance artist Leigh Bowery
TASK 4: Once you have uploaded your first task, stay in the same groups and this time produce some close ups using the studio lighting system. Pay attention to make-up, facial expression, clothing. Again look to transform 1 actor into several characters.