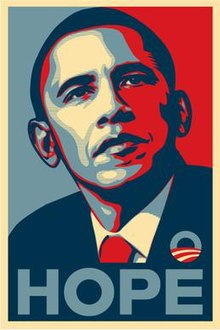
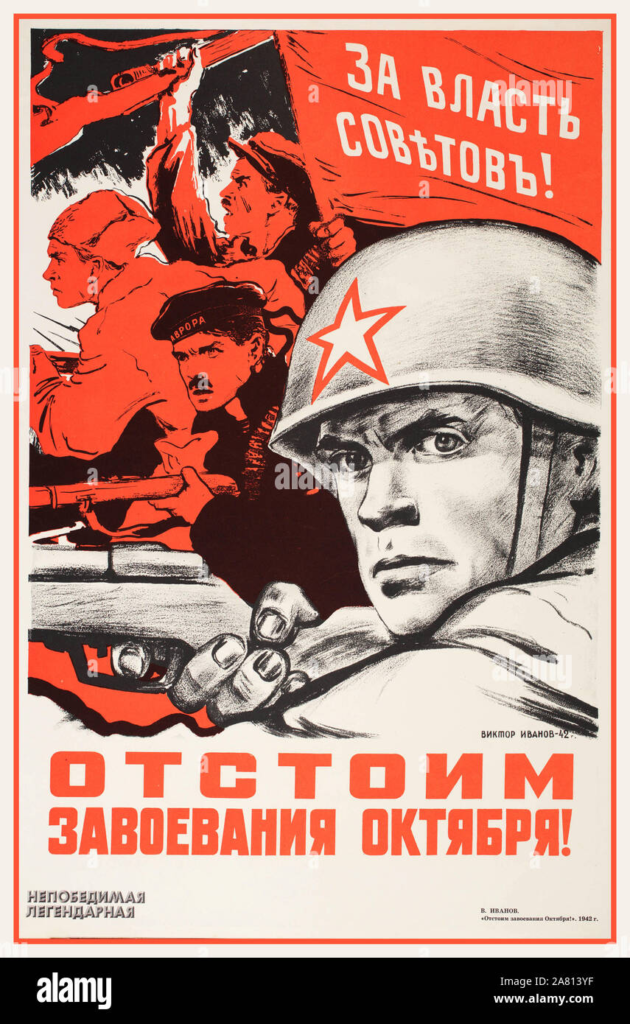
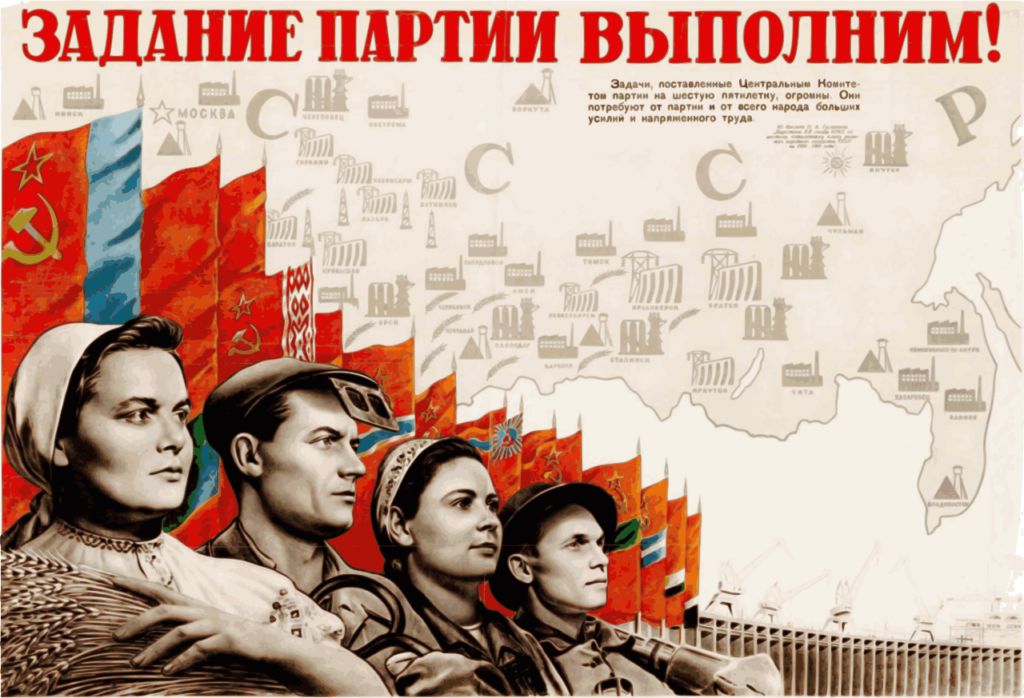
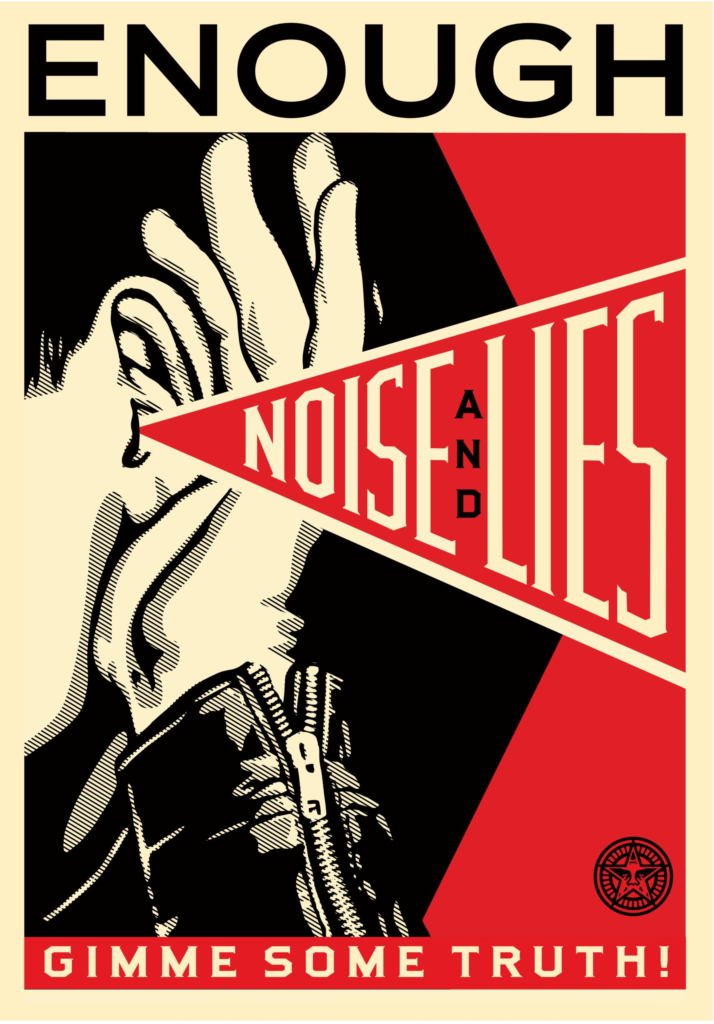
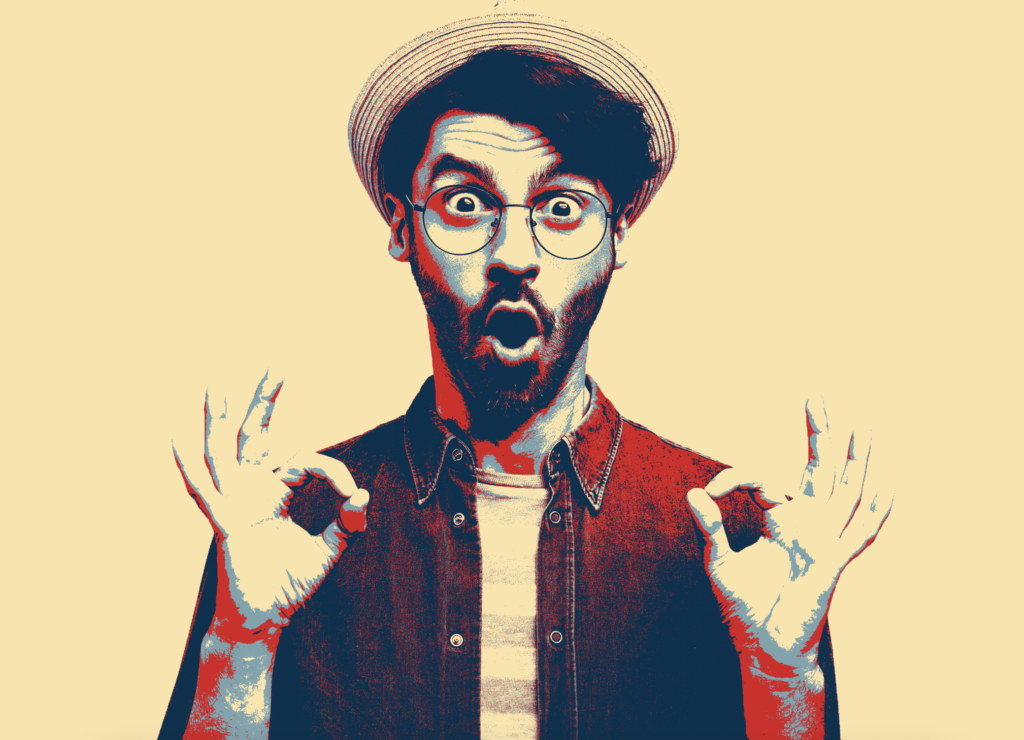
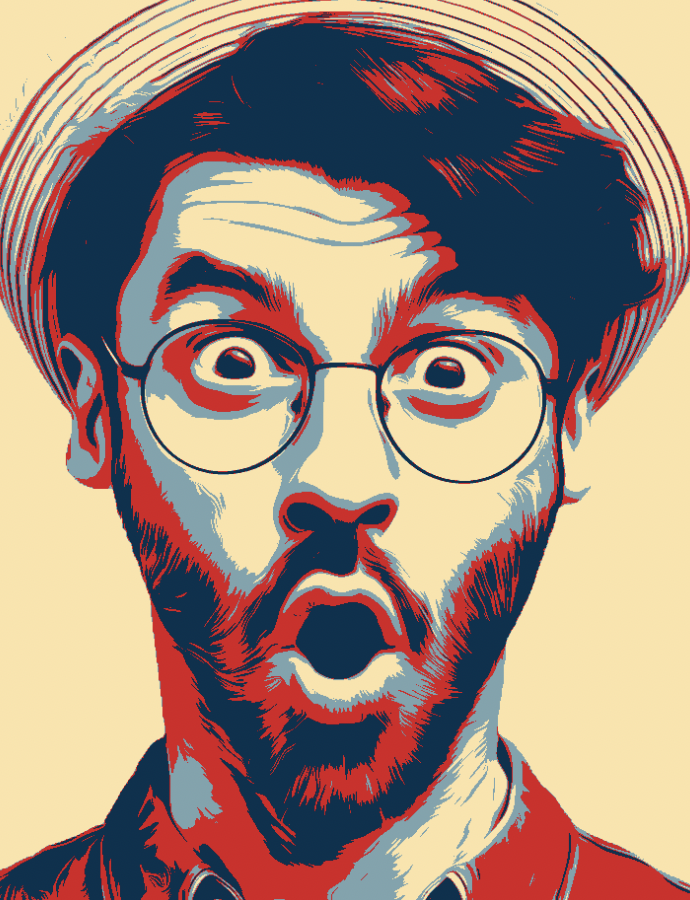
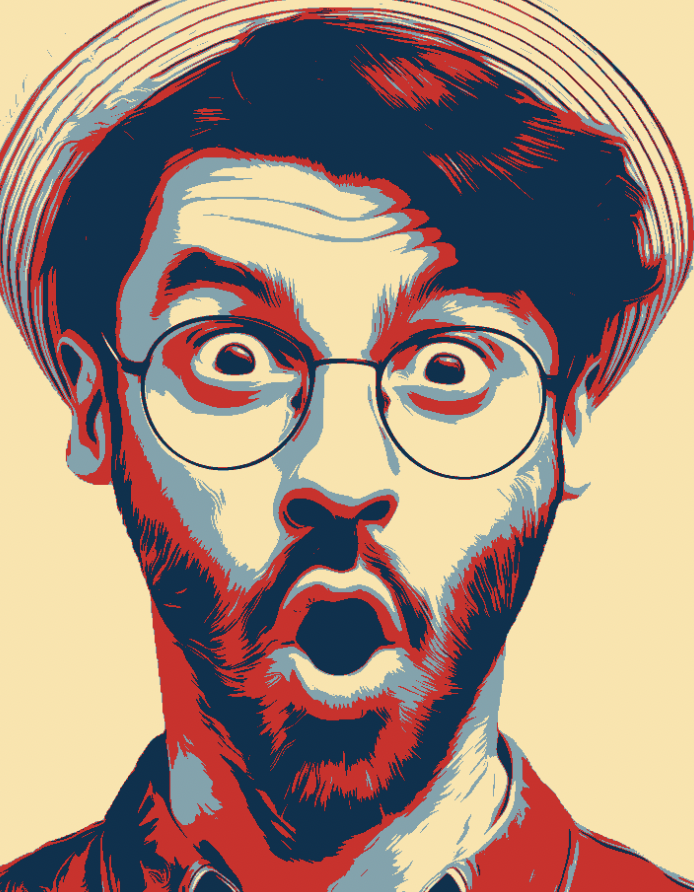
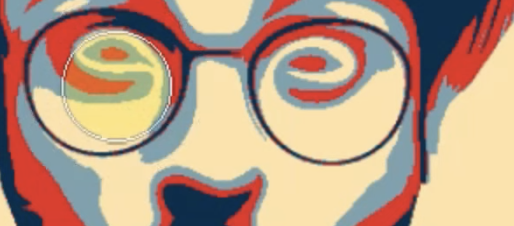
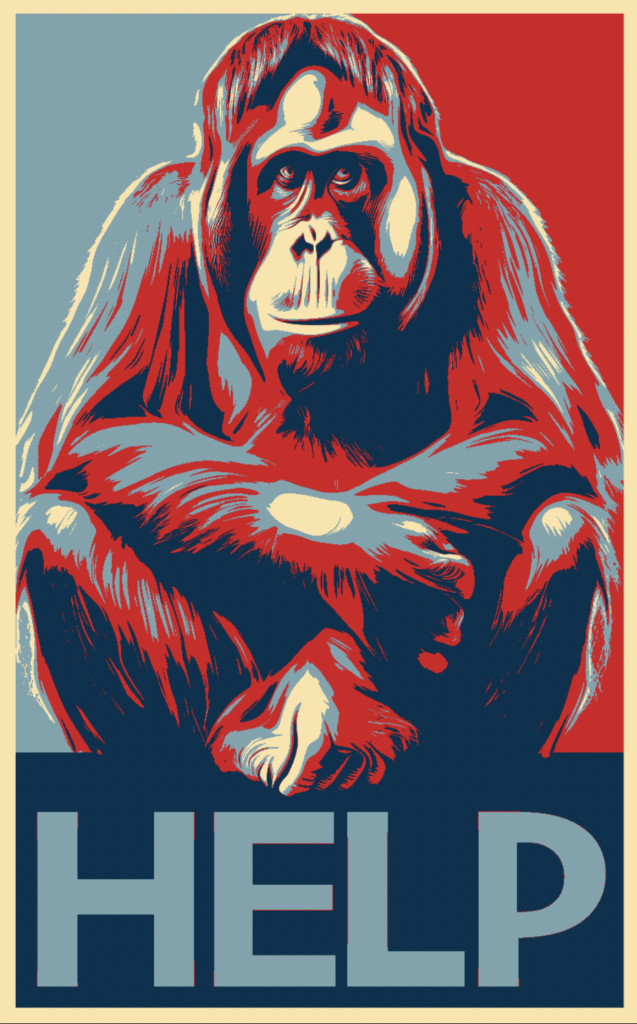
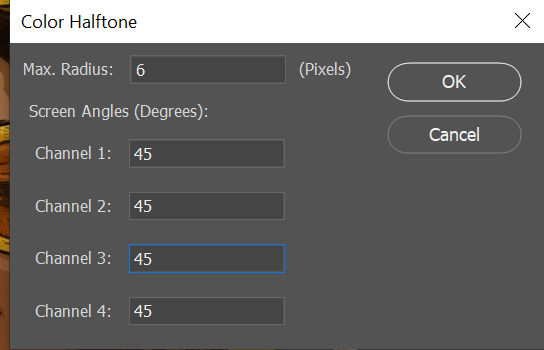
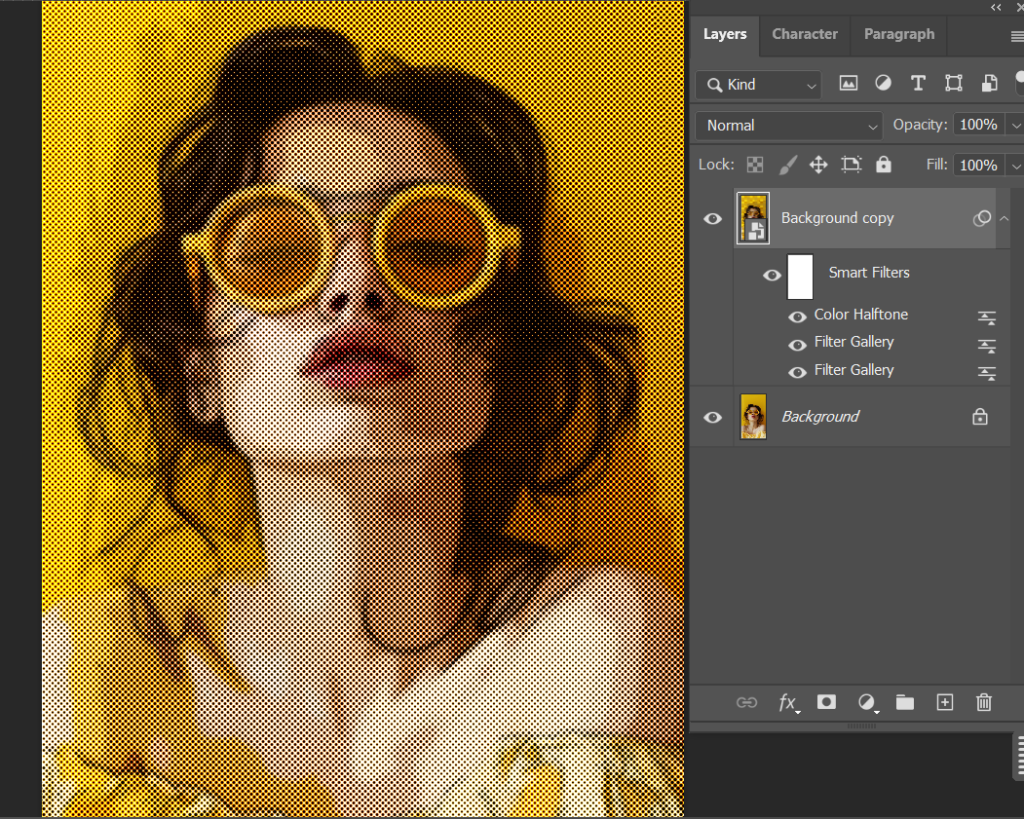
Street artist, graphic designer, and activist Shepard Fairey created this visionary portrait of then Senator Barack Obama in 2008 as a form of grassroots activism to support Obama’s first presidential campaign. Fairey based the work on an Associated Press photograph by Mannie Garcia, which he transformed with his signature high-contrast stencil technique, inspired by the political message and bold graphics of Soviet Socialist Realism:
Fairey’s Poster was first disseminated as a street poster, but the image was later used to create thousands of stickers and T-shirts and was widely circulated online.
Emblazoned with the word “Hope” and featuring reds and blues that complement the campaign logo designed by Sol Sender, Fairey’s portrait was quickly adopted as an official image of Obama’s 2008 presidential campaign. New Yorker art critic Peter Schjeldahl called the poster “the most efficacious American political illustration since ‘Uncle Sam Wants You.’”
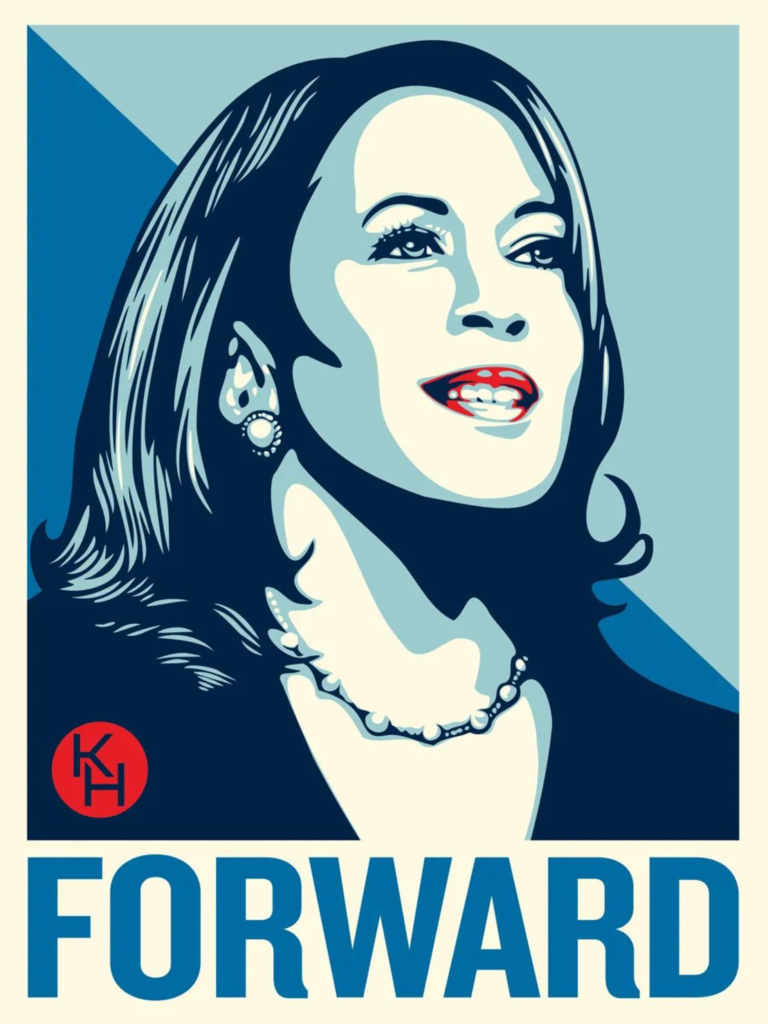
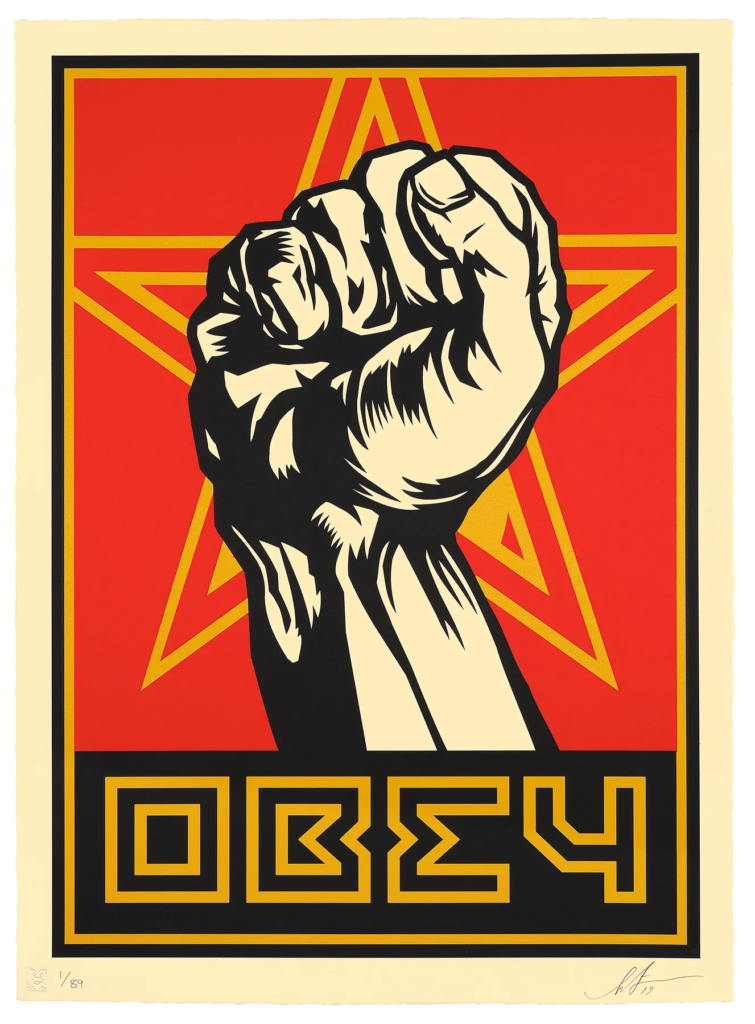
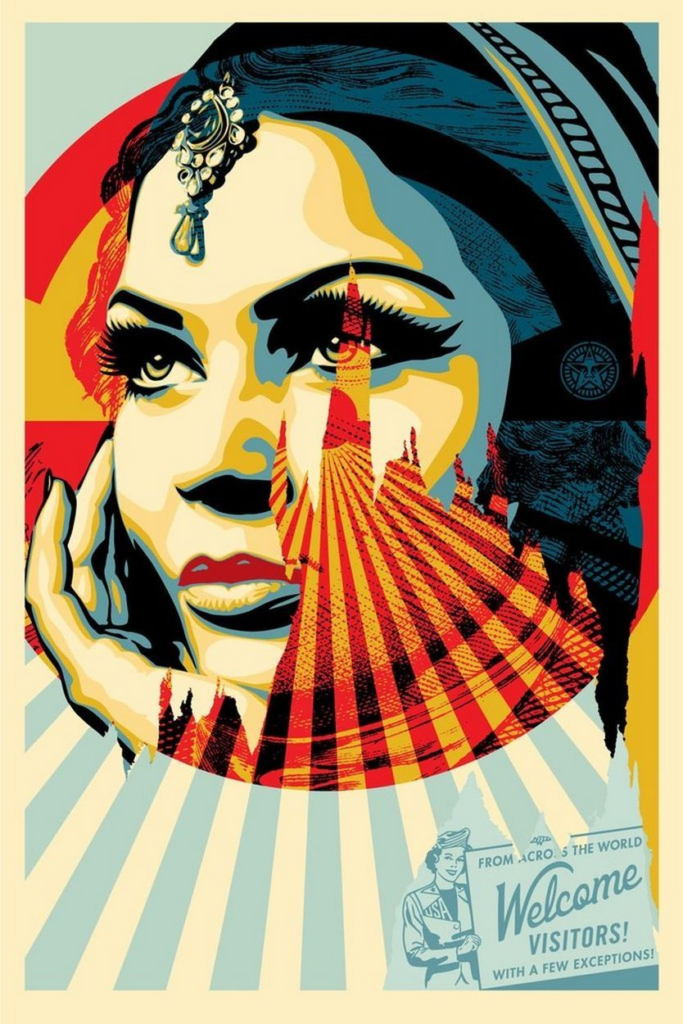
Some of Shepard Fairey’s other work:
DESIGN YOUR OWN:
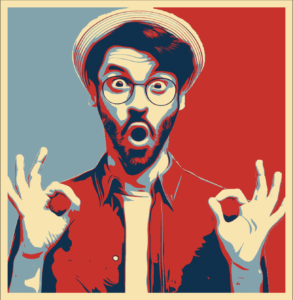
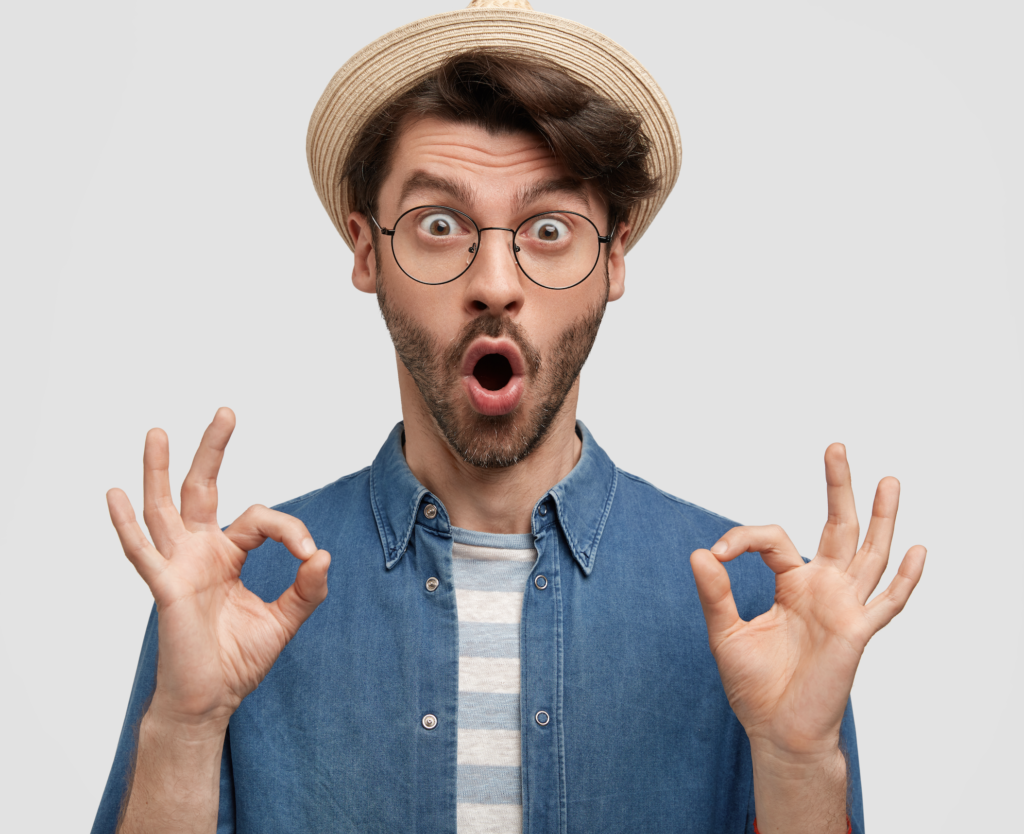
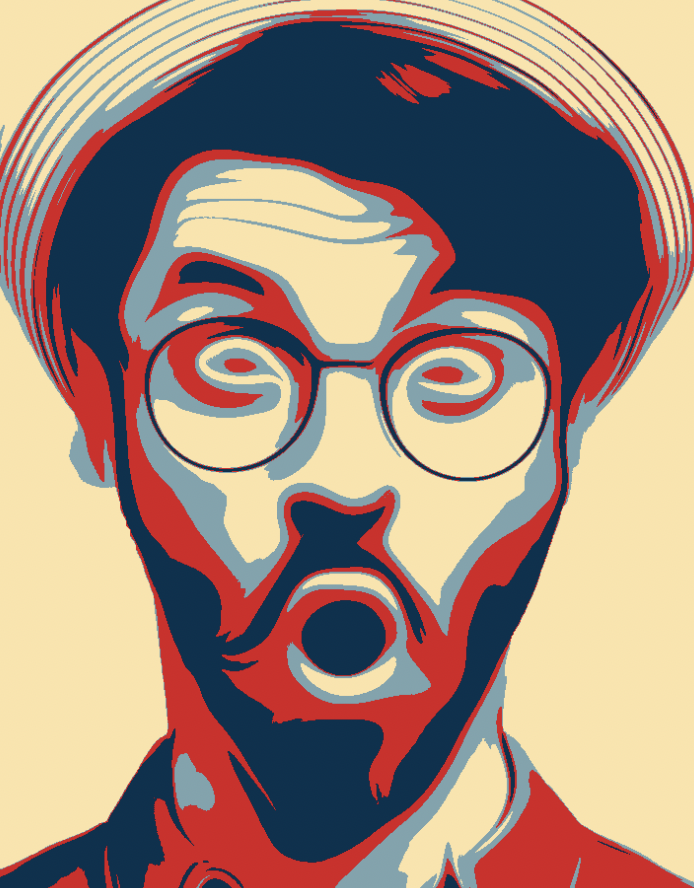
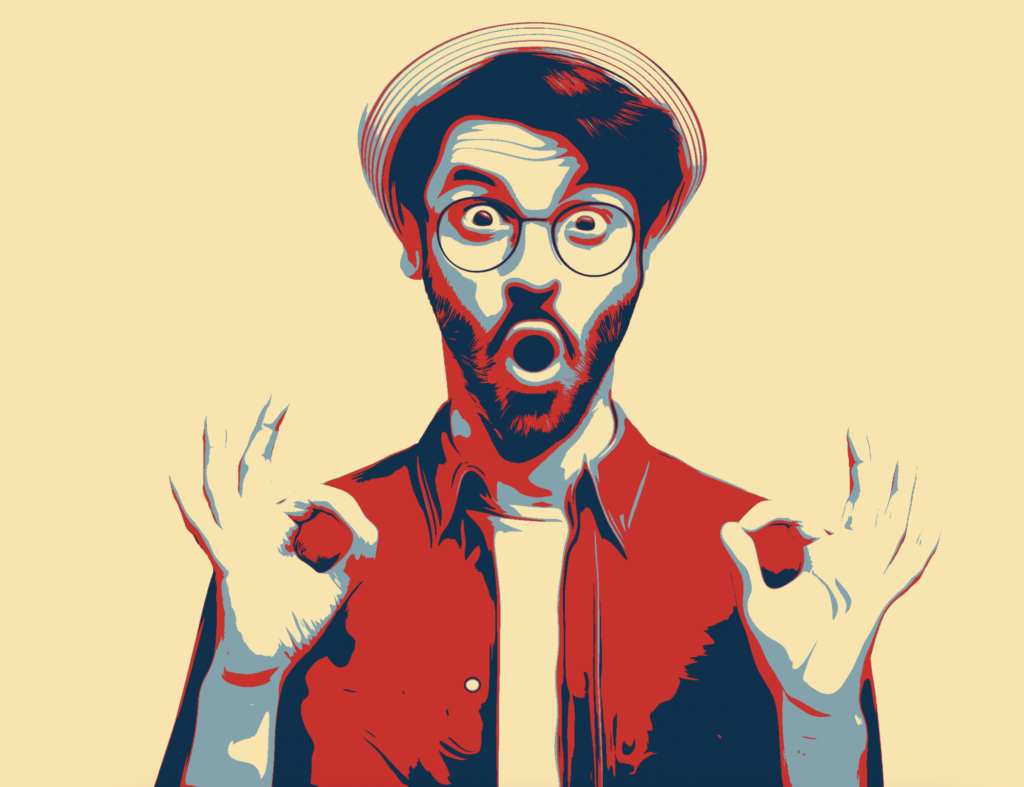
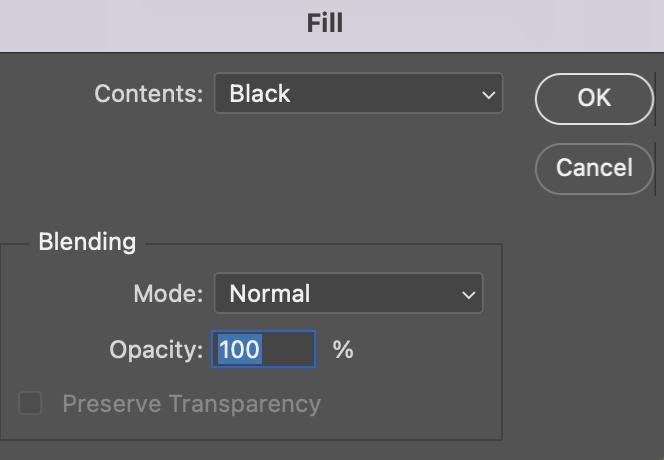
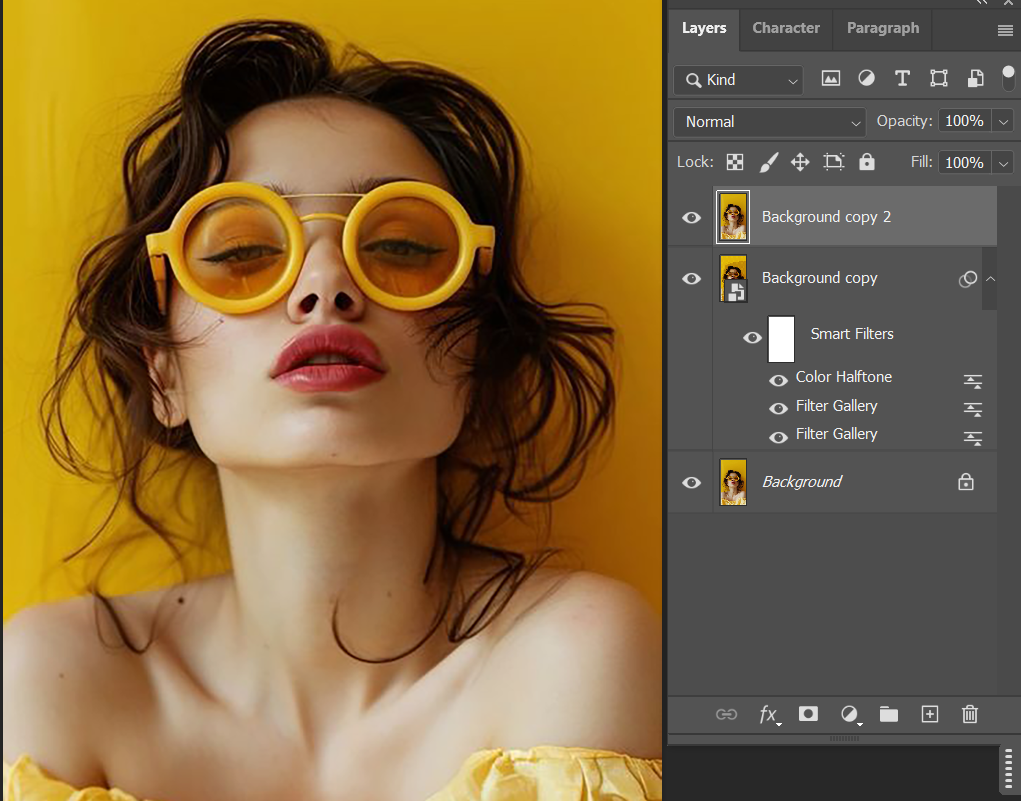
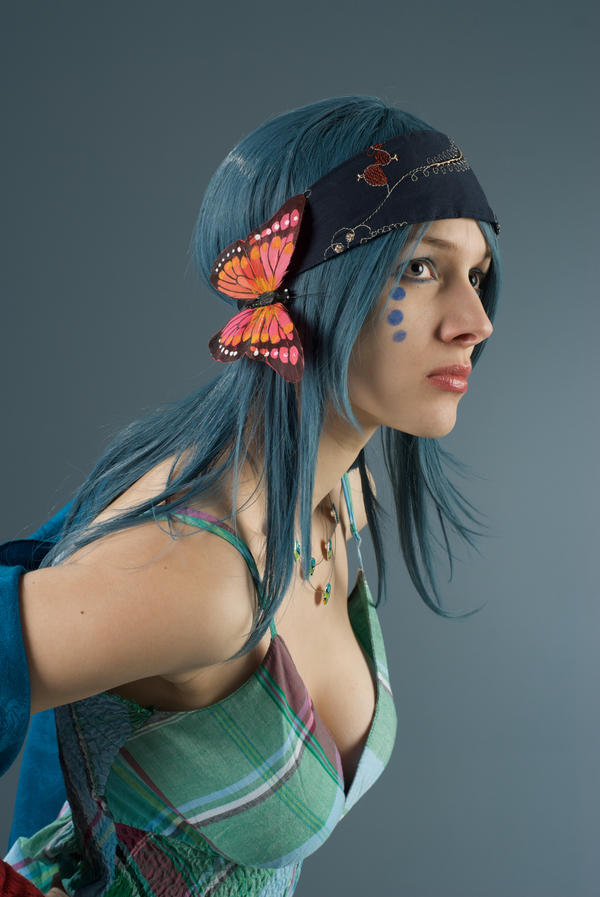
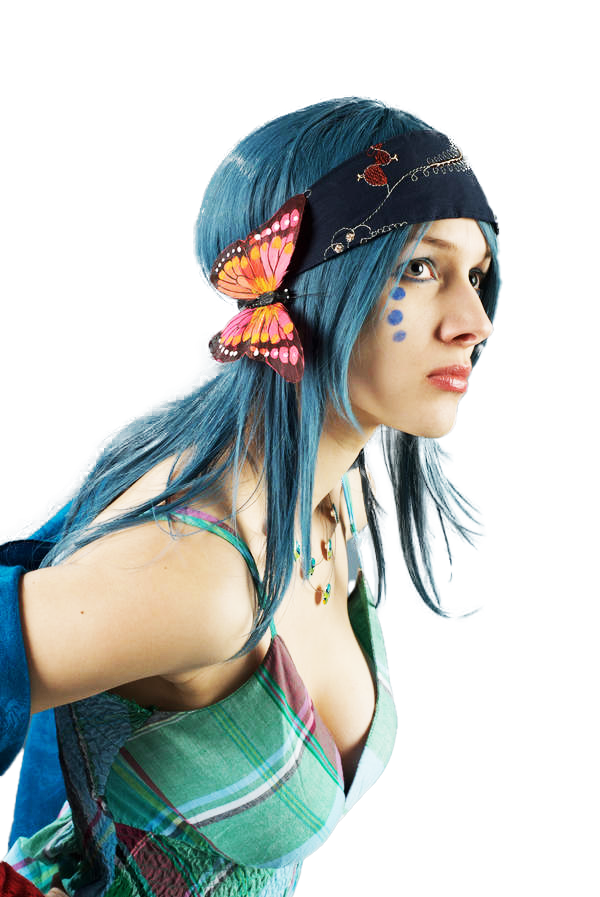
- For this design, you can either choose your own portrait photo (from the internet or, even better, one you have taken yourself) or you can download the image I have used below.
2. Open the image in photoshop. (Right click on the photo and select, ‘open with’ > ‘Photoshop’
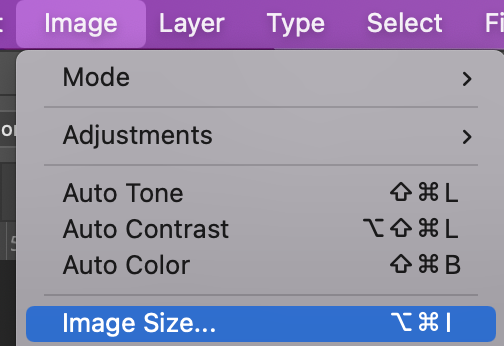
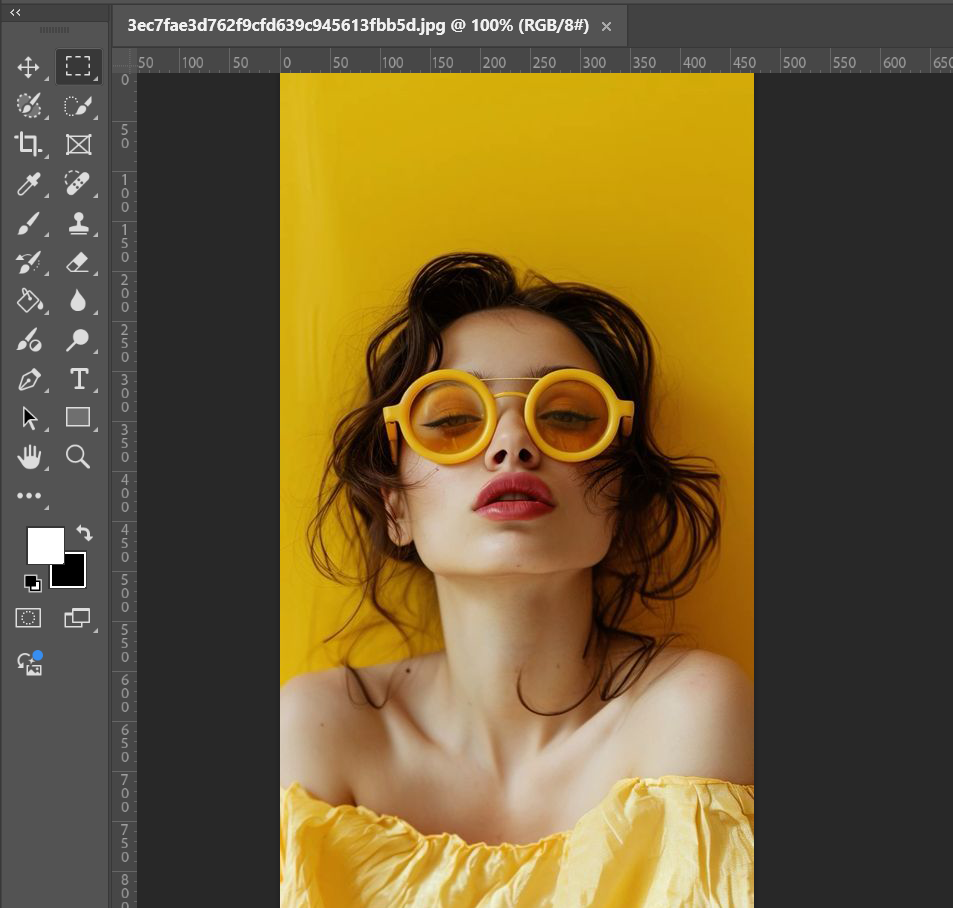
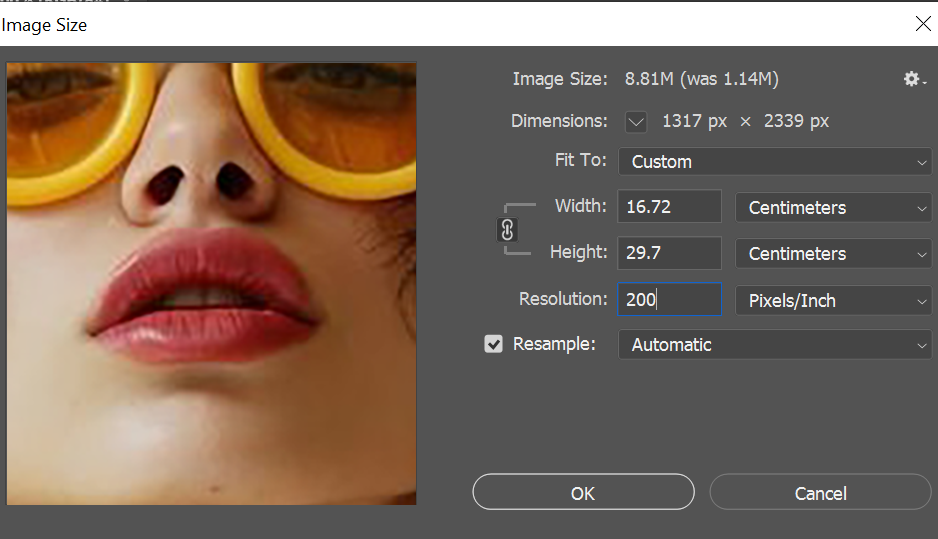
3. Firstly, we need to reduce the image size. With the image open in photoshop, go to ‘Image’ > ‘ Image Size’
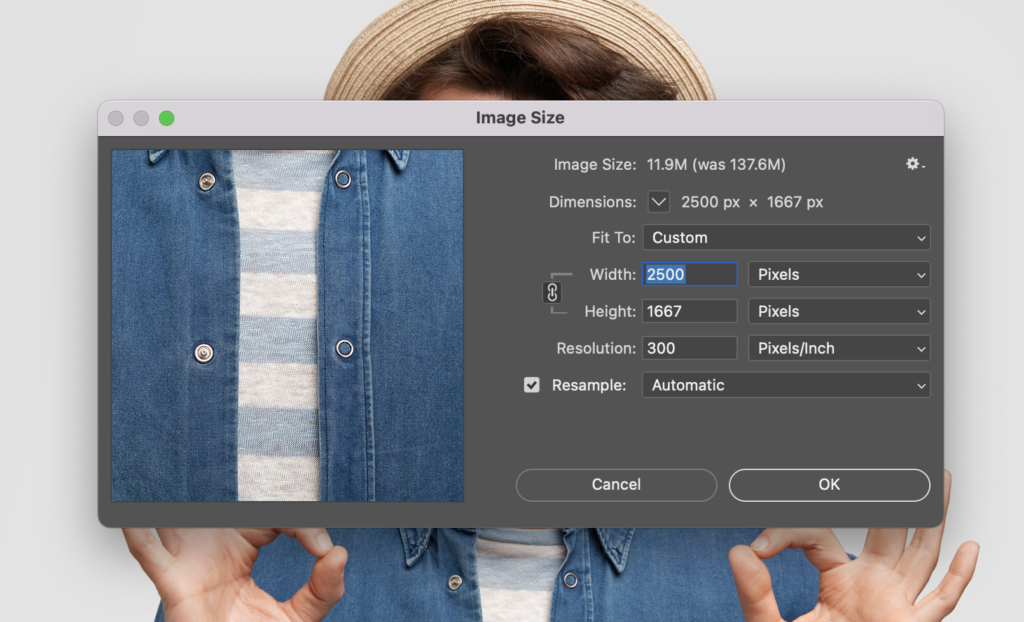
4. Change the image width to 2500 pixels (not centimetres!). The height should automatically change to 1667 centimetres. Press OK.
5. Click the zoom tool and then ‘Fit Screen’

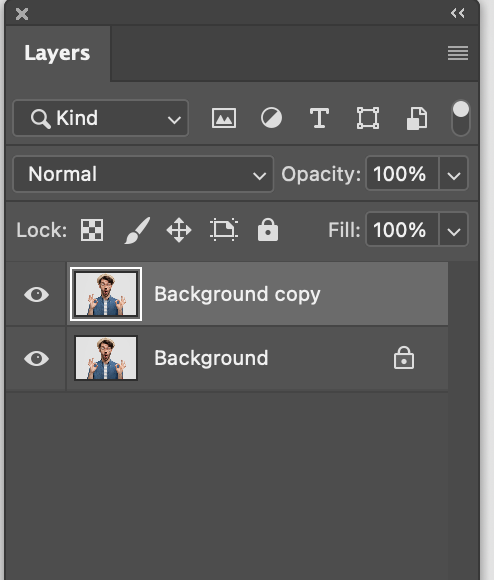
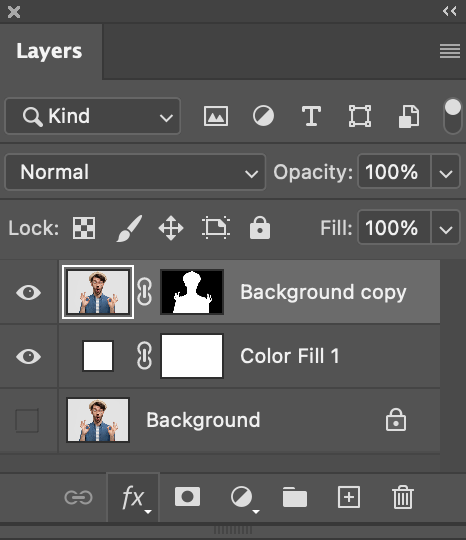
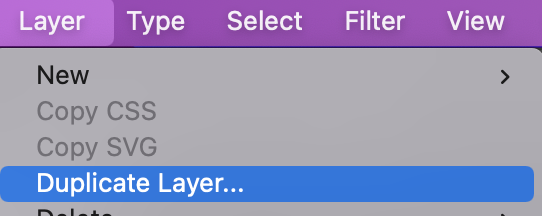
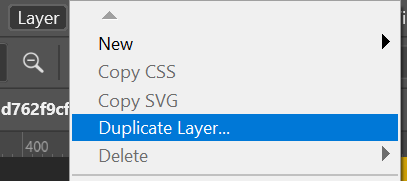
6. Duplicate the layer:
– To show the layers panel, go to ‘Windows’ > check that ‘Layers’ is ticked
– Now click, ‘Layer’ along the top panel, followed by ‘Duplicate layer’
– You should now be able to see two layers in the layers panel
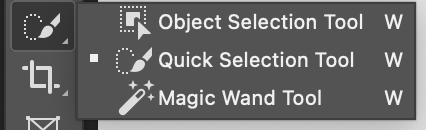
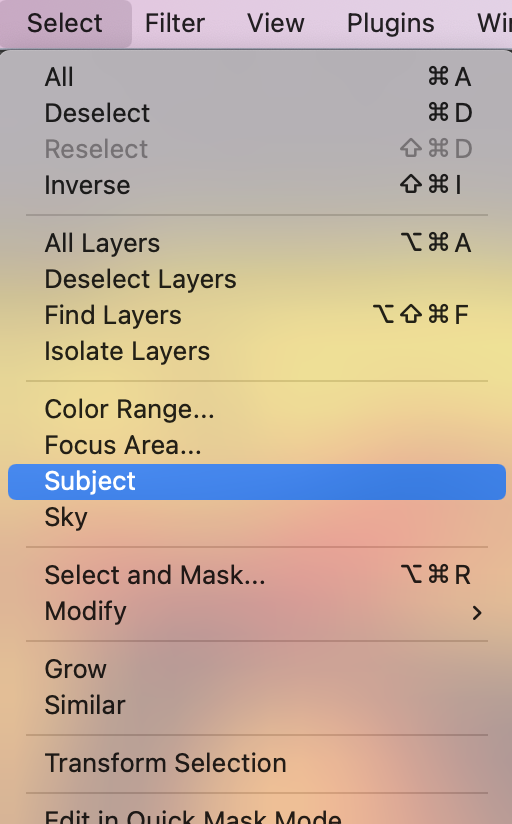
7. Select the quick selection tool from the toolbar
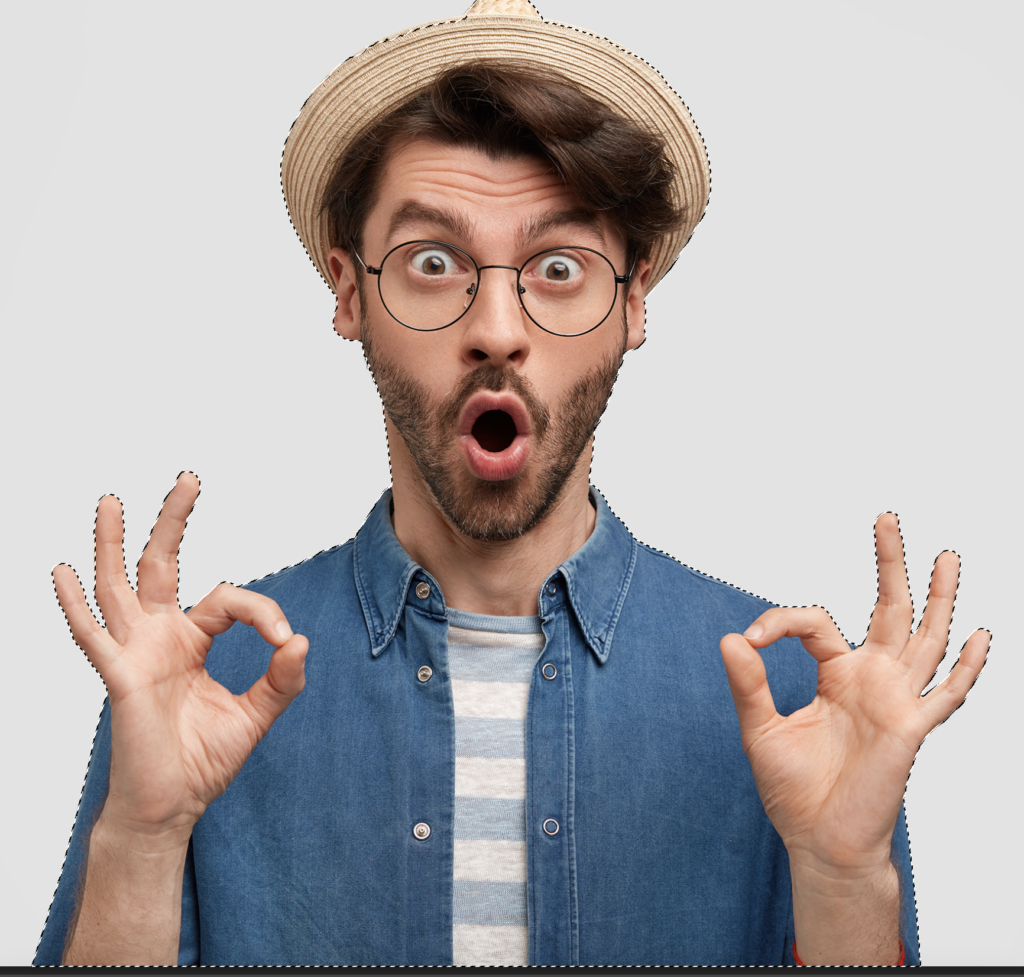
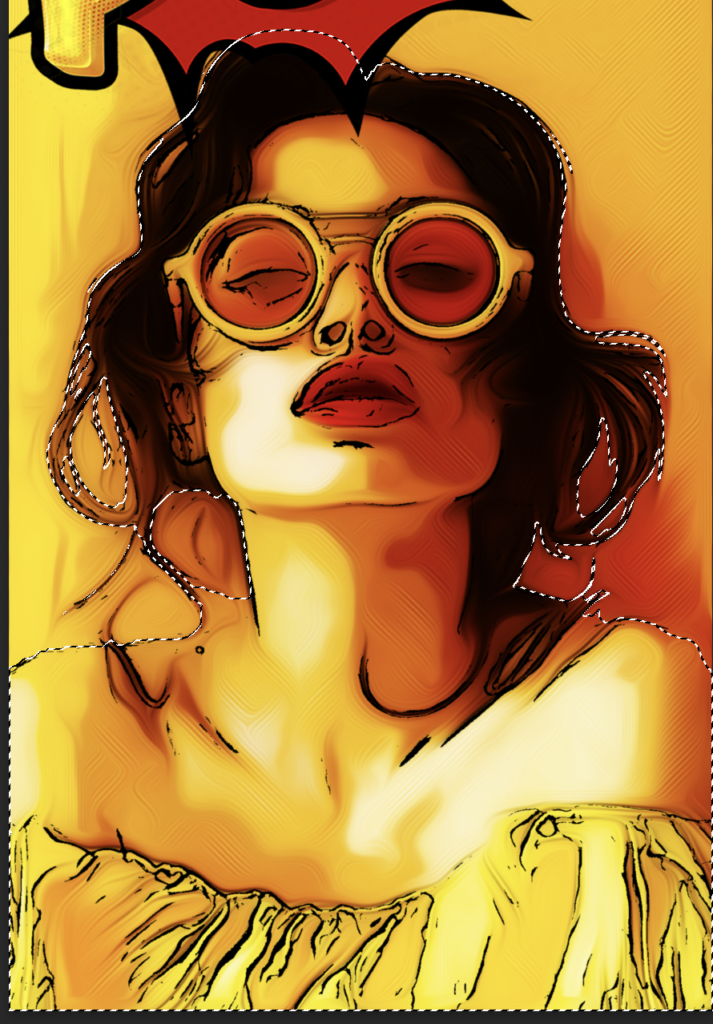
8. With the quick selection tool, select somewhere inside the person and drag your mouse around until all the person is fully selected.
9. Click the mask button on the layers panel
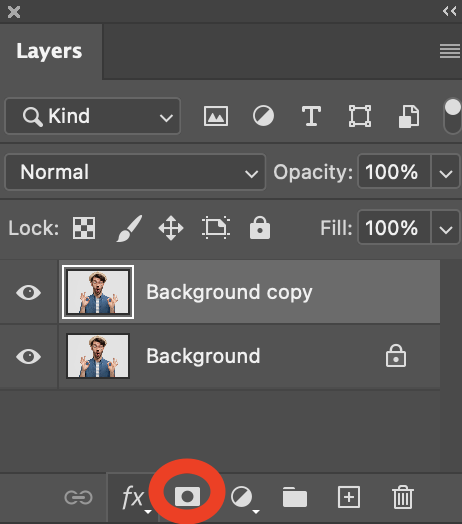
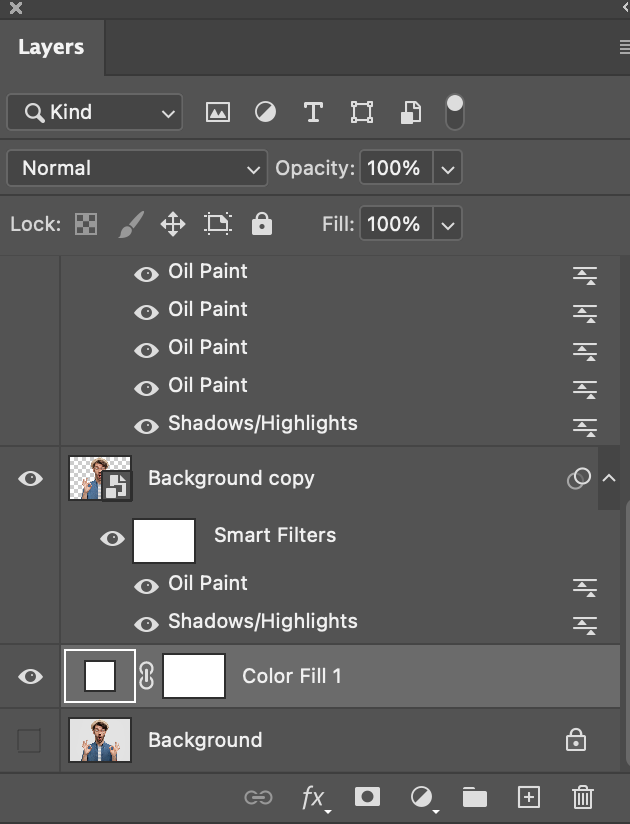
Your layer should now look like this in the layers panel

10. Now hide the background layer (the bottom layer) by clicking the eye next to the layer.
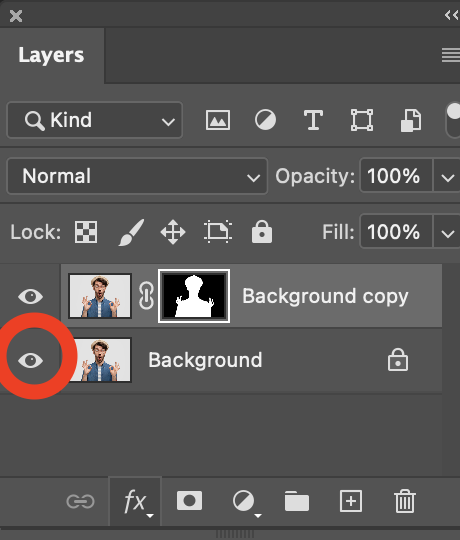
You should be able to see that you have now isolated the person from the background (the checkered background indicates a transparent background).

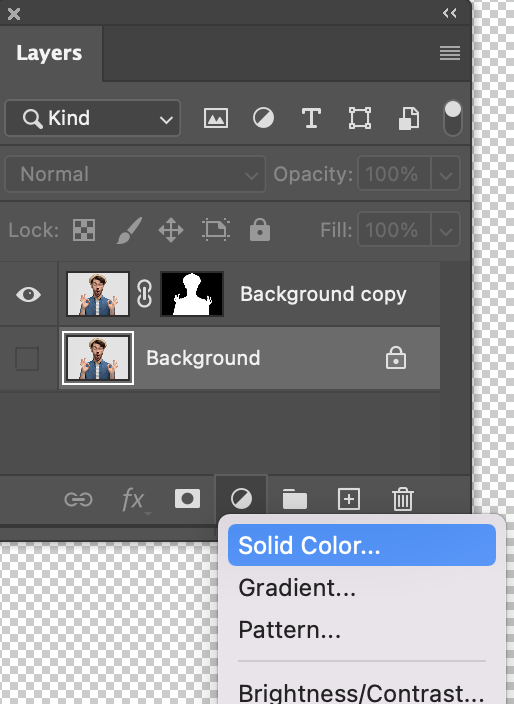
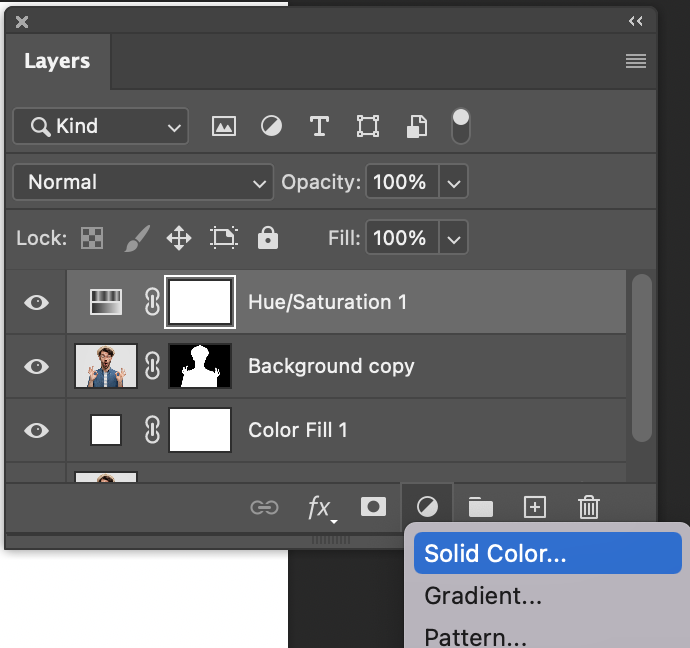
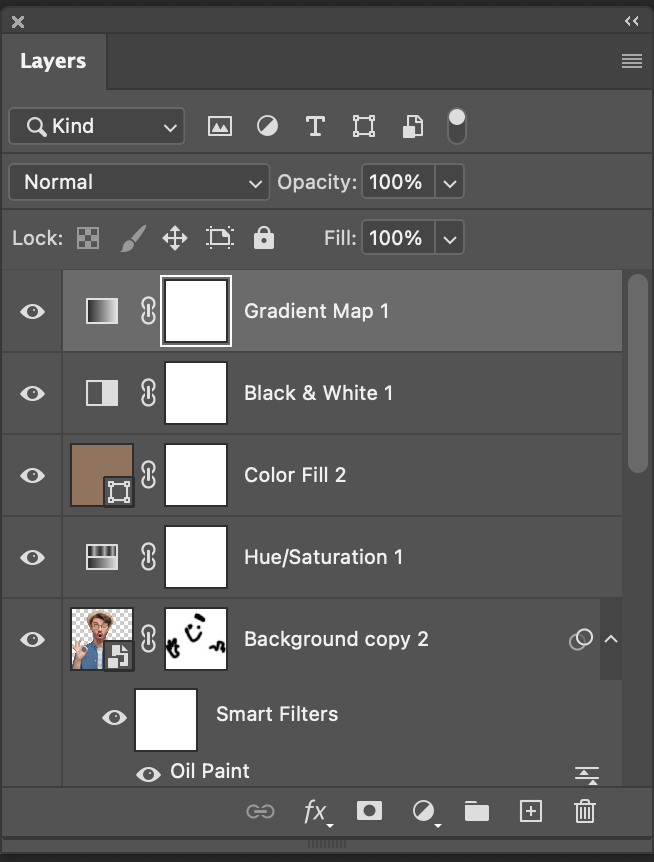
11. Now you need to create a new fill layer. With the bottom background layer selected, click the ‘new layer ‘icon along the bottom of the layers panel

In the drop down, select ‘Solid colour’
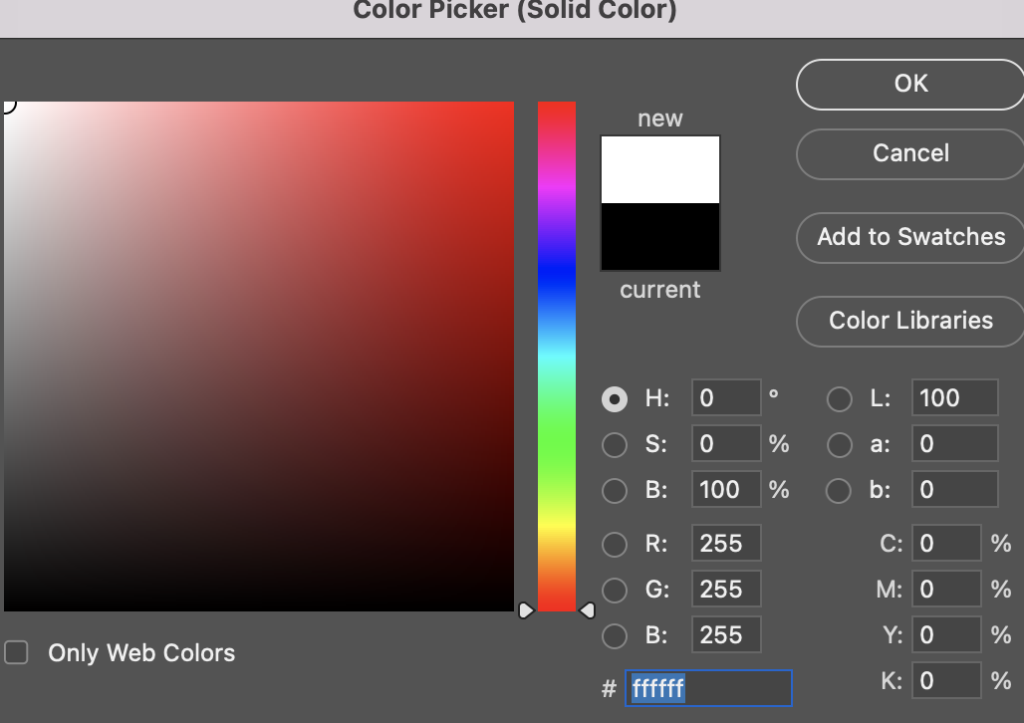
12. Choose white as the colour.
13. Click onto the top layer
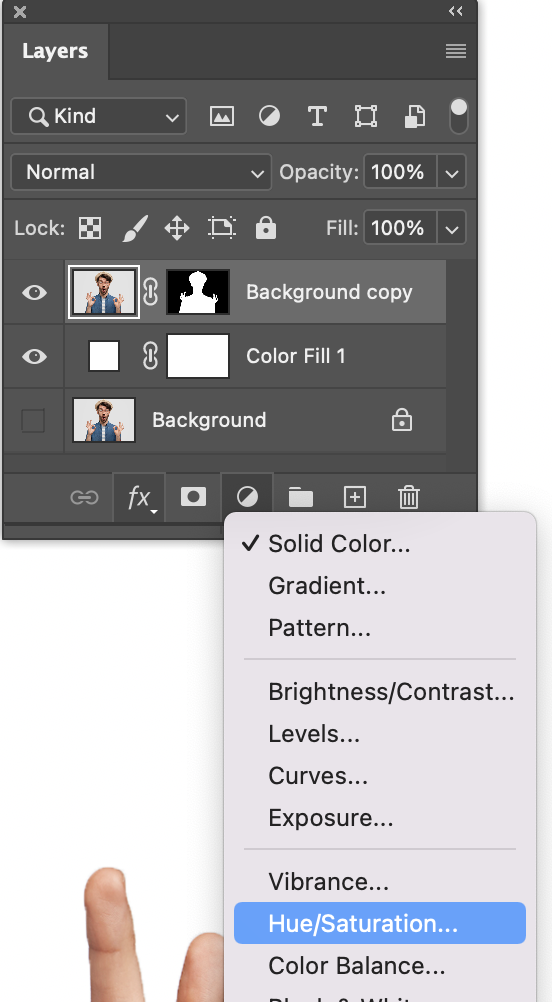
14. Now we need to change the layer to greyscale. Click the ‘new layer ‘icon along the bottom of the layers panel
Select ‘Hue / Saturation’ form the drop down.
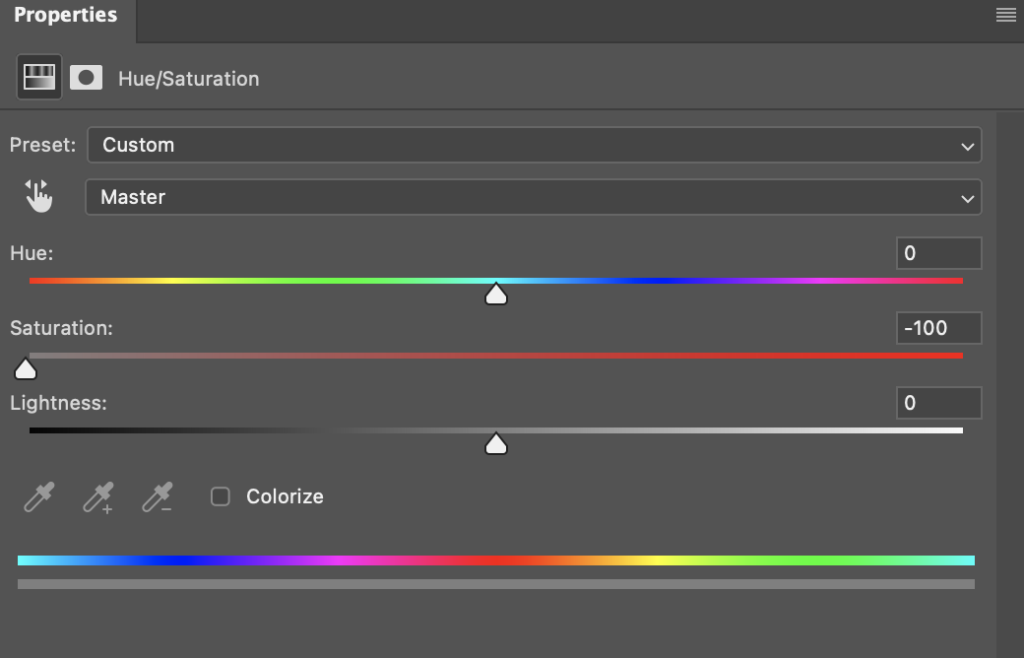
15. In the pop up ‘properties’ panel, drag the saturation down to ‘-100’
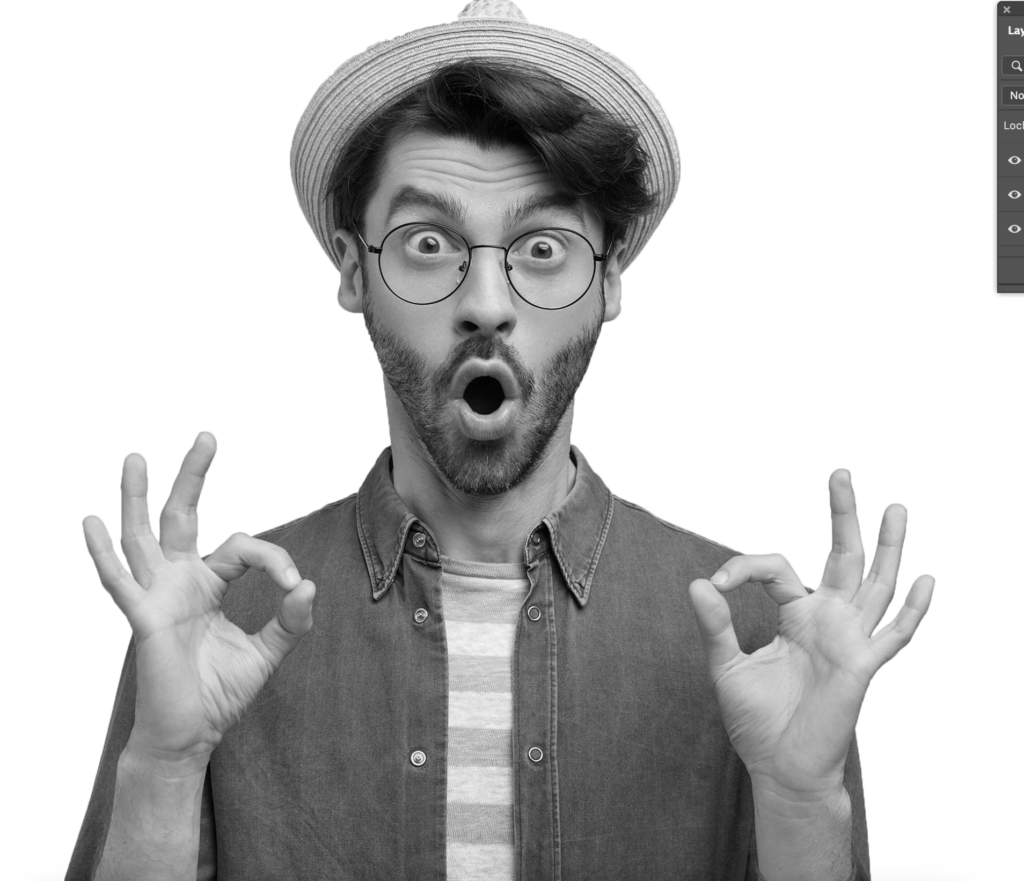
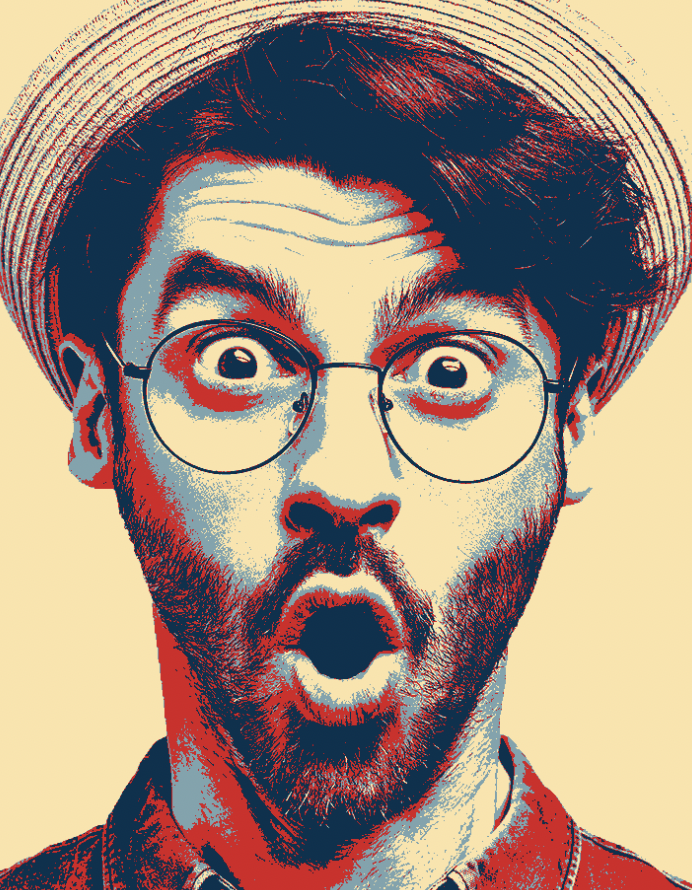
Your image should now look like this…
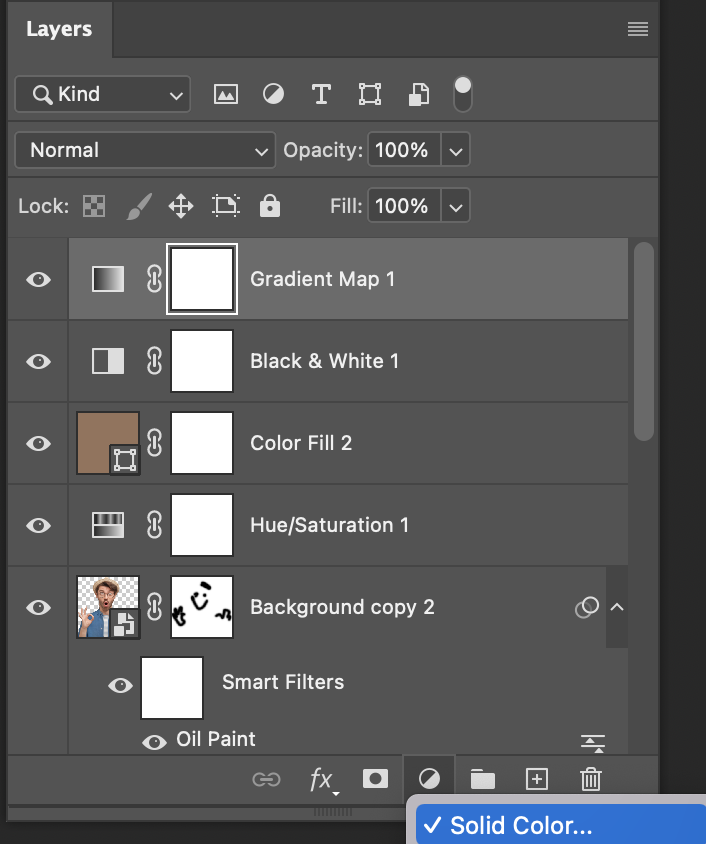
16. Now we need to create another solid colour layer. Go to the ‘new layer’ icon at the bottom of the layers panel.
Select ‘solid colour’ from the drop down
Set the colour to ‘96735a’ – press OK

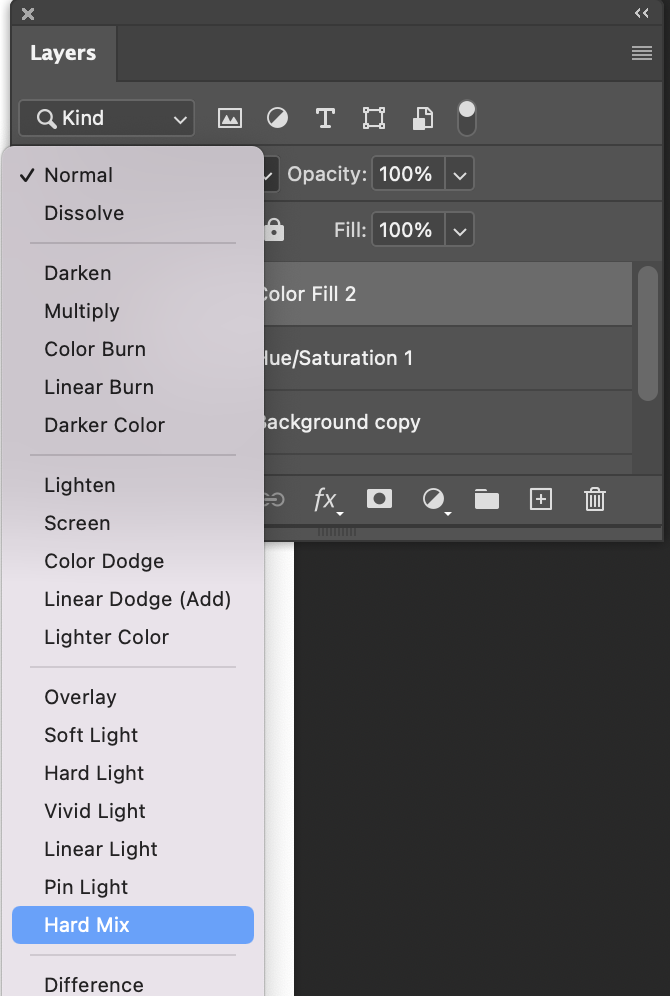
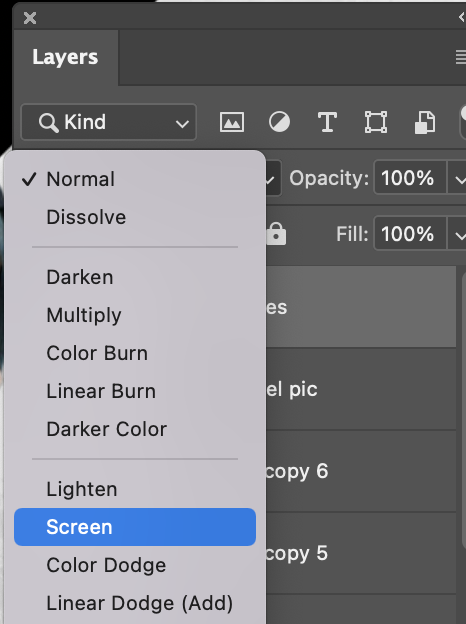
17. Set the blend mode of this layer to ‘Hard Mix’. To do this, click where it says ‘normal’ on the layers panel, and select ‘hard mix’ from the drop down.
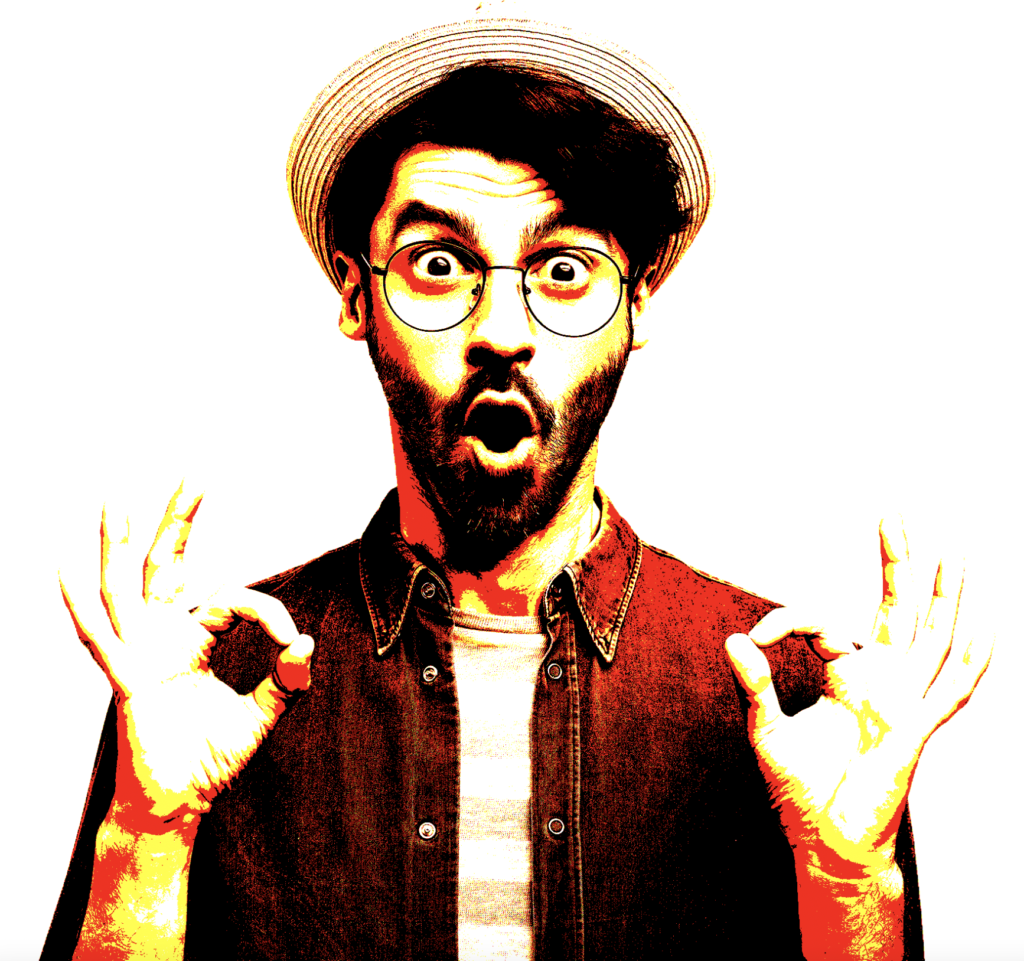
18. Your layer should now look like this.
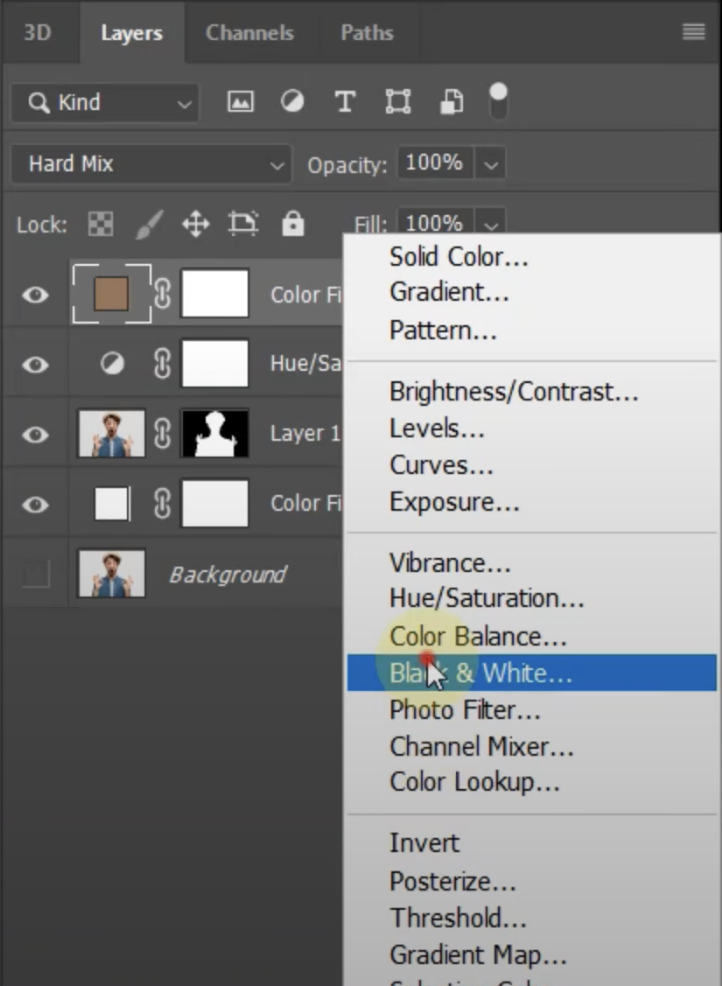
19. This has given a good threshold (separating the colours more dramatically). But now we need to turn it black and white again. To do this, select the ‘new layer’ icon at the bottom of the layers panel.
Choose ‘black and white’ from the drop down
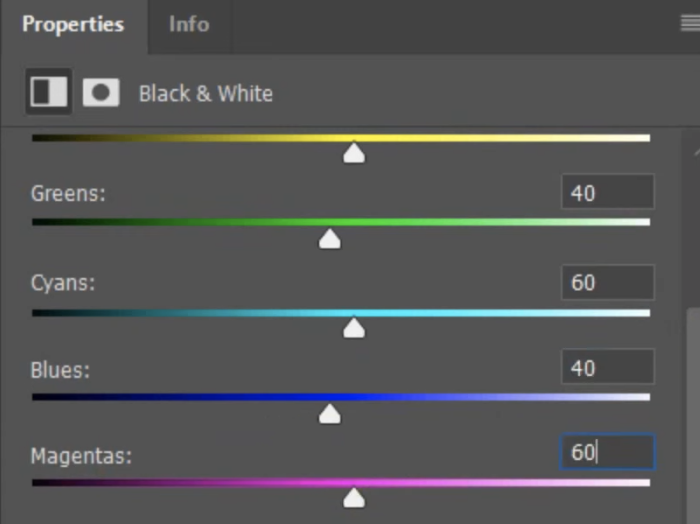
In to pop up properties panel, scroll down and change the level of the blues to ’40’ and the magenta to ’60. You can keep the rest the same.
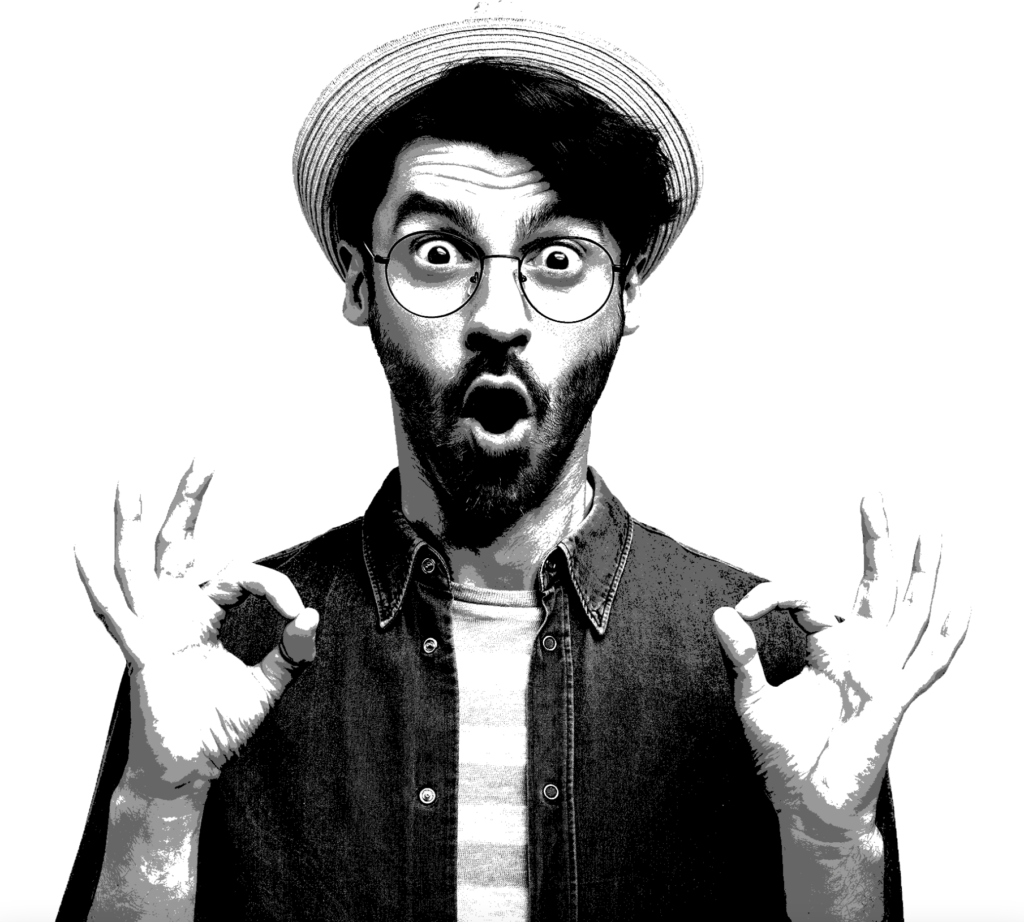
Your image should now look like this
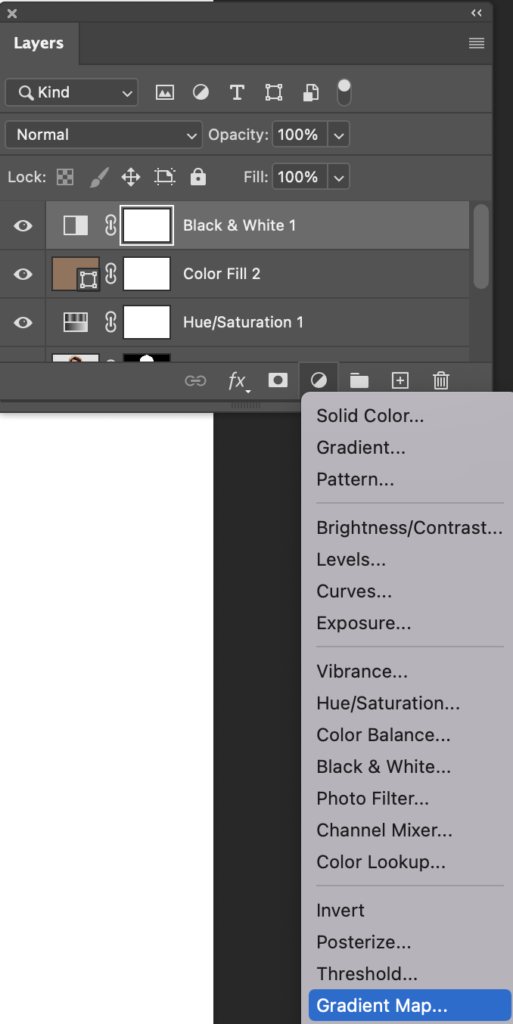
20. Now you need to select your colours for the whole image. To do this, go to the ‘new layer’ icon at the bottom of the layers panel.
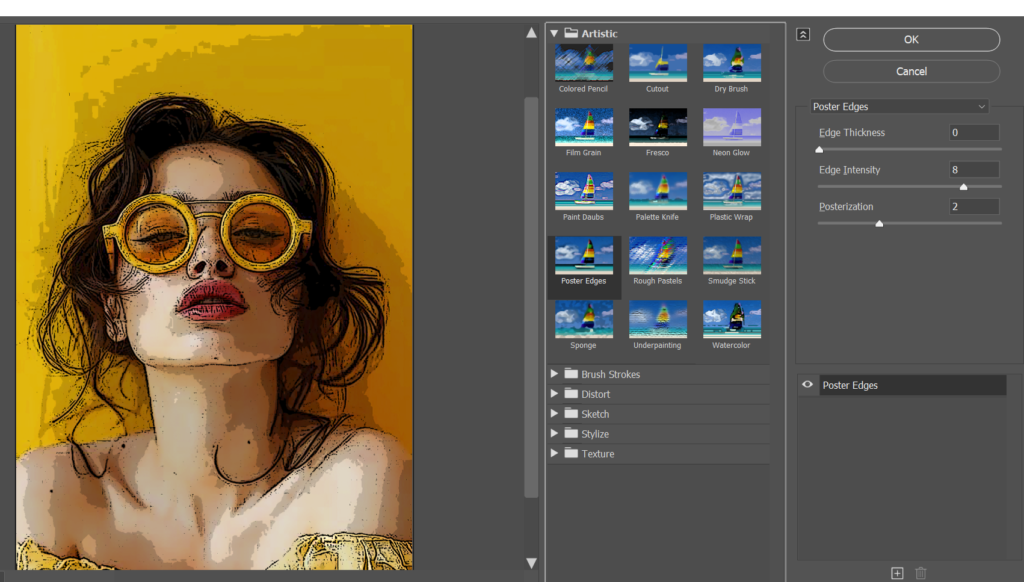
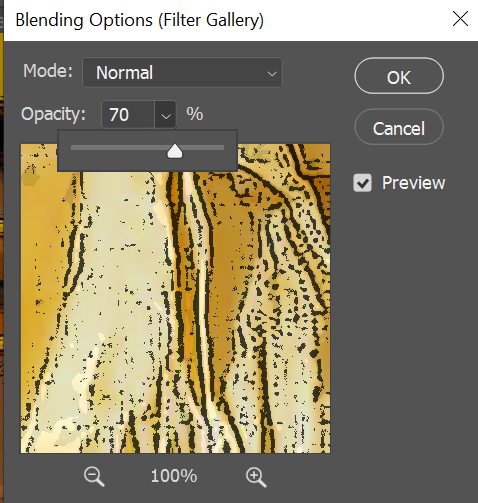
In the drop down, select ‘gradient map’
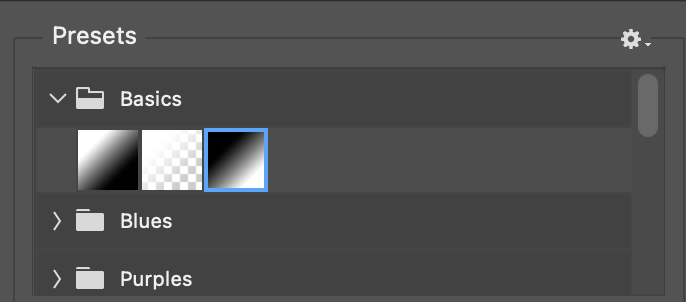
21. In the pop up properties panel, click within the gradient bar.
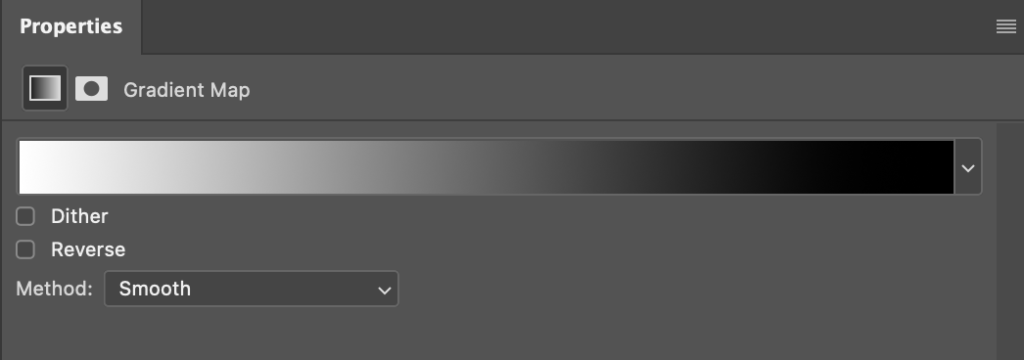
22. From the presets, select the black and white icon that has the black in the top left corner
23. Double Click on the little square to the bottom left of the gradient bar
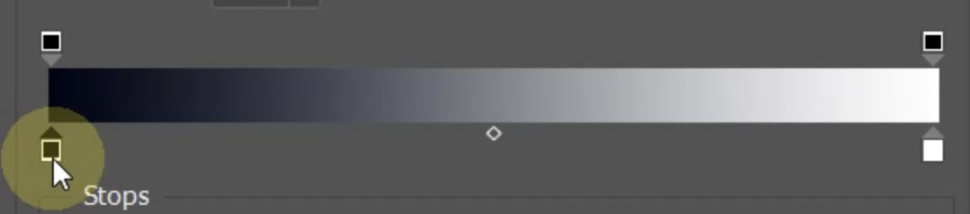
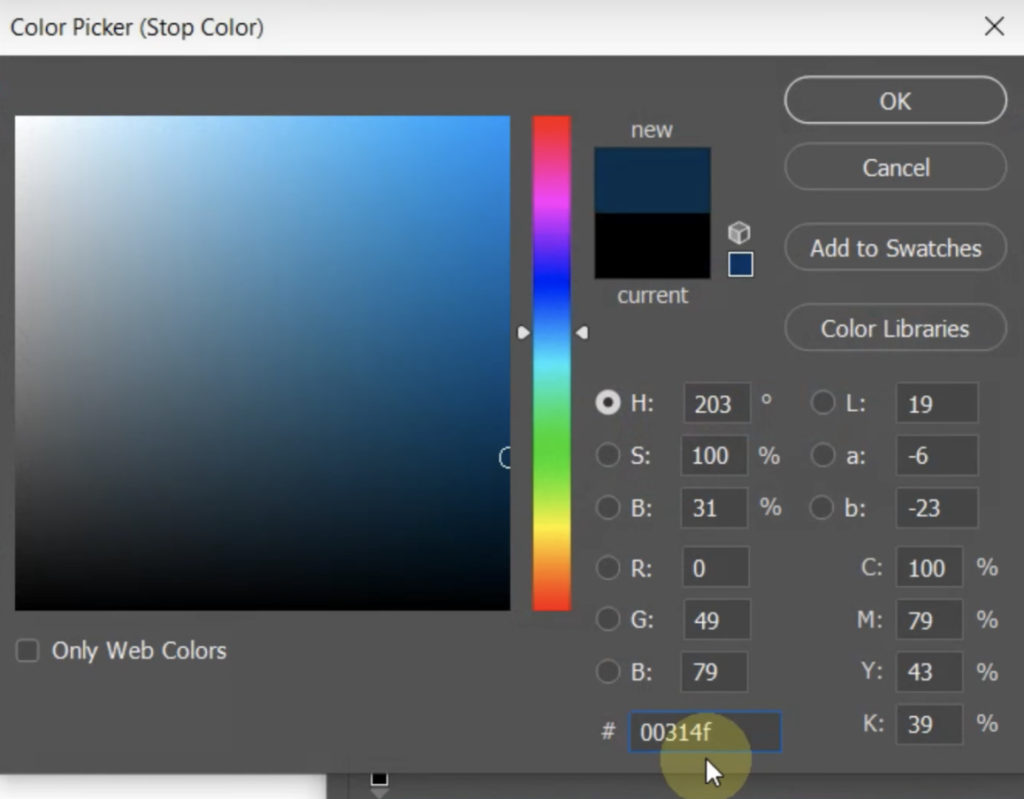
24. In the pop up, set the colour to 00314f – press OK
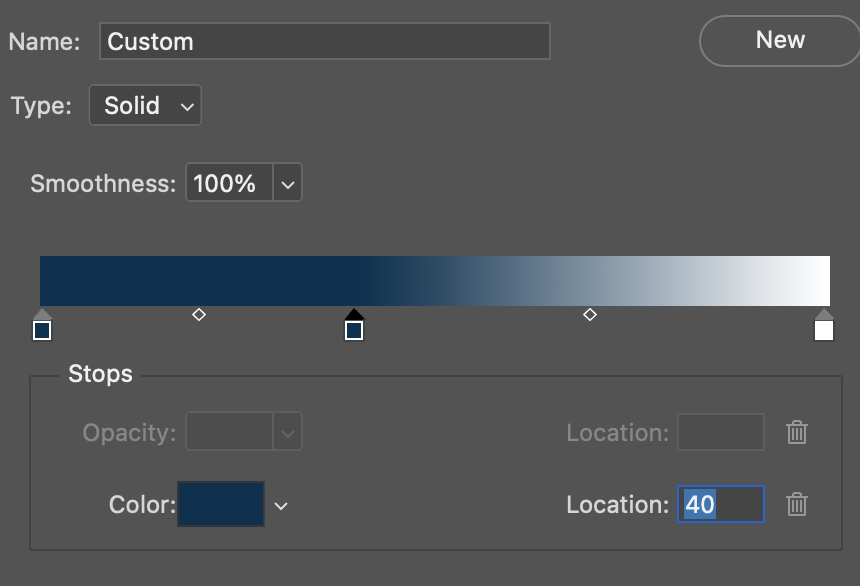
25. You now need to create another colour stop. To do this, click under the gradient bar as shown
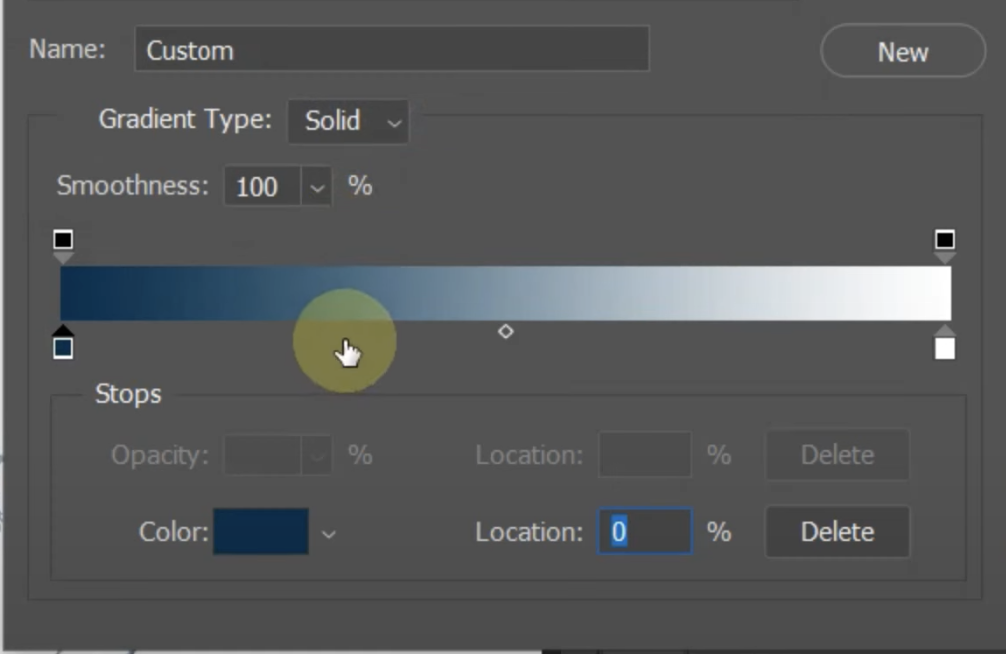
26. Now set the location to around 40
27. Then click on the colour icon
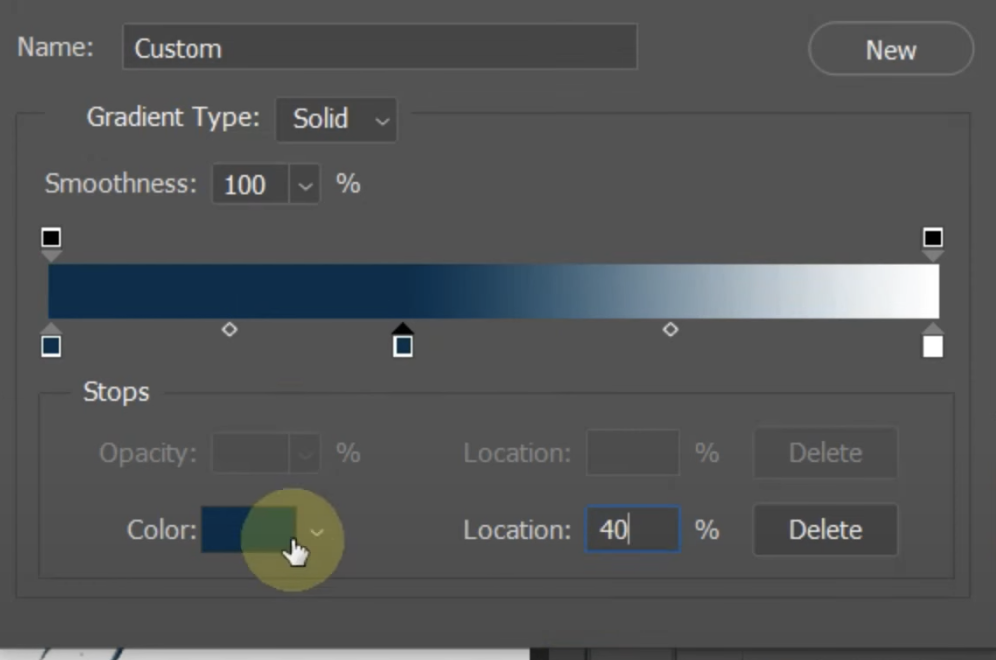
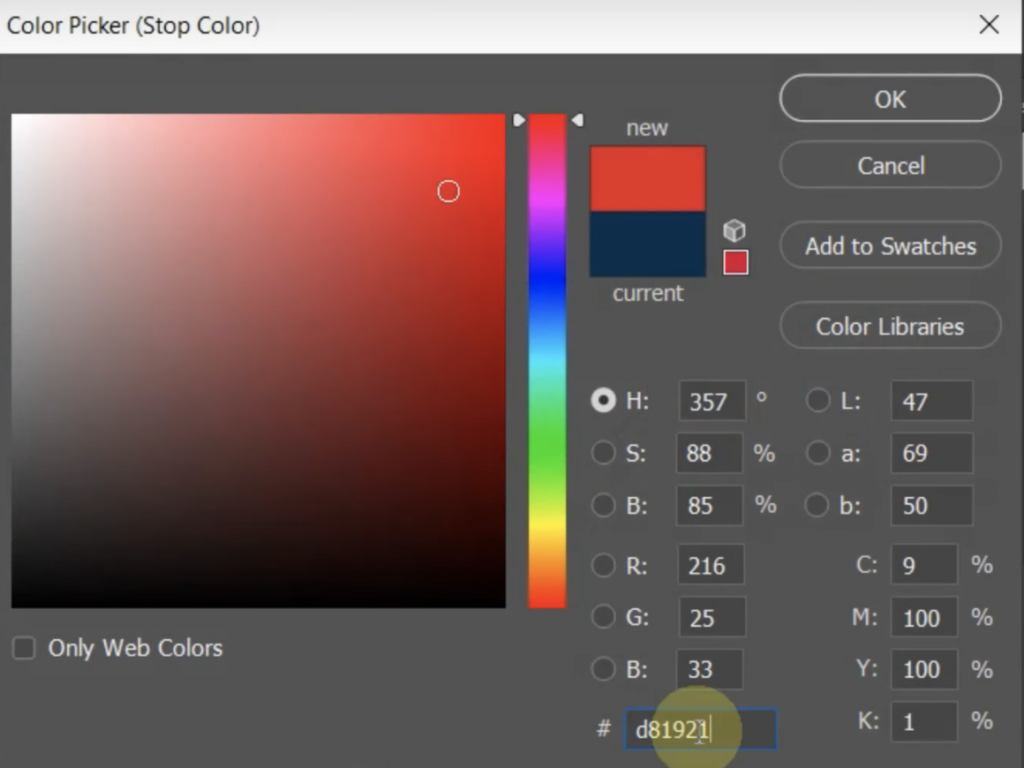
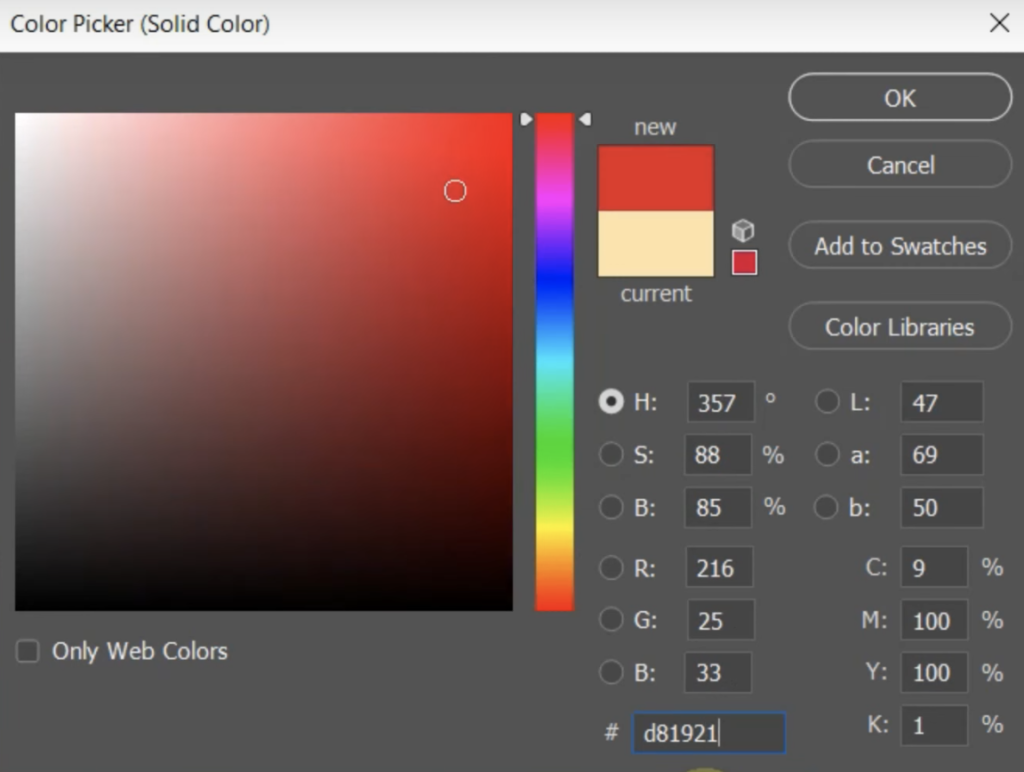
28. Set the colour to d81921 – Press OK
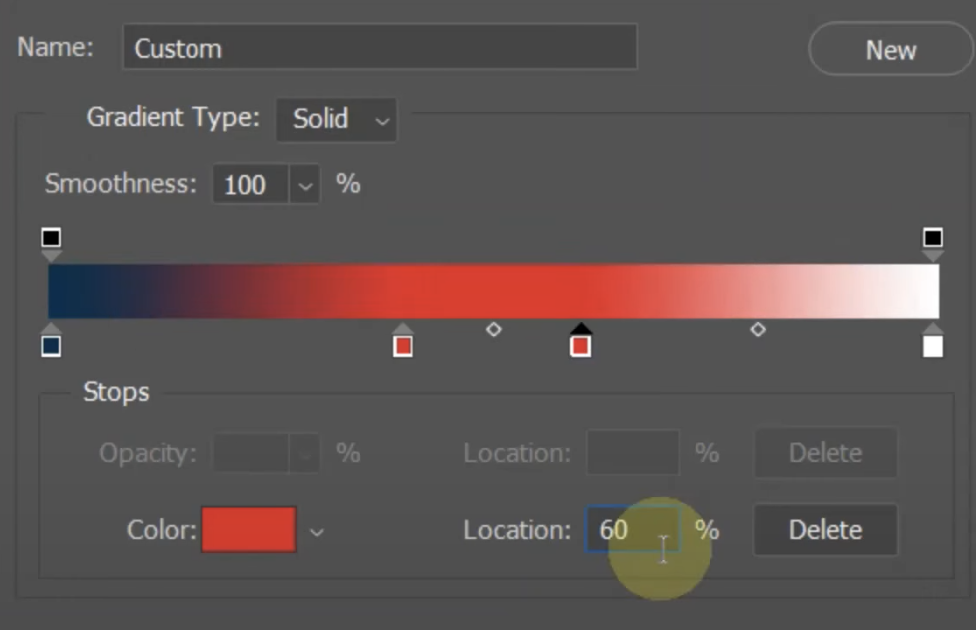
29. Add one more colour stop by clicking under the bar as shown.
30. Set the location to around 60
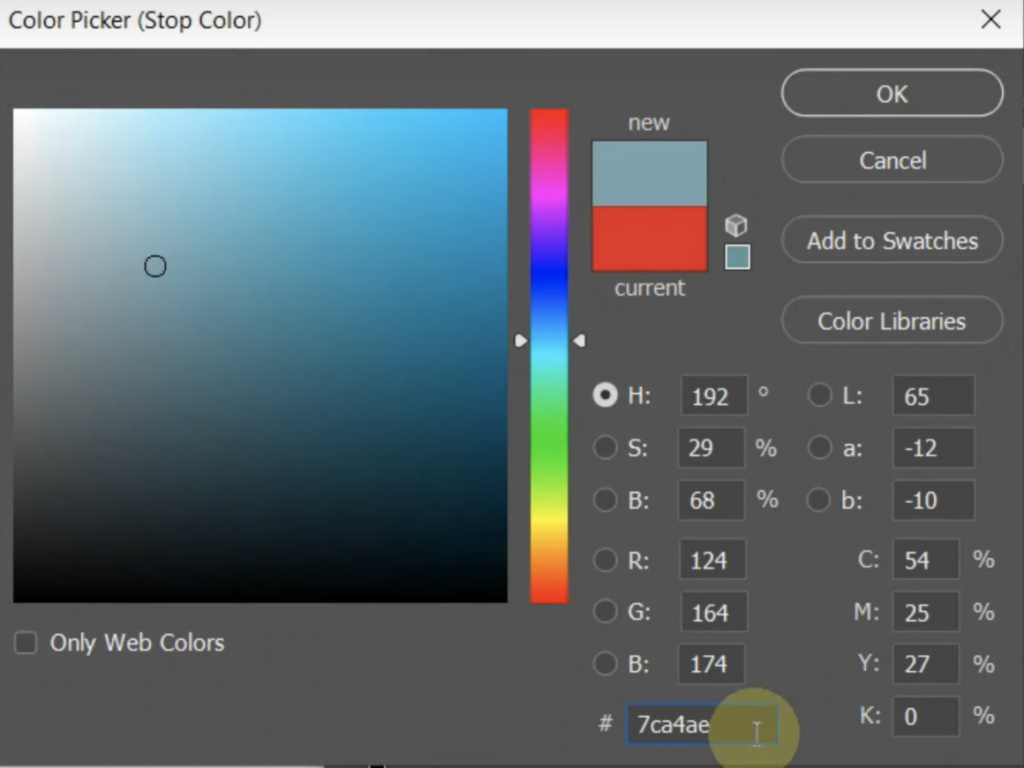
31. Click on the colour icon
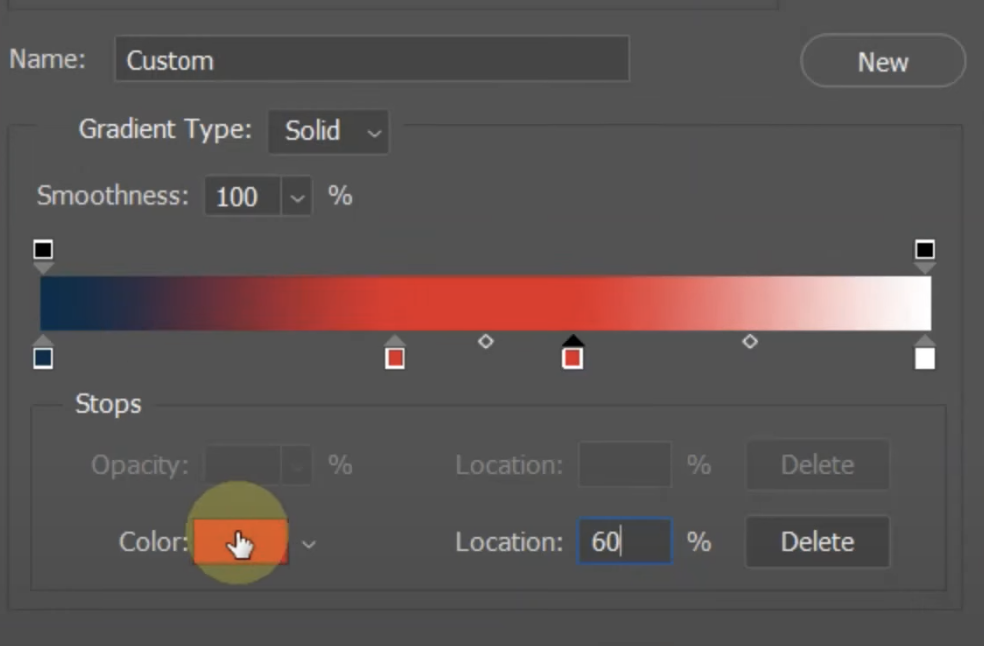
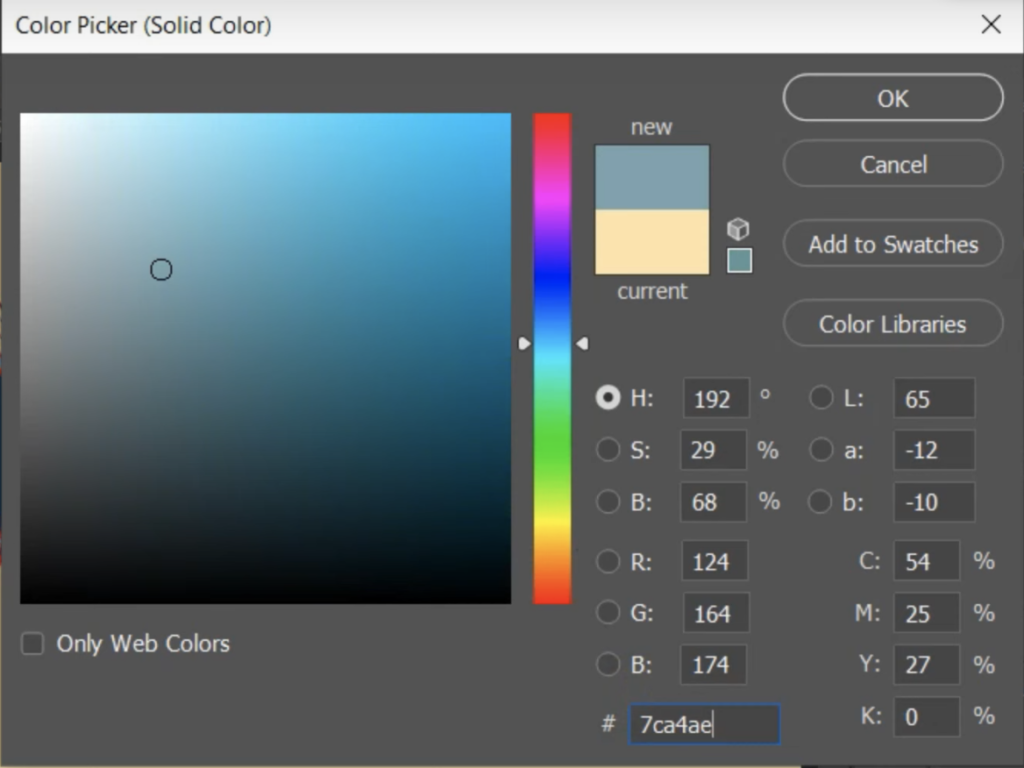
Set the colour to 7ca4ae – Press OK
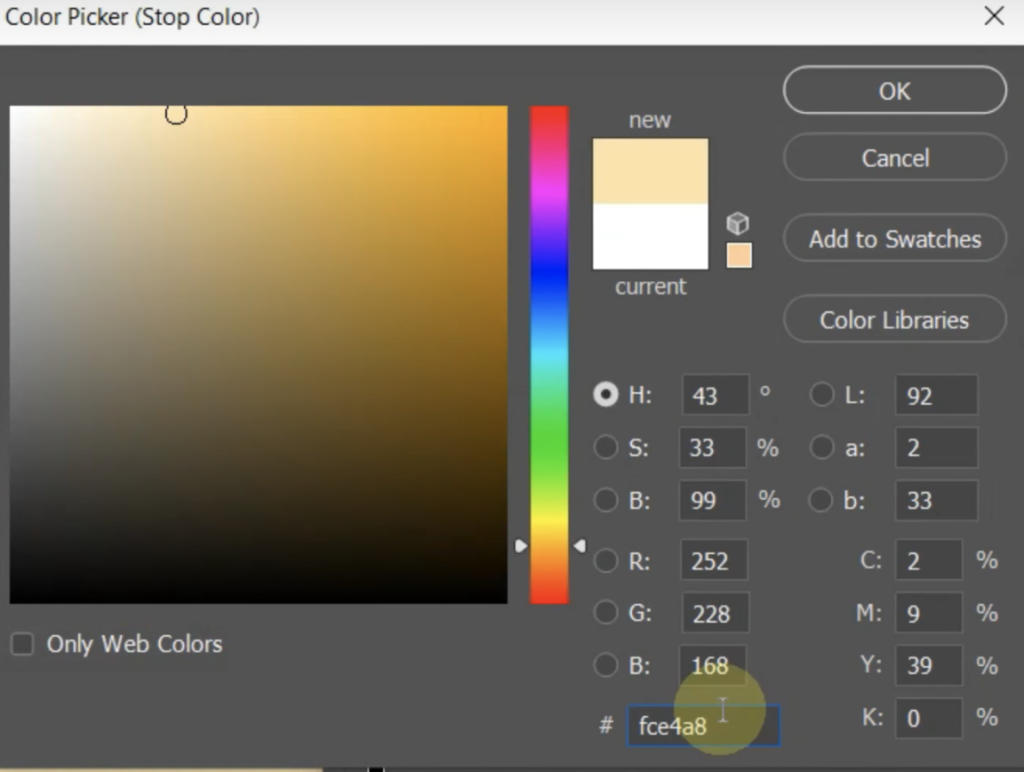
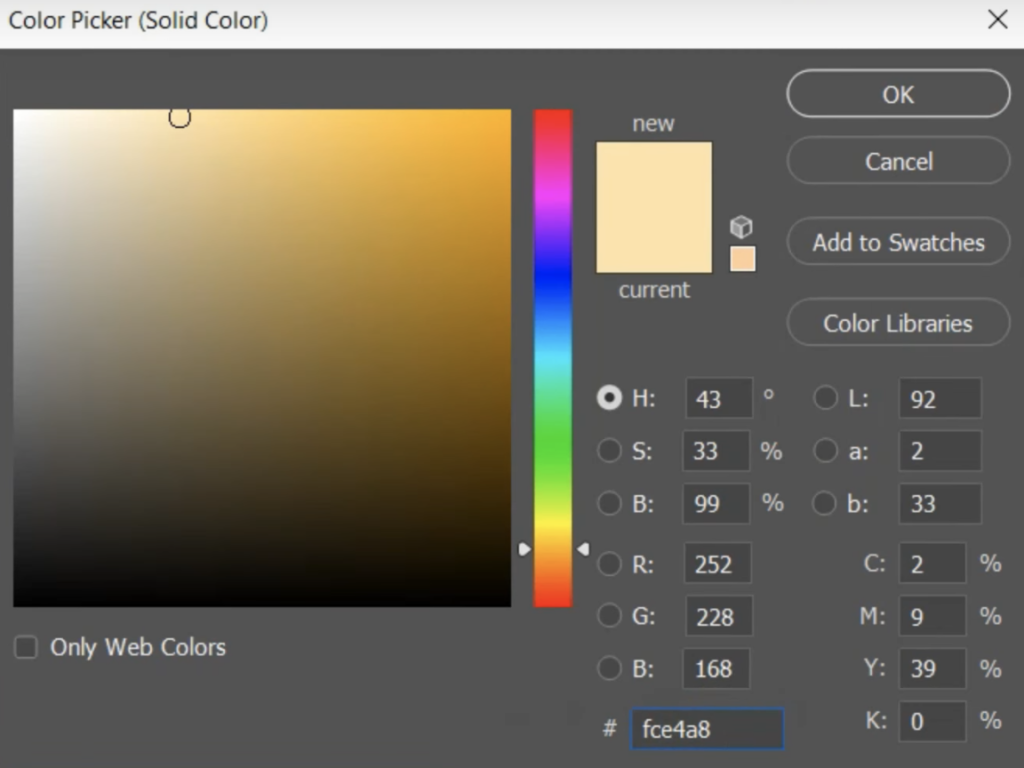
32. Double click on the white colour stop as shown
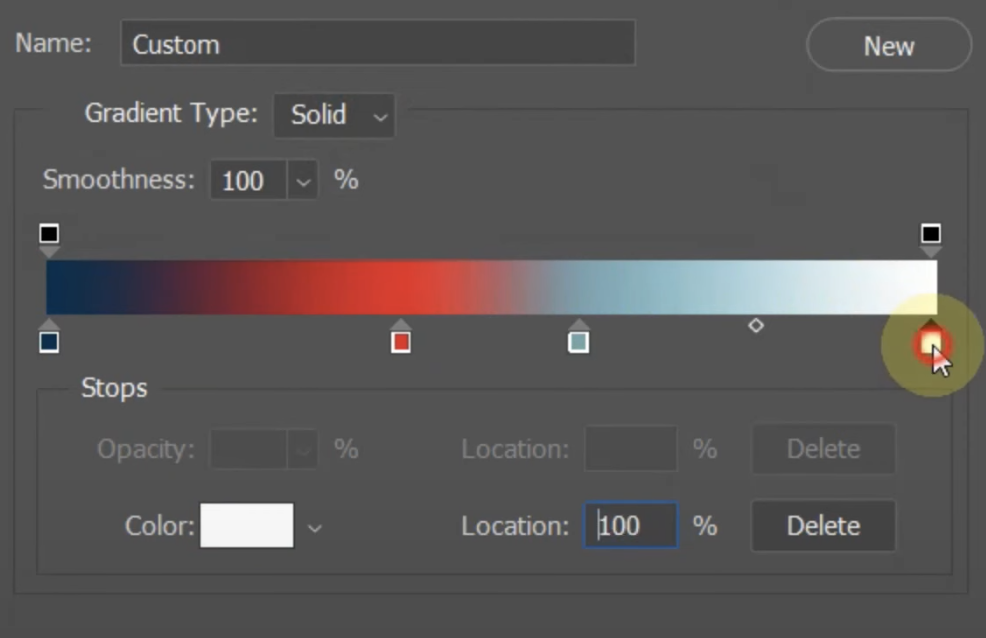
Set the colour to fce4a8 – press ok – and then OK again to close the gradient panel.
33. This is what your image should look like so far
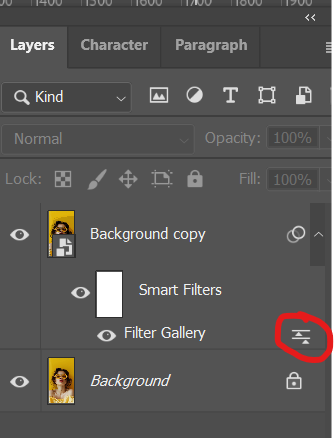
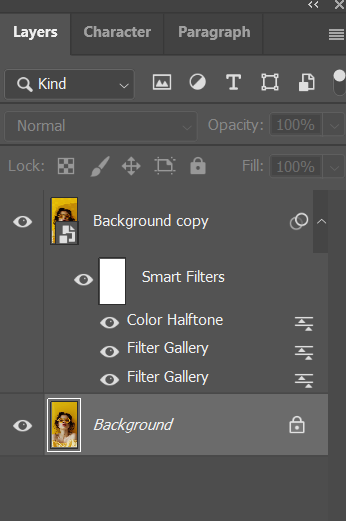
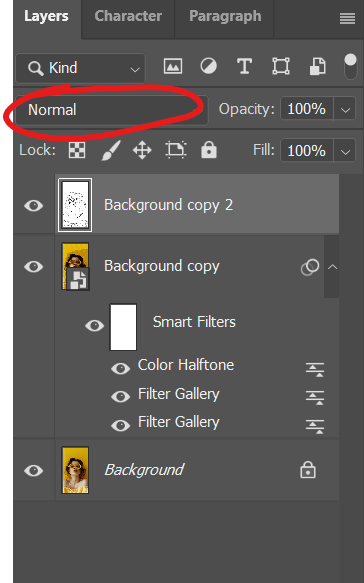
34. Now we need to adjust the details… To do this, click onto the background copy layer as shown
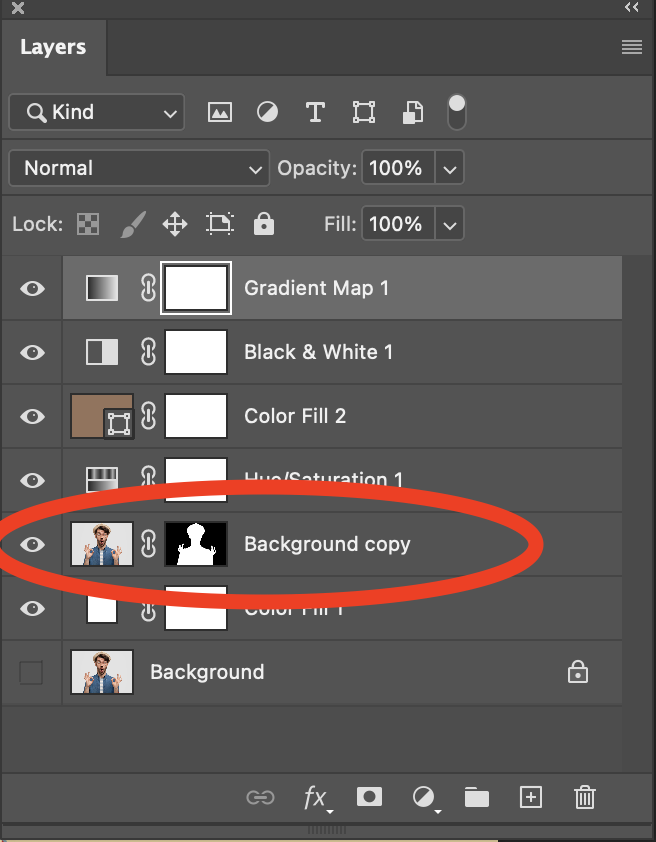
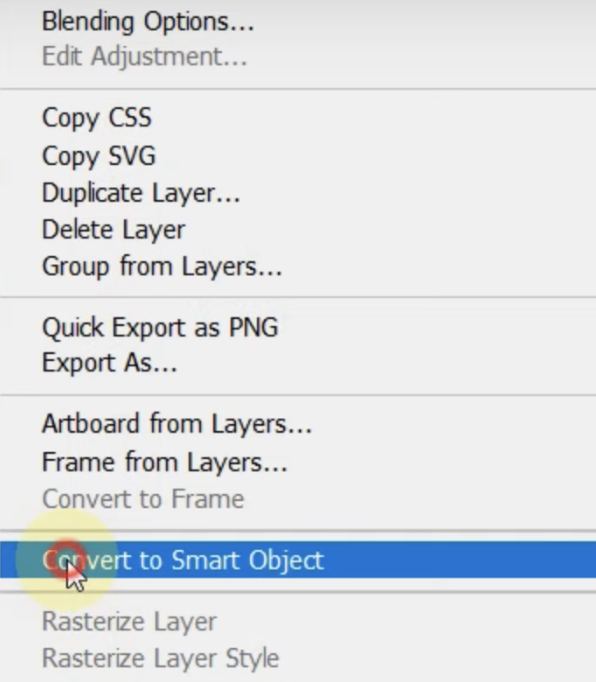
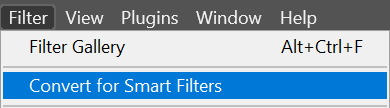
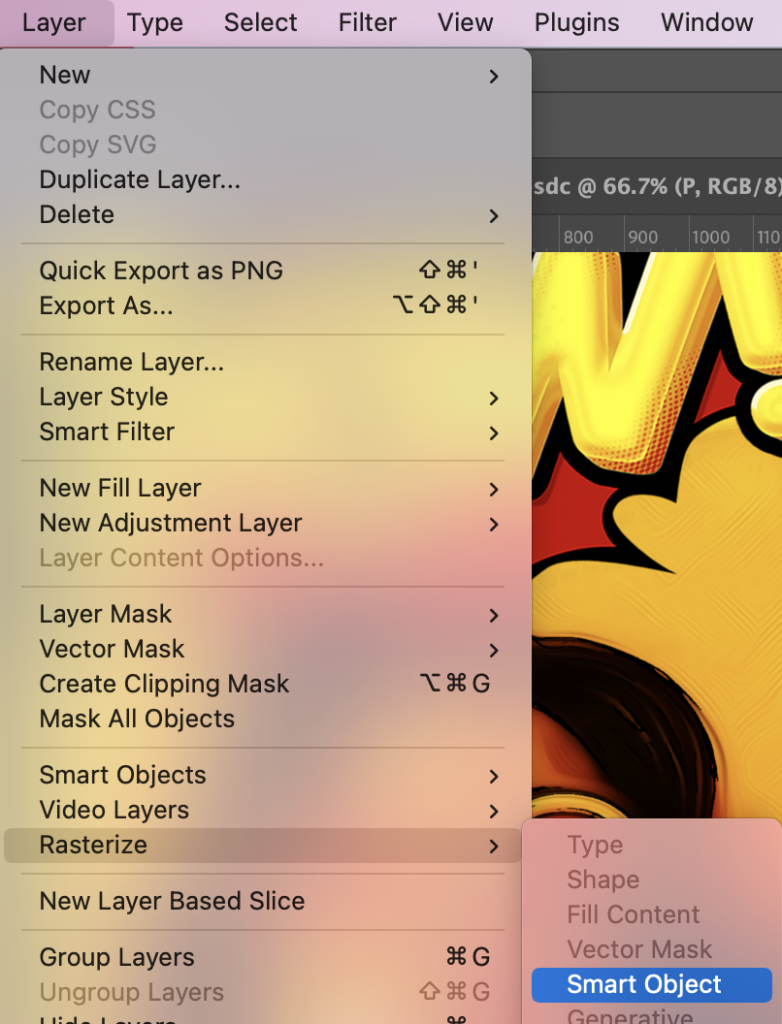
35. Right click on the layer and select ‘convert to smart object’
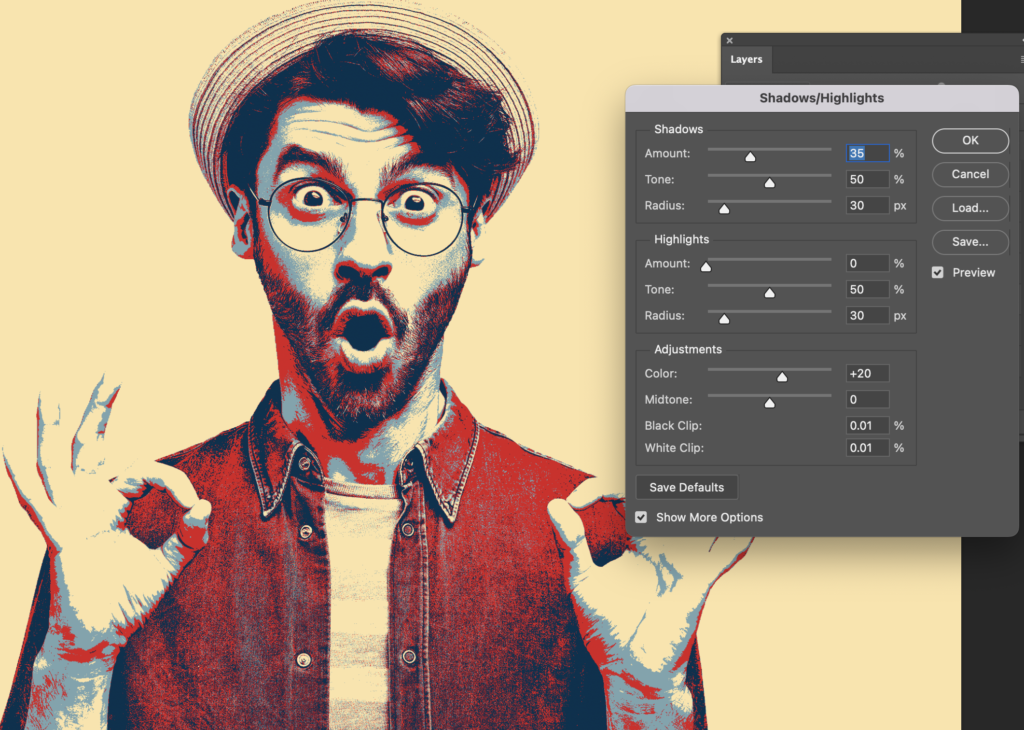
36. To bring out more detail, we are going to adjust the highlights and shadows… To do this, click ‘Image’ from across the top panel, followed by ‘adjustments’ > ‘ Shadows and Highlights’
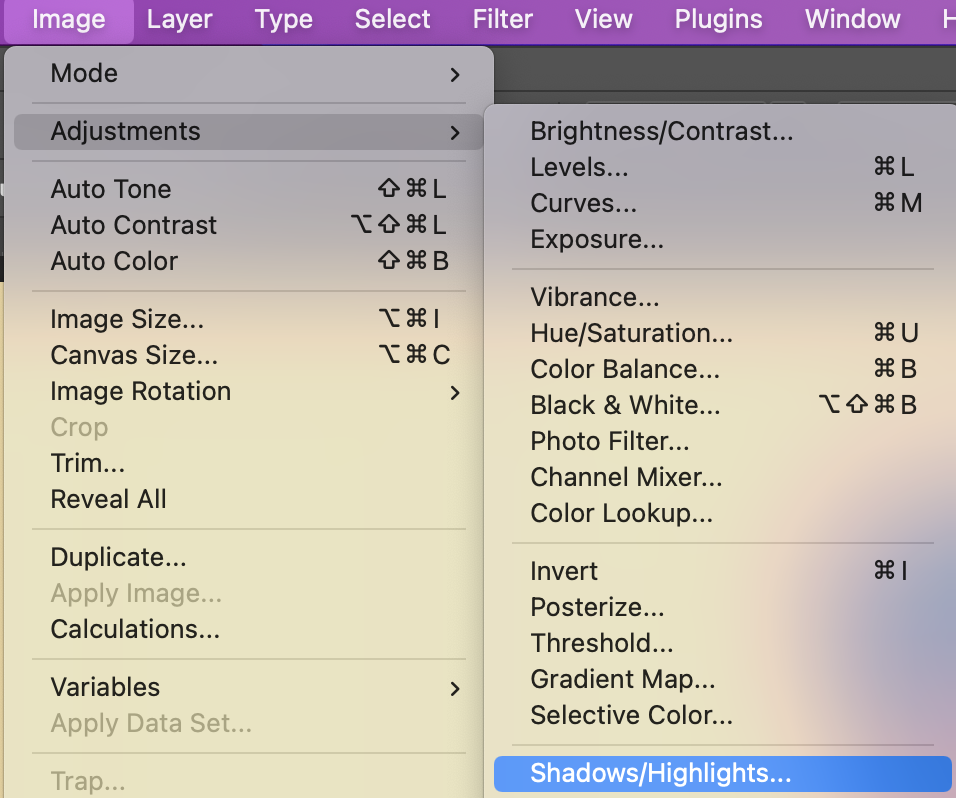
37. In the pop up, you don’t need to type anything, the automatic corrections are just right. So just click ‘OK’
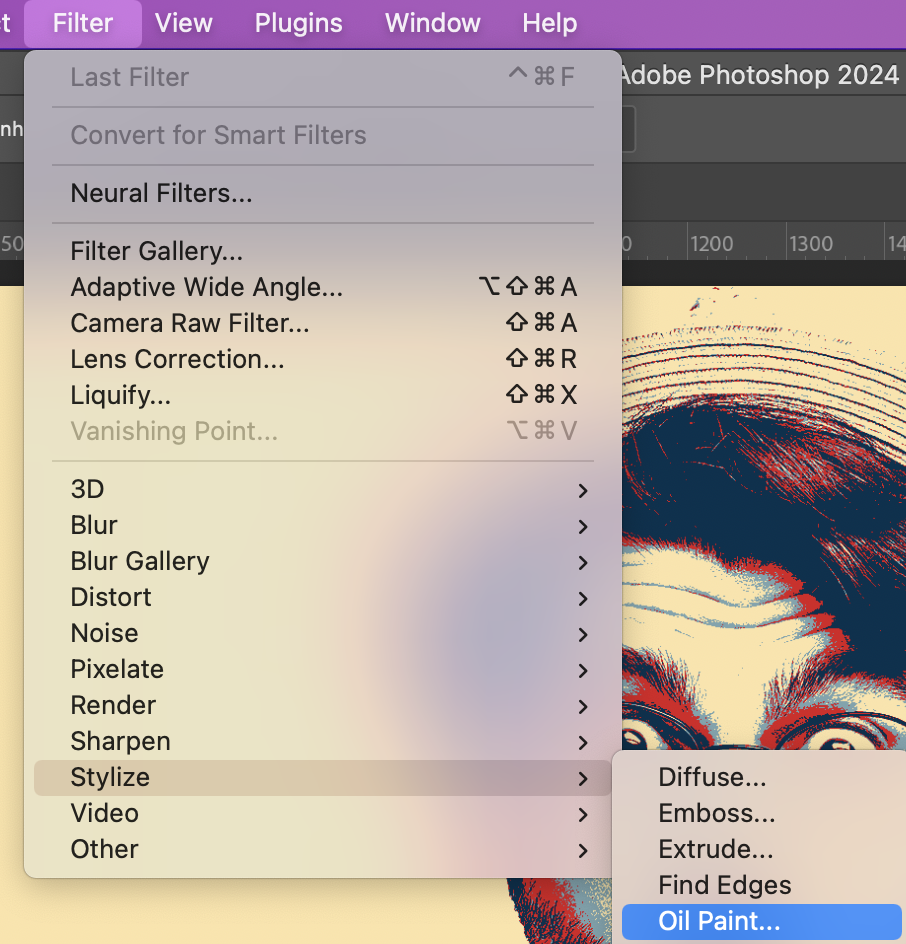
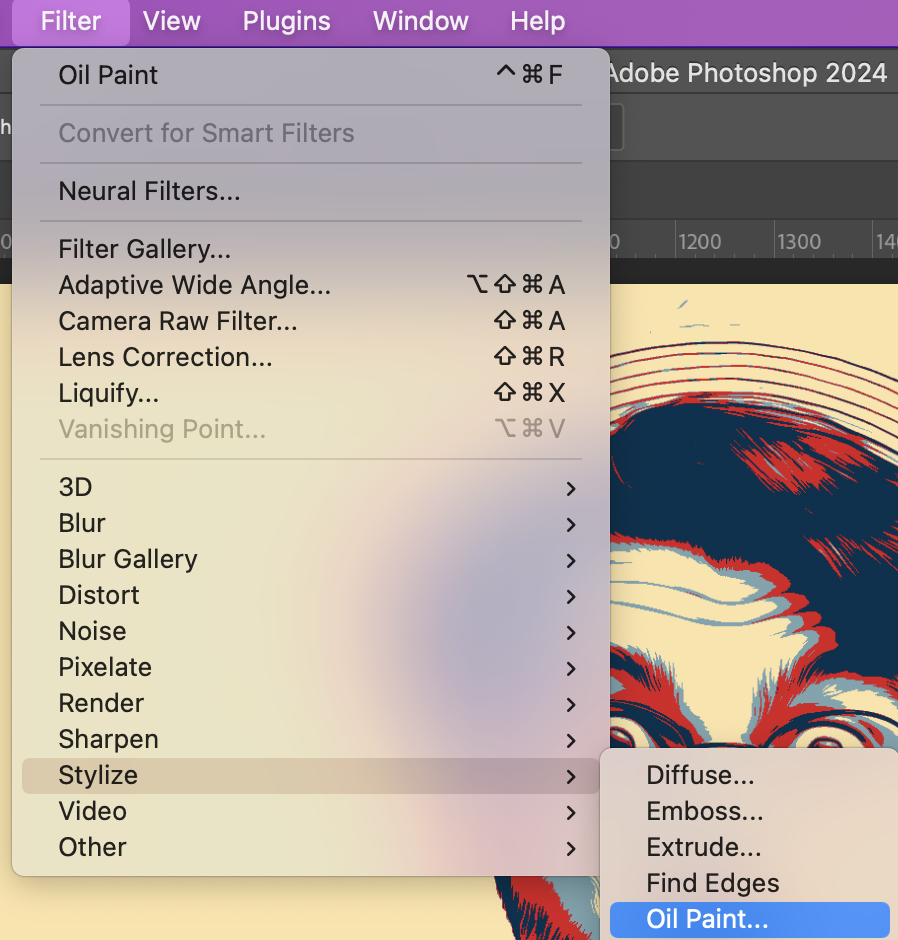
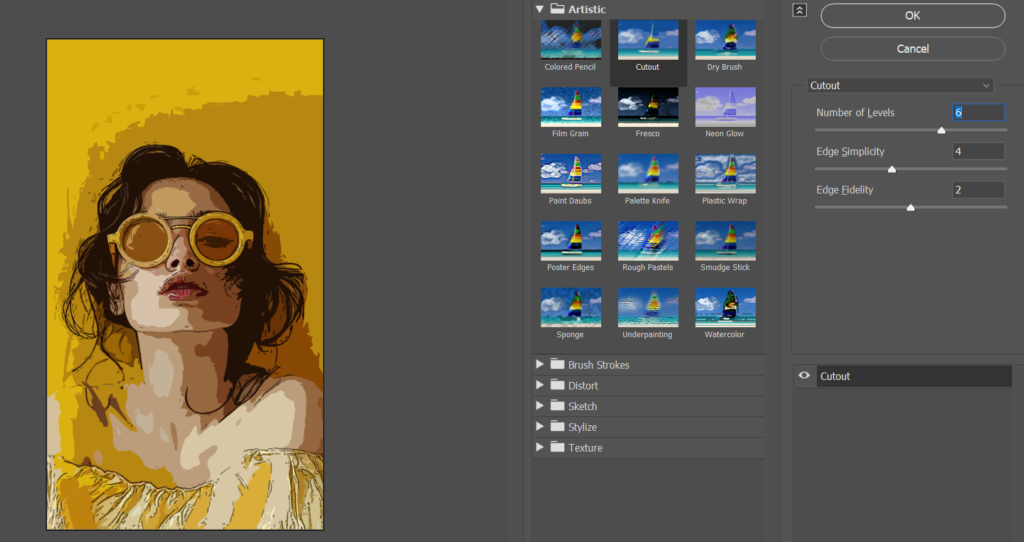
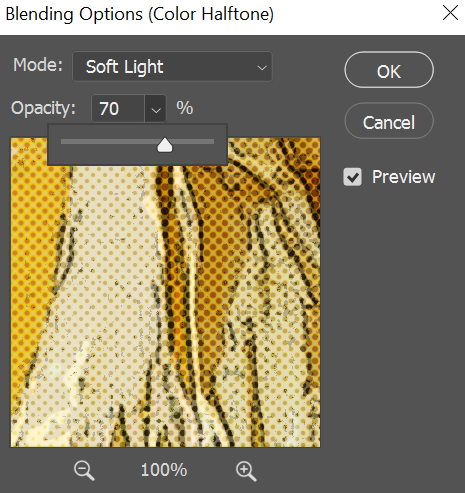
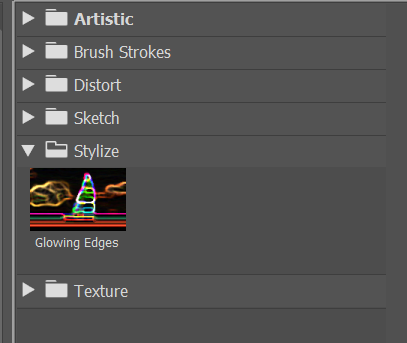
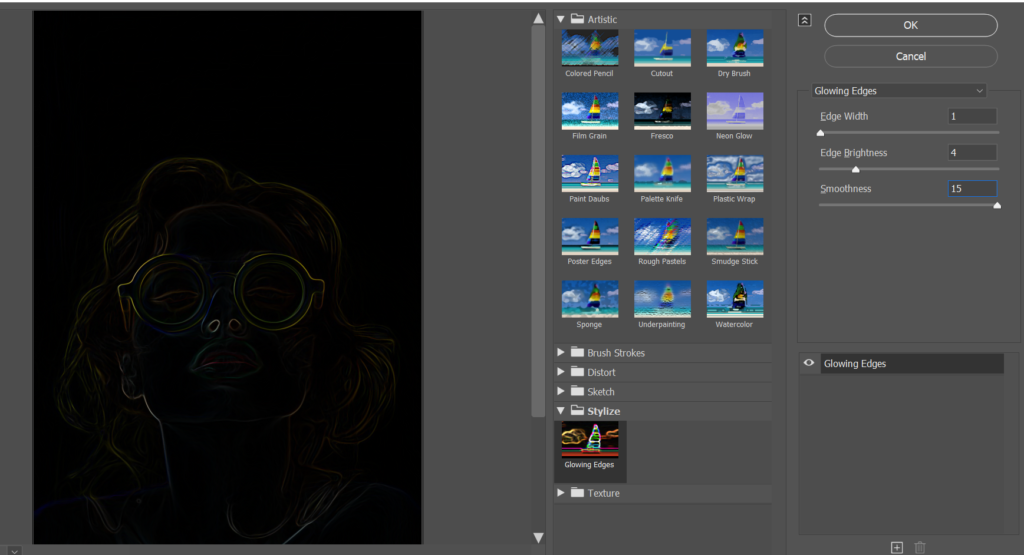
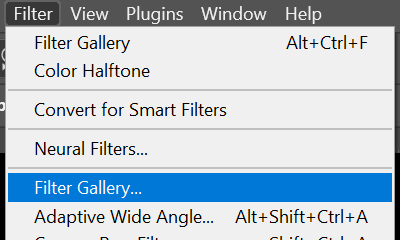
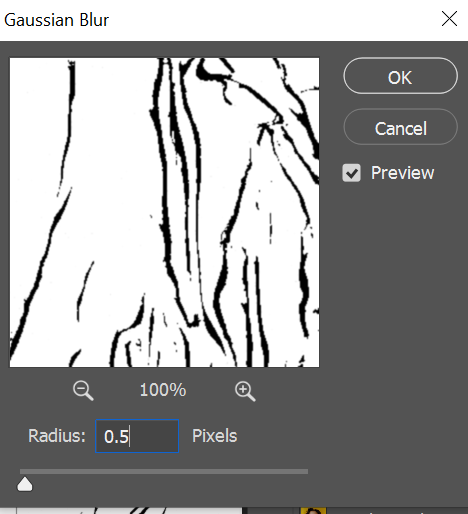
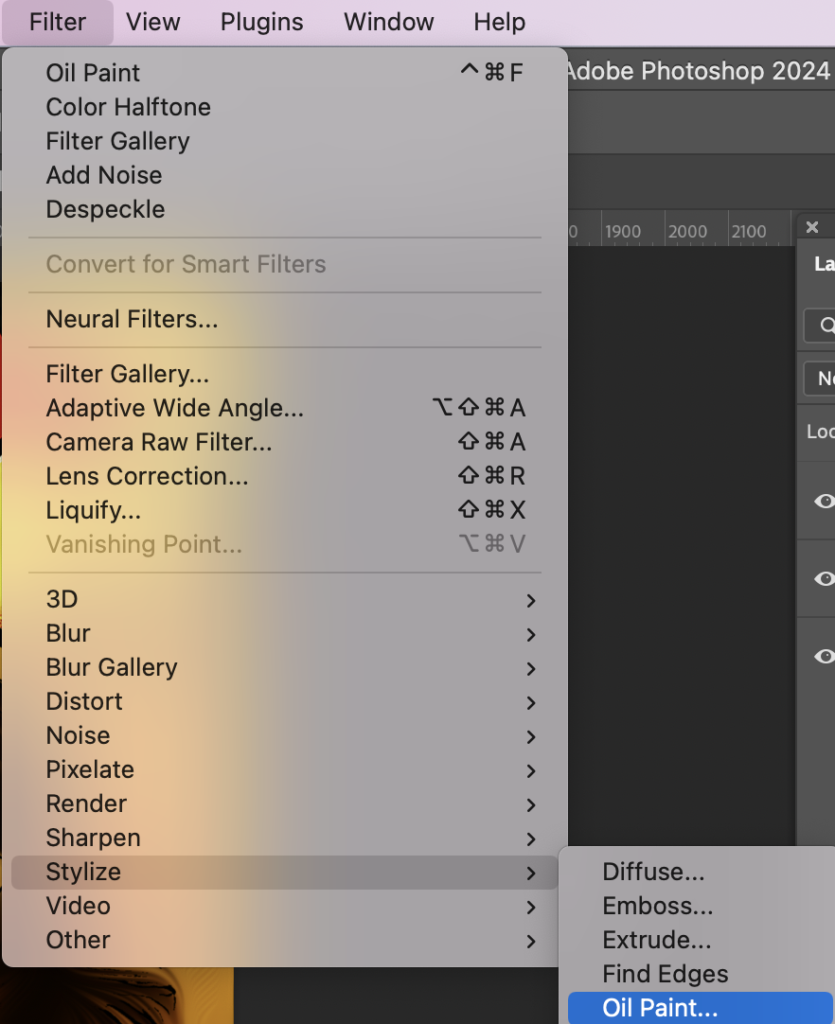
38. Now you are going to smooth the colours of each layer. To do this, go to ‘Filter’ on the top panel > Stylize > Oil Paint
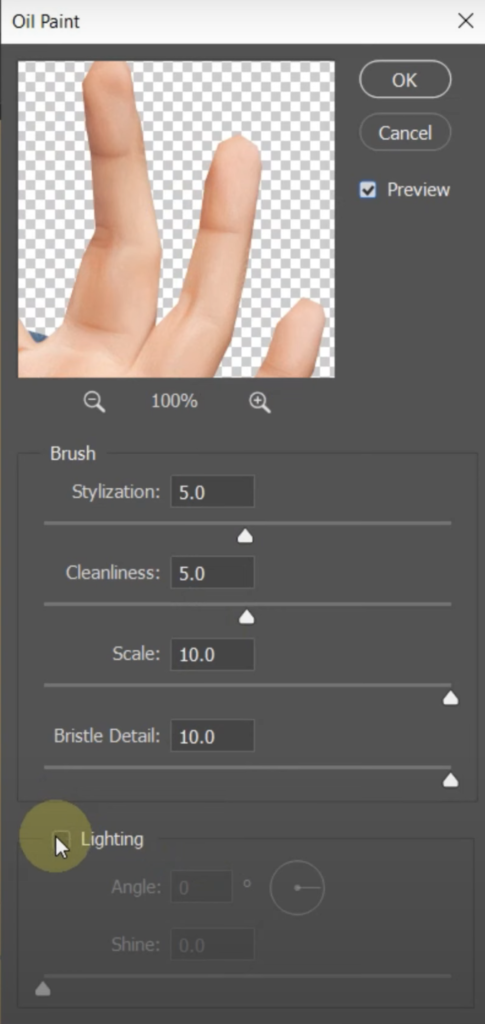
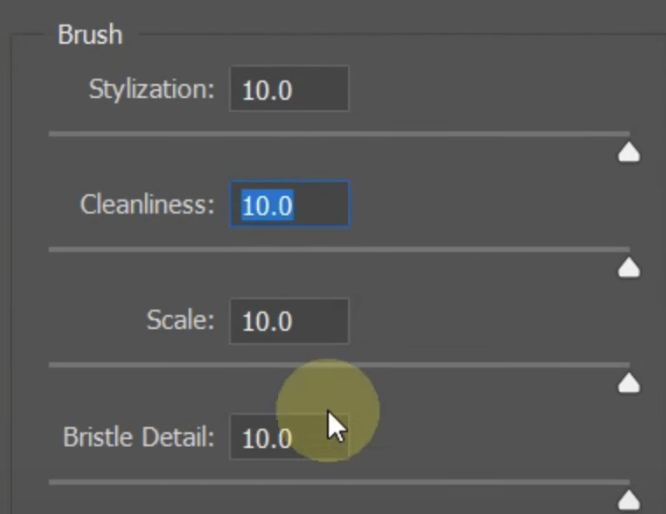
39. Set the settings as follows:
- Stylization: 5
- Cleanliness: 5
- Scale: 10
- Bristle detail: 10
- Make sure the ‘lighting’ is UNchecked
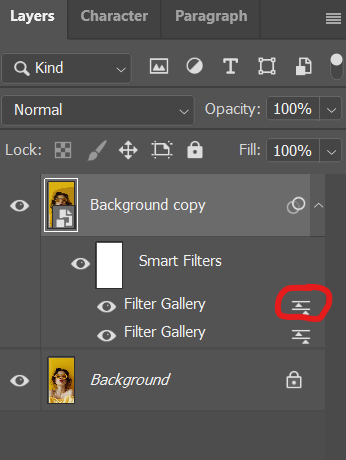
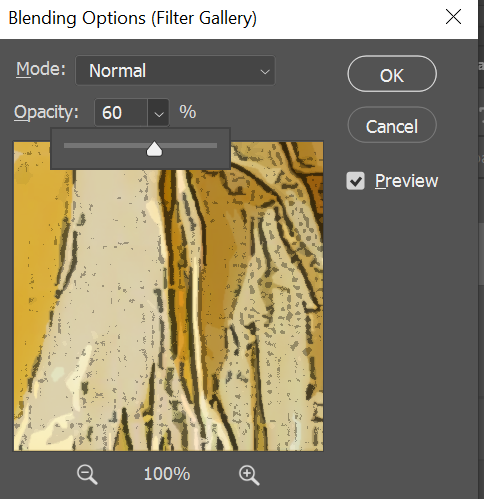
40. Now you need to continue smoothing some more areas, while maintaining the details of others. To do this, Duplicate the layer… Layer > Duplication Layer
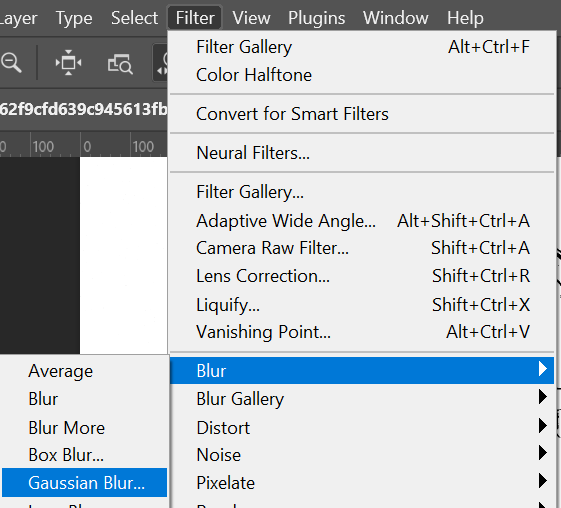
41. Click Filter > Stylize > Oil Paint
42. Set the levels to 10, as shown below – Press OK
43. Now you need to repeat this process 4 times to make the image even smoother. With the same layer selected, click on Click Filter > Stylize > Oil Paint, and set the levels to 10. Press ok and repeat 4 times.
44. So now you have smoothed out the image, but you have lost some of the details of the eyes and hair. To bring these back… Click on the Add Layer Mask Icon in the layers panel

45. Now select the brush tool

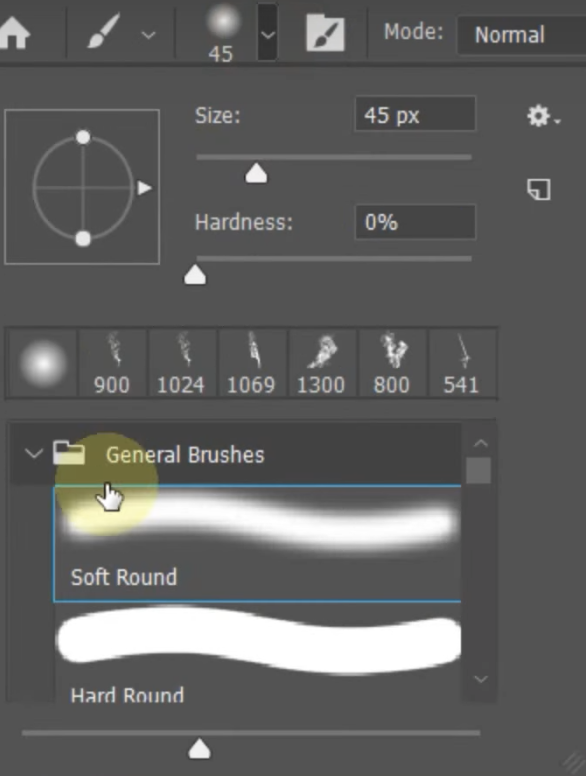
46. Set the brush as ‘Soft Round’
47. Make sure the opacity and flow are set to 100%

48. Set the foreground colour as Black
49. Change the size of your brush as desired, I used about 114px.
50. Now, to bring back the detail, you need to pain the area where you want the detail to reappear. (The way a mask layer works is that anything filled in black will reveal the layer below).
I recommend colouring the eyes, the hair, the beard, around each hand

51. Now you are going to change the background to a nice split colour. To do this. scroll to the bottom of your layers panel and click on the colour fill layer.
52. Make sure the ruler is visible in photoshop. If it is not, click CTRL+R

53. Click the ruler on the left and drag a line to the middle of the face. Since our image size was 2500px, I will drag it to 1250px

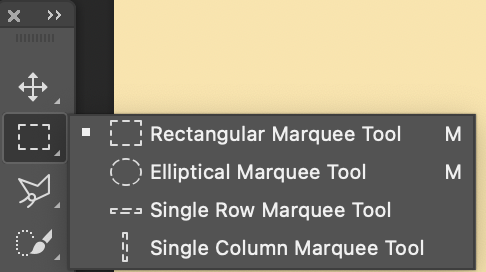
54. Now select the left half of the background. To do this, choose the rectangle marquee tool form the toolbar.
55. Click and drag to select the left half of the image.

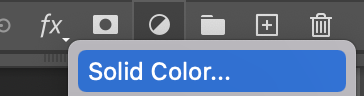
56. Now you need to fill side with a colour. To do this, select the ‘new layer’ icon at the bottom of the layers panel.
In the drop down, select ‘Solid Colour’
57. Set the colour as: 7ca4ae – Press OK
58. Now select the right half of the document using the Rectangle Marquee Tool
59. Select the ‘new layer’ icon at the bottom of the layers panel.
In the drop down, select ‘Solid Colour’
60. Set the colour to: d81921 – press OK
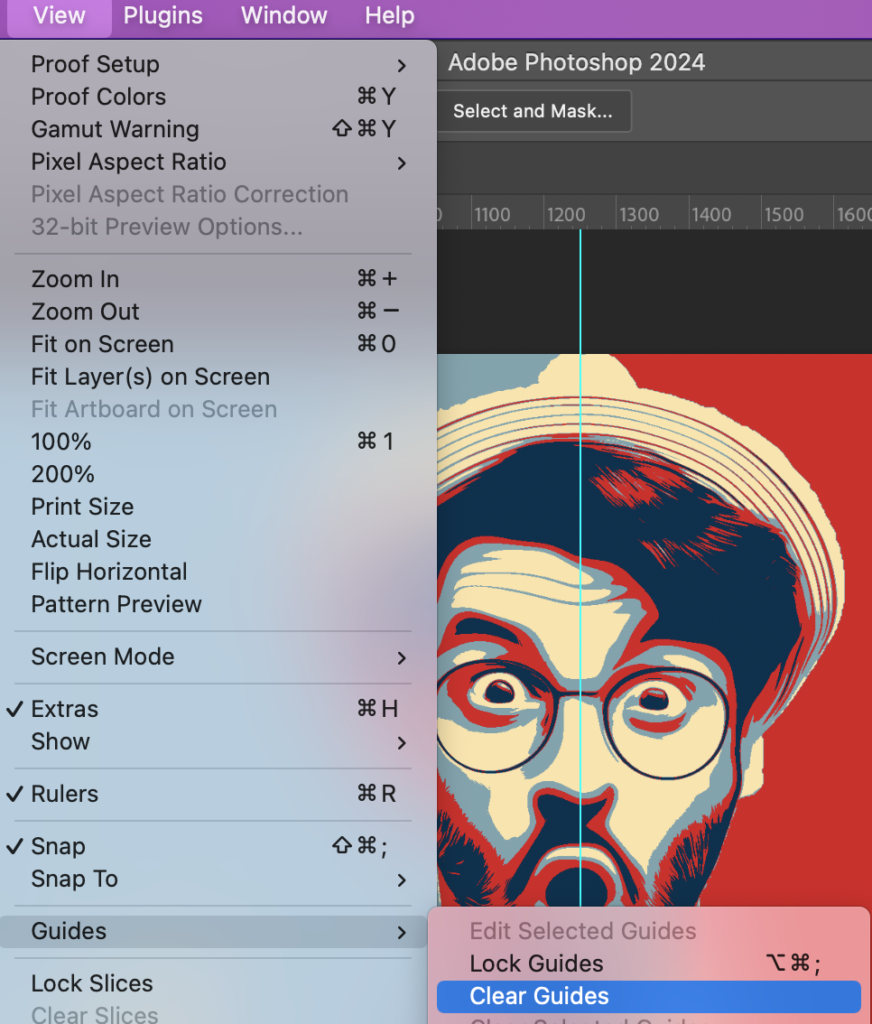
61. To remove the line in the centre, click View > Guides > Clear guides
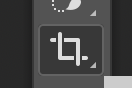
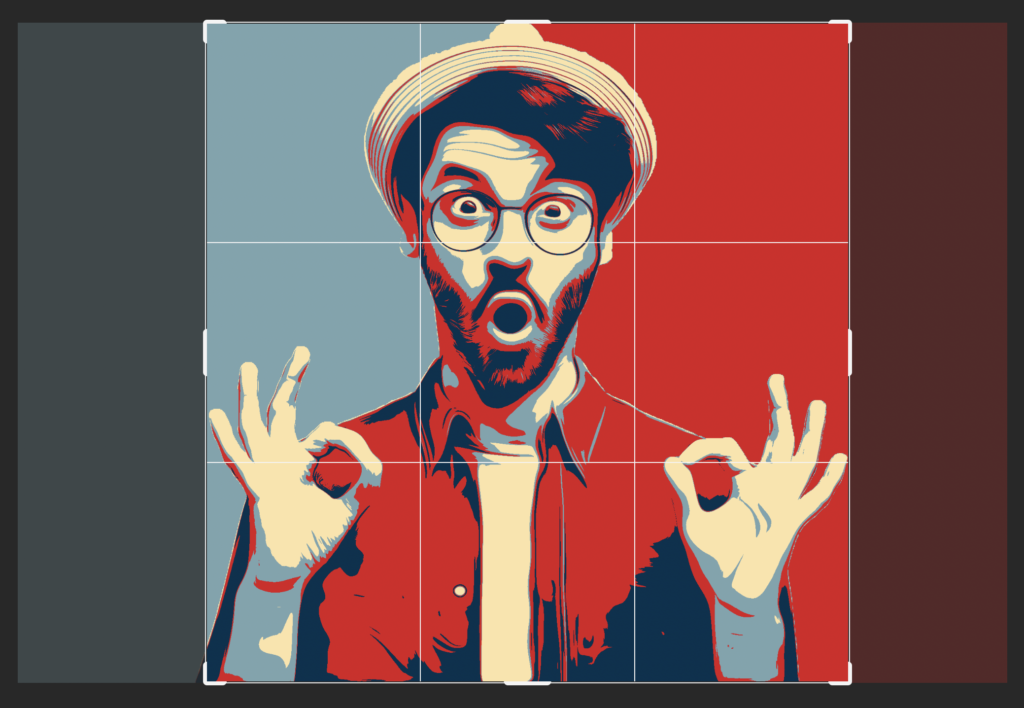
62. Now crop the image – select the crop tool
Drag the edges up to the hands in the image – Press Enter when happy with selection
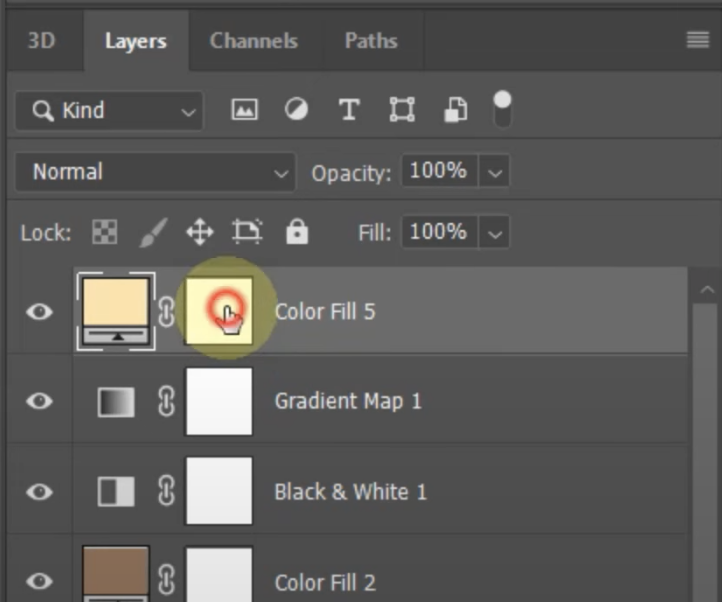
63. To create a nice boarder around your image, scroll to the top of your layers panel, and click the top layer.
64. Select the ‘new layer’ icon at the bottom of the layers panel.
From the drop down, select ‘Solid Colour’
65. Set the colour as: fce4a8 – Press OK
66. To reveal the image behind the border, activate the mask of this layer by clicking on the white box as shown
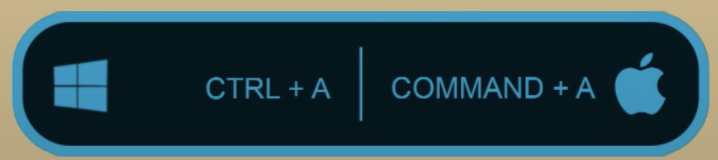
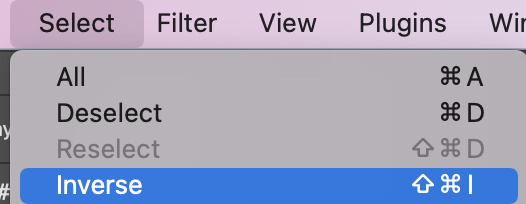
67. Select the whole document by holding CTRL + A
68. Now click: Select > Modify > Contract
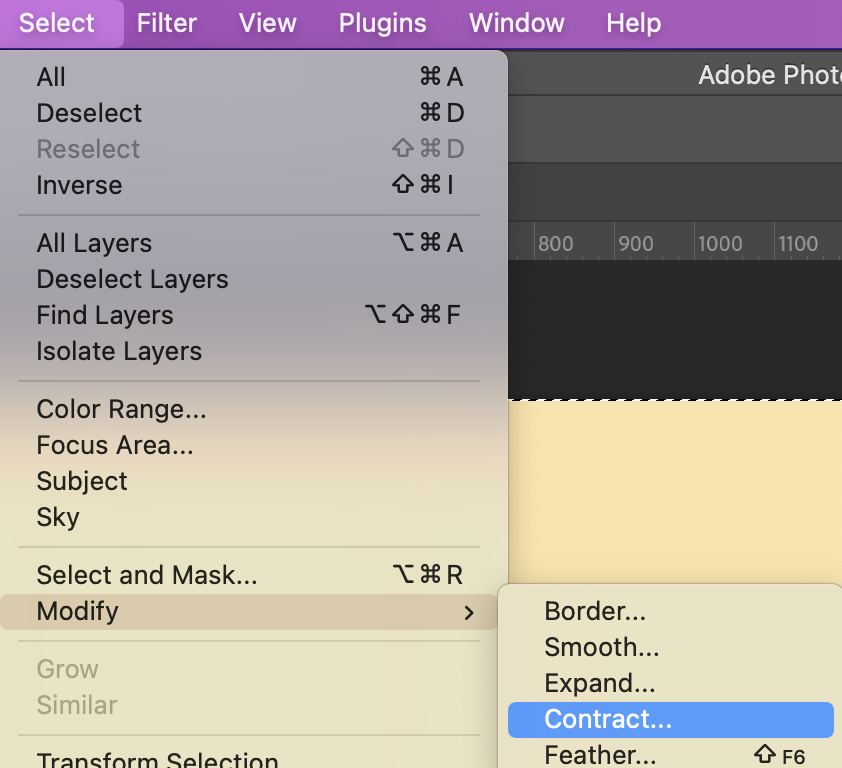
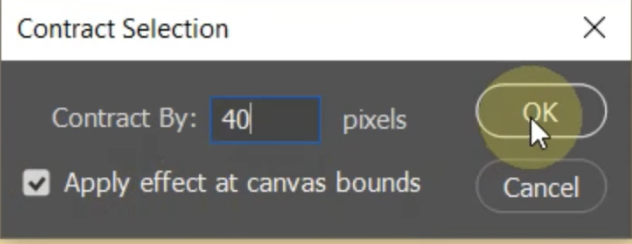
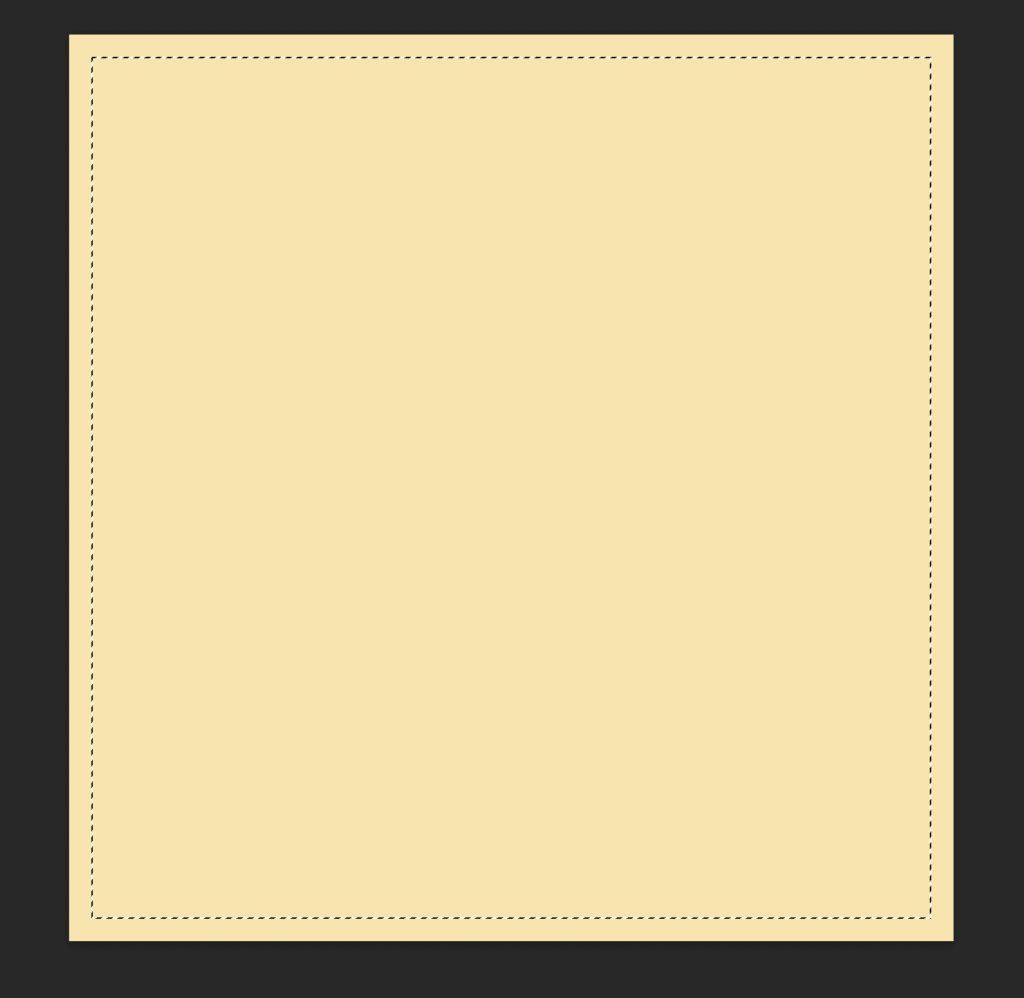
69. Set Contract By to: 40 pixels. Check that ‘ Apply effect at canvas bounds’ is ticked.
This should create a dotted boarder like below:
70. Click Edit > Fill
Set the contents as black (remember a mask works by revealing the layer below in any areas that are coloured black).
Press OK (hold CTRL + D to deselect the dotted line) and your image should look like this:
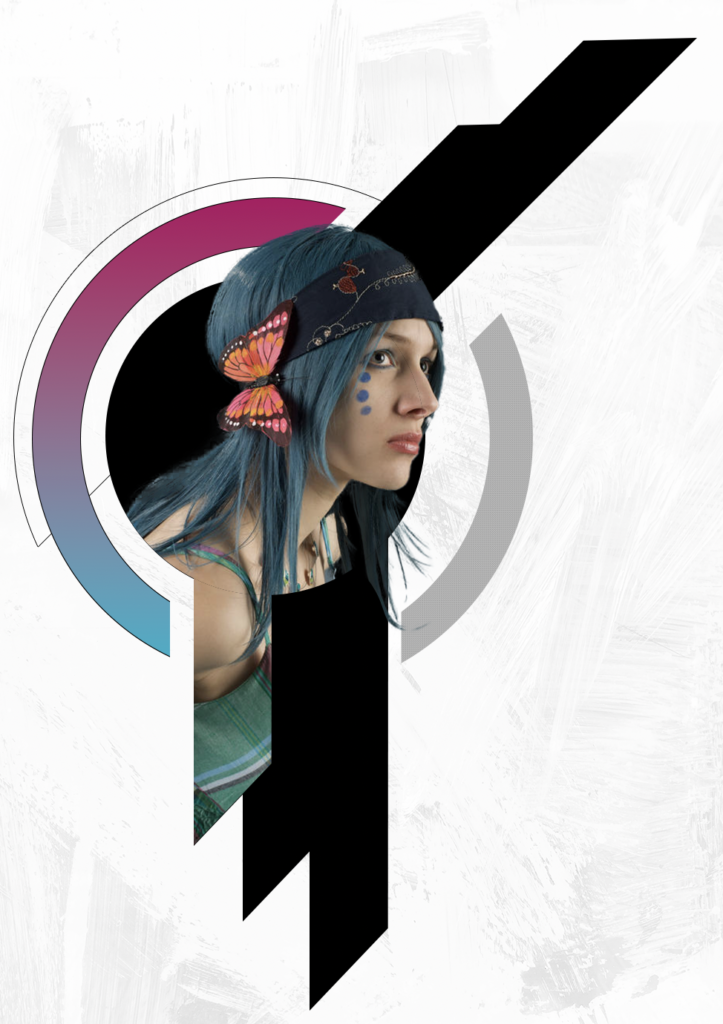
Challenge:
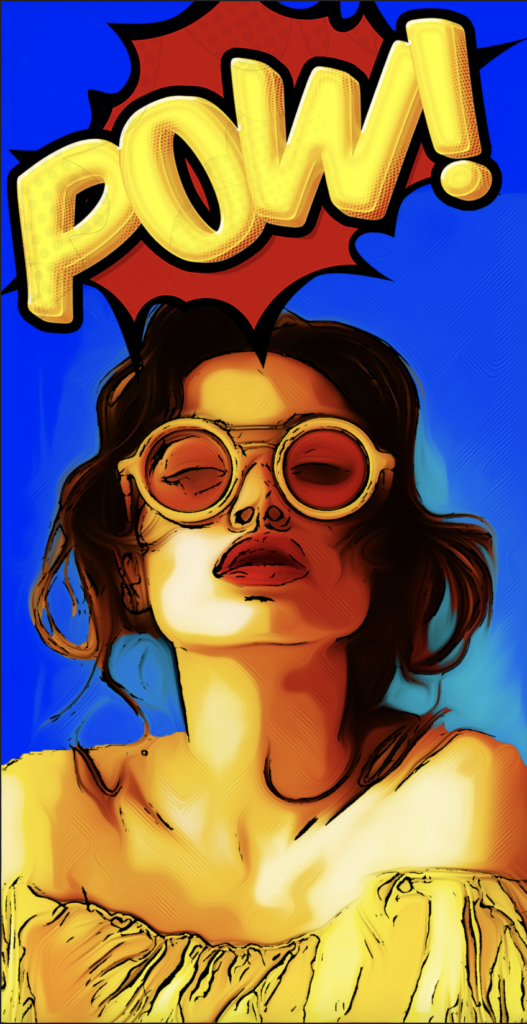
Create your own image / birthday card for someone you know or for a poster for a particular political statement / message (like below)
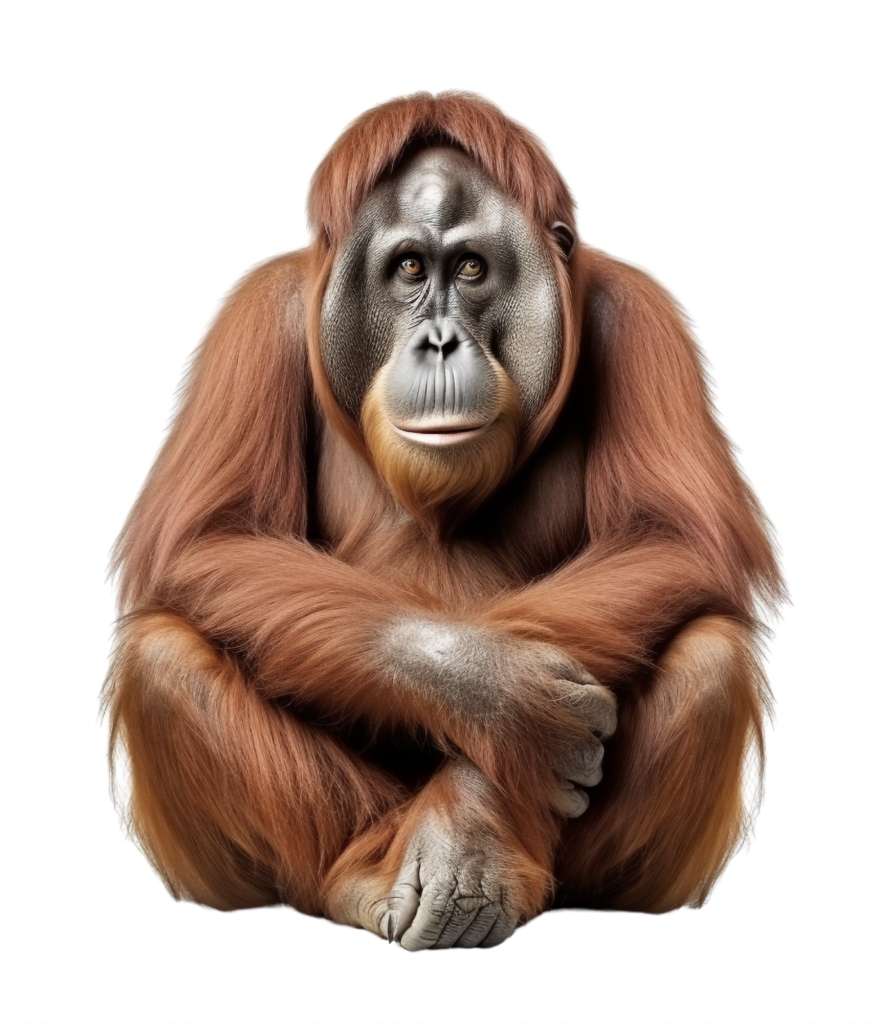
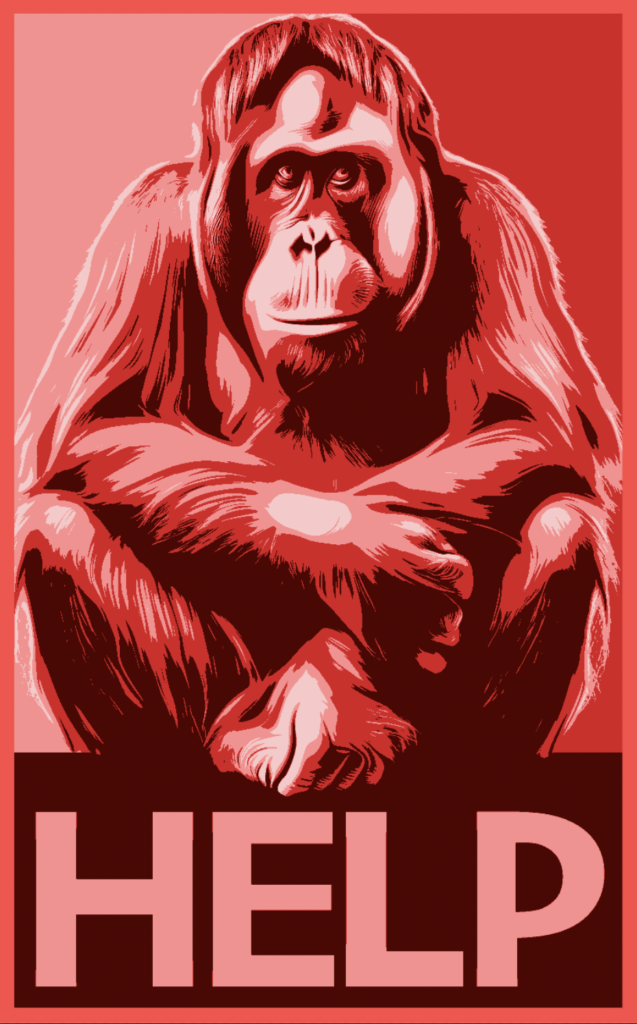
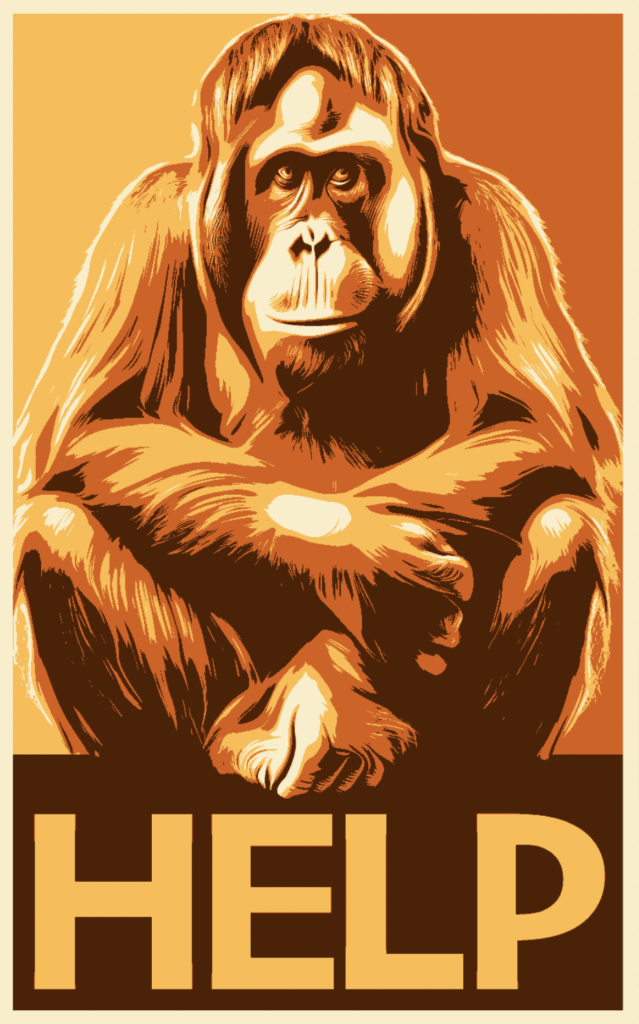
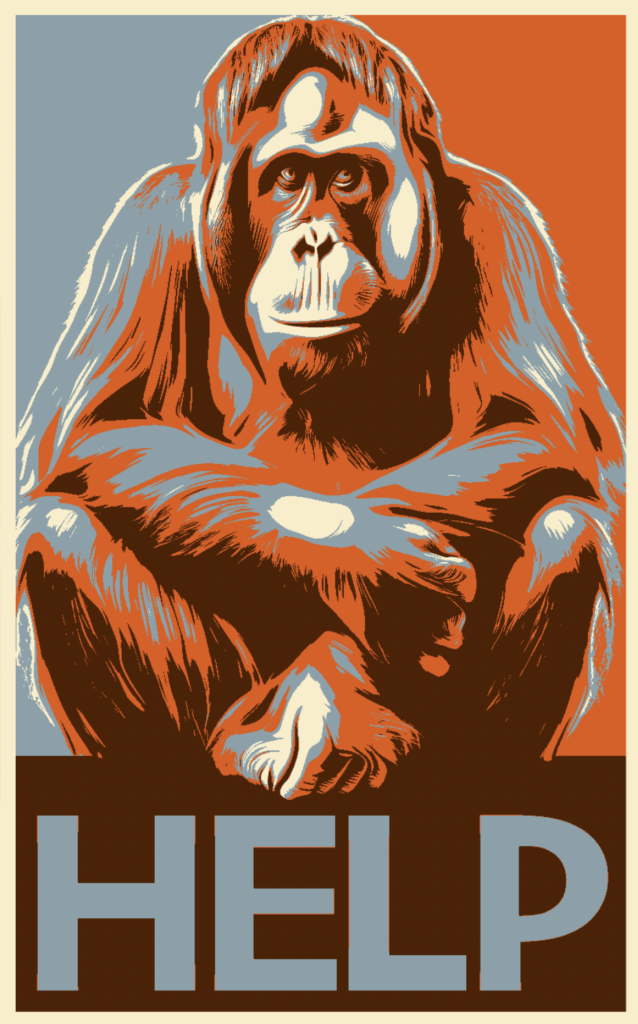
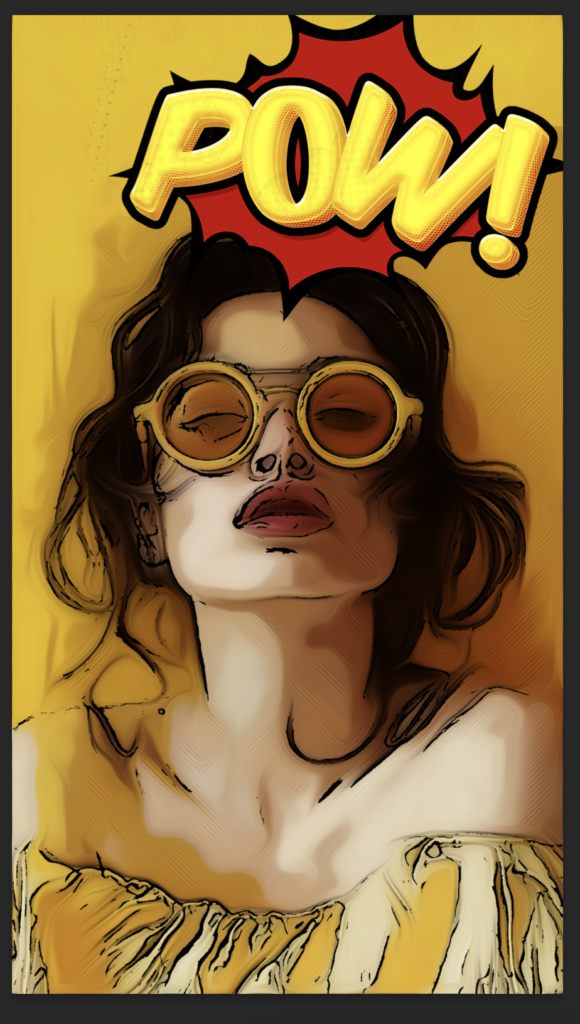
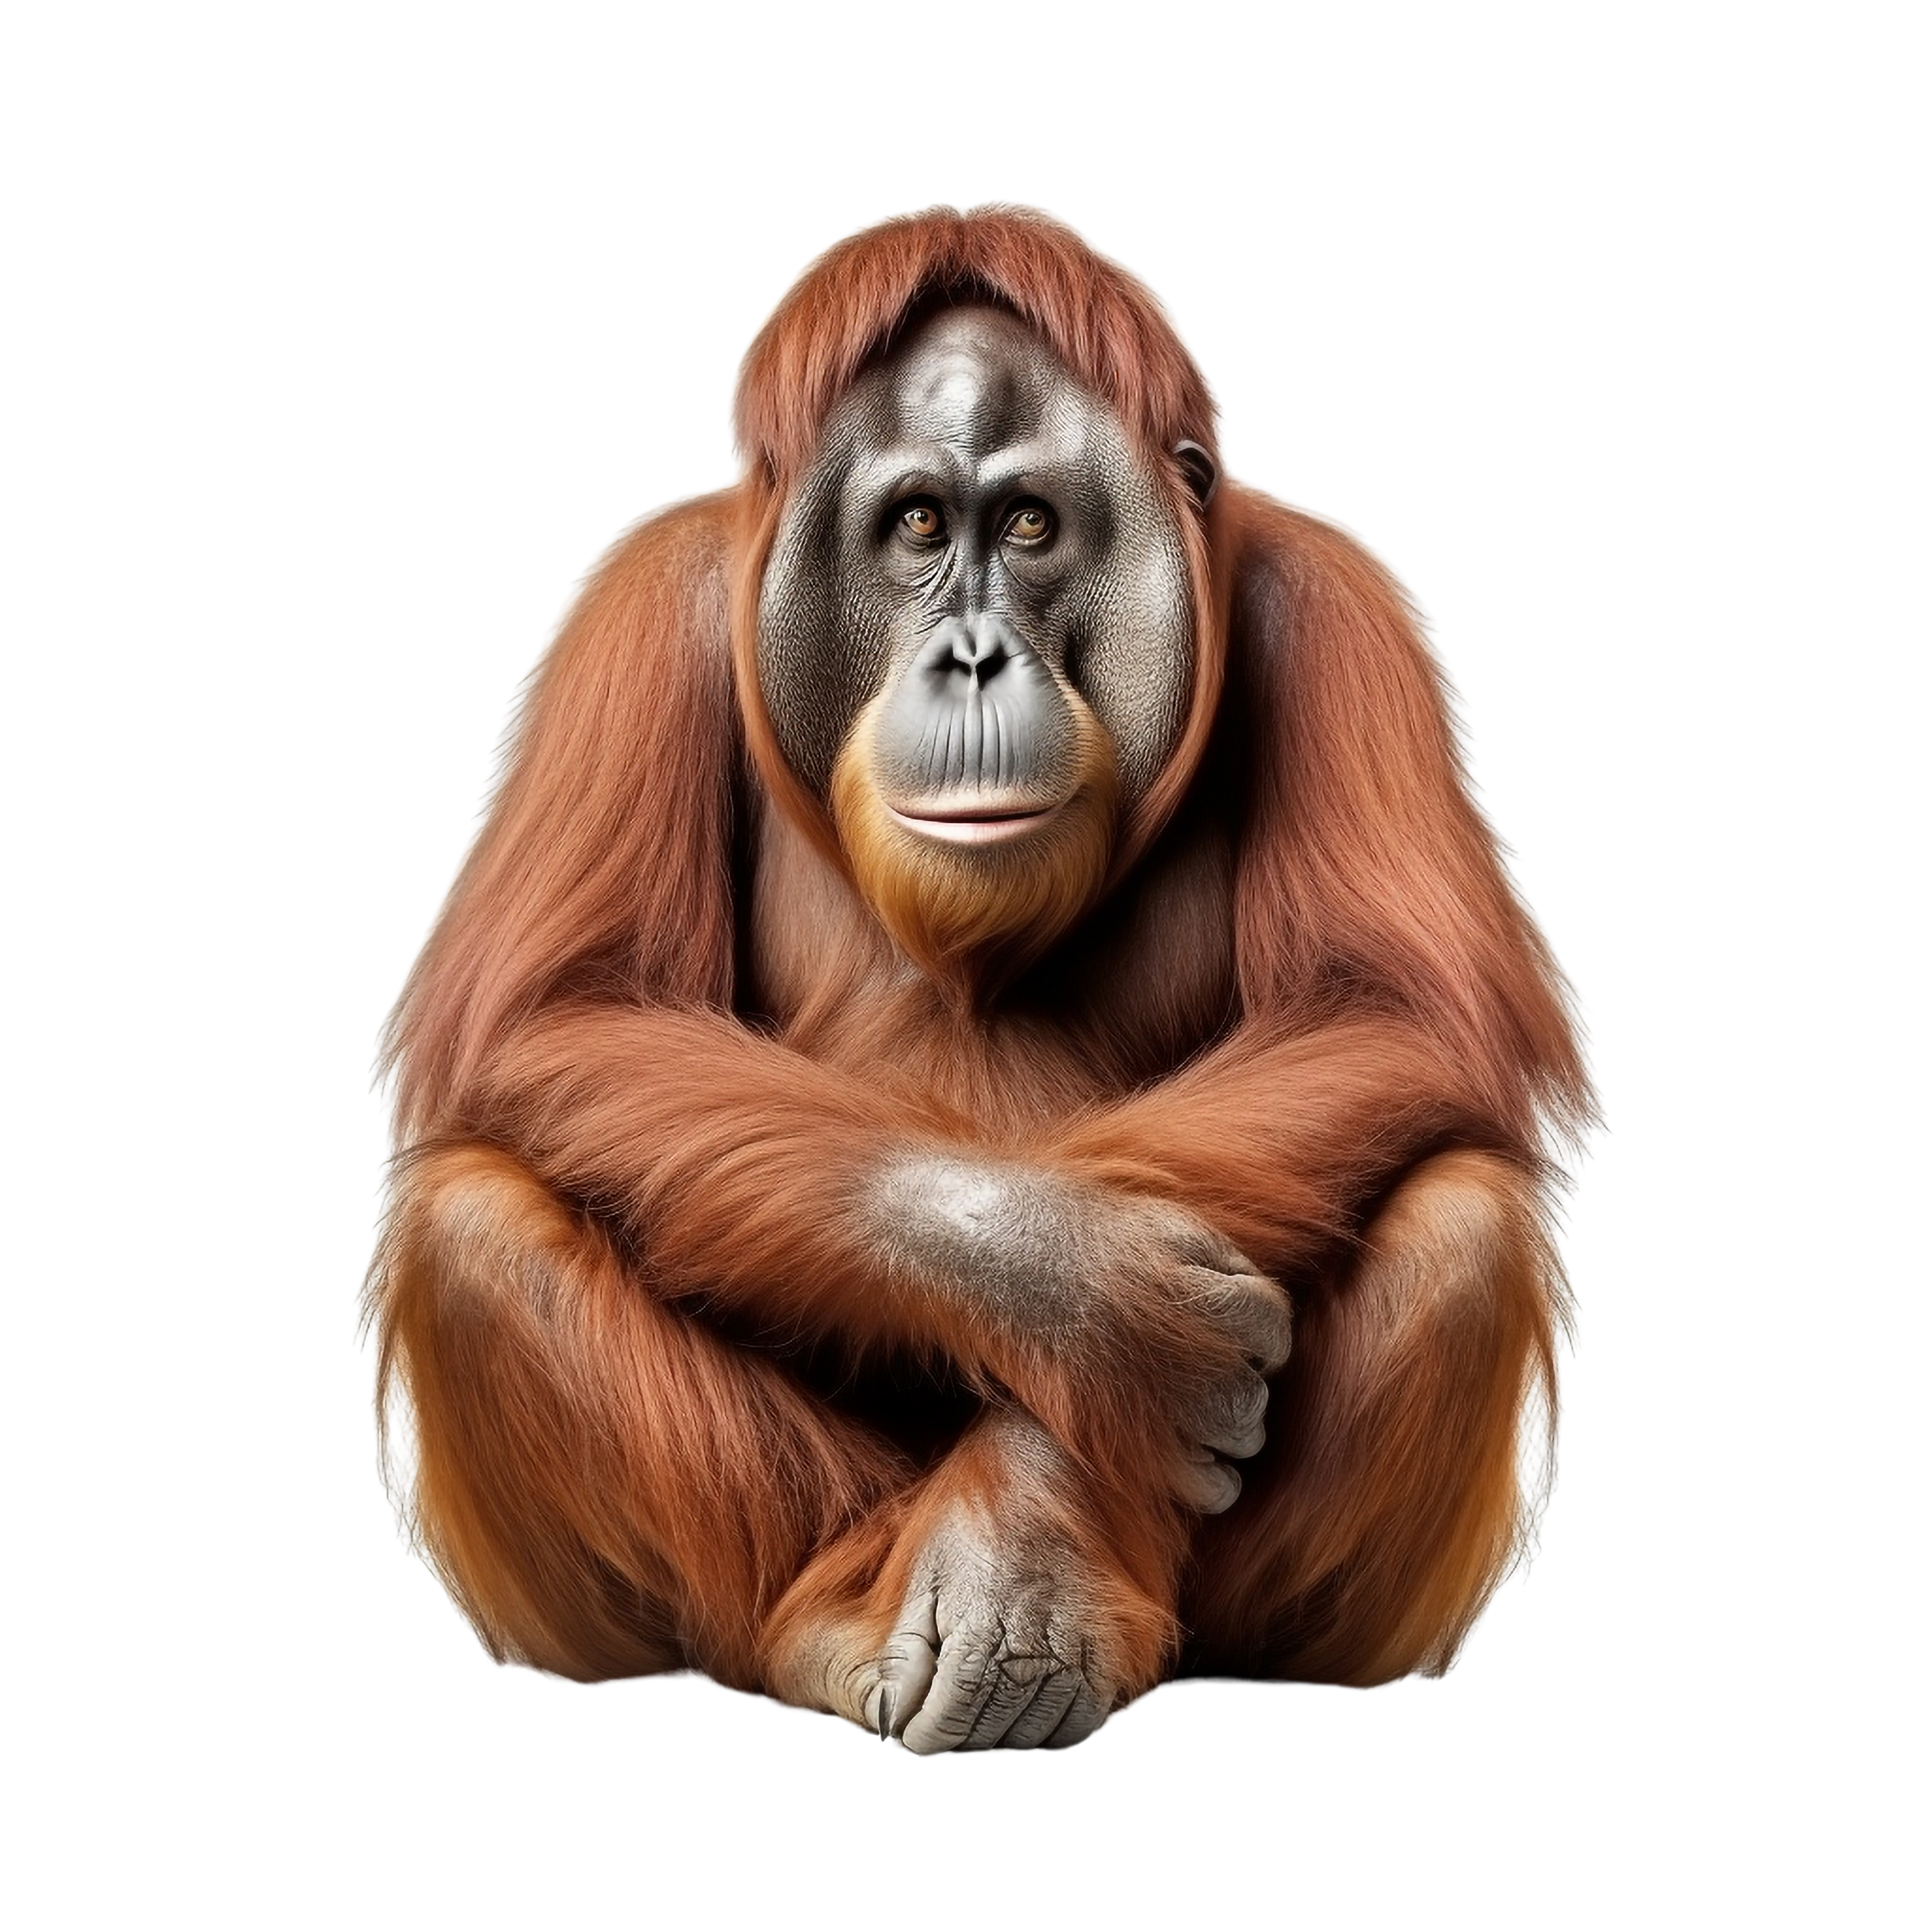
Tips for the Orangutan image:
- When adjusting the black and white levels of blue and magenta (in step 19) you will also have to adjust the reds to: 40
- When adding the colours to the background at the end, add a third colour fill of the dark blue to the bottom
- You will need to extend the image at the bottom while cropping to make room for the typography
- To change the colours, you just need to change the gradient layer, and the boarder layer:


